Tag: military history

  • The Gate at El Alamein: How a Bottleneck in the Sand Became the War’s Turning Point

    The Gate at El Alamein: How a Bottleneck in the Sand Became the War’s Turning Point

    In the late summer of 1942, the British Eighth Army was a force in retreat. Chased across Libya by Erwin Rommel’s Afrika Korps, they had lost Tobruk in a humiliating surrender, and the German commander stood at the edge of Egypt, a mere 100 kilometers from Alexandria. The Royal Navy had already evacuated the port, sending its warships to the Red Sea. Cairo was burning its archives, preparing for occupation. But geography, more than any general, was about to draw a line in the sand.

    Between the Mediterranean coast and the impassable Qattara Depression, the desert narrows to a corridor just 60 kilometers wide. That bottleneck, a place called El Alamein, was where the Axis advance would either break through to the Suez Canal or grind to a halt. It was there that the war in North Africa and arguably the fortunes of the Allies in 1942 would be decided.

    The Desert’s Sieve

    The first collision at El Alamein was not a planned offensive but a desperate stand. In July 1942, General Claude Auchinleck, commanding the Eighth Army, threw his forces into a defensive line at the bottleneck, fighting Rommel’s exhausted Panzer Army Africa to a bloody stalemate from July 1 to 27. The German supply lines, stretched thousands of kilometers back to Tripoli, were fraying. The British, by contrast, had Alexandria just down the road. Auchinleck halted the Axis drive, but Winston Churchill, hungry for a decisive victory, saw caution as a failure. In August, he replaced Auchinleck with Lieutenant-General Bernard Montgomery.

    Montgomery was a different breed of commander. He had no taste for Rommel’s fluid, improvisational warfare. Instead, he insisted on a set-piece battle: overwhelming superiority in men, tanks, artillery, and air power, and a plan that left little to chance. He drilled his troops, rebuilt their morale, and refused to attack until every condition was met. By October, he had assembled roughly 195,000 troops, 1,029 tanks (including American Grants and Shermans), and 900 guns. Against him, Rommel fielded about 104,000 men and 547 tanks, many of them outdated Italian models. The Luftwaffe could muster only around 350 operational aircraft against the Desert Air Force’s 1,500.

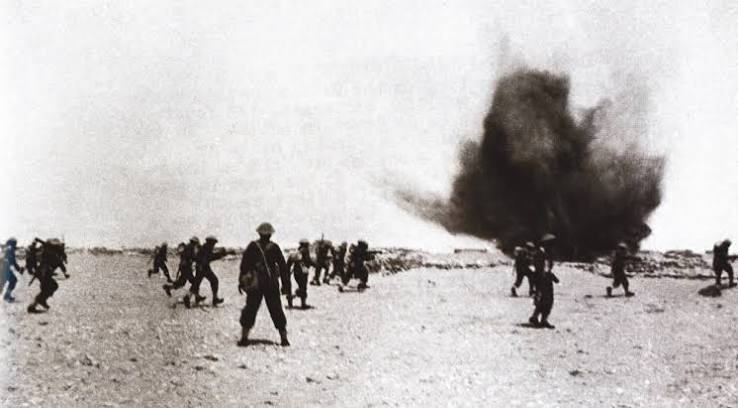
    Rommel, meanwhile, was not even present when the storm broke. He had flown to Germany on sick leave, leaving General Georg Stumme in command. On the night of October 23, 1942, the silence of the desert was shattered by the simultaneous roar of over 1,000 British guns. Operation Lightfoot had begun.

    Breaking the Devil’s Gardens

    Montgomery’s plan was methodical. Under the cover of darkness, infantry would advance through the extensive Axis minefields—dubbed the “Devil’s Gardens”—clearing lanes for the armor to pass. The attack was a gamble: the minefields were dense, and the defenders were dug in. But the sheer weight of artillery, firing a creeping barrage ahead of the infantry, was designed to suppress the Axis gunners.

    For the first two days, the battle was a slog. The Eighth Army breached the minefields but met fierce resistance. Stumme died of a heart attack on October 24, and Rommel, summoned from Germany, returned on October 25 to find the situation slipping. He launched counterattacks, but the British air superiority and artillery dominance ground them down. The turning point came with Operation Supercharge, the breakout phase launched on November 2. With the Axis lines fatally weakened, the armor pushed through, and Rommel ordered a retreat westward into Libya. By November 11, the Second Battle of El Alamein was over.

    Casualties told the story of a hard-won victory: the Allies lost about 13,500 killed, wounded, or missing. The Axis lost 30,000 to 37,000 men, plus roughly 30,000 prisoners, most of them Italian. The threat to Egypt and the Suez Canal was ended. The Eighth Army pursued the retreating Axis forces, but the immediate victory was what mattered.

    Why It Was a Turning Point

    El Alamein was not the largest battle of World War II, nor the most strategically complex. But it was the first major, permanent land victory by the Allies over a German-led army. Earlier successes, like Operation Compass in 1940, had been against Italians alone. Here, the Afrika Korps was broken and pushed back.

    The broader context made the victory resonate far beyond the desert. In the same months, the Red Army was bleeding at Stalingrad, holding on by a thread. The Allies had yet to land in North Africa (Operation Torch would come on November 8, 1942). Churchill, speaking in November 1942, summed up the shift: “Before Alamein we never had a victory. After Alamein we never had a defeat.” It was an overstatement—there were setbacks ahead—but it captured the psychological change. El Alamein proved that the Axis could be beaten on land, and it gave the British public a victory to rally behind.

    The Tools of Victory

    Two factors were decisive. First, intelligence: Ultra decrypts gave the Allies a detailed picture of Axis supply shortages, troop positions, and Rommel’s intentions. Montgomery knew where the weak points were. Second, air power: the Desert Air Force relentlessly attacked supply convoys and provided close support to ground troops. The Axis could not move supplies safely, and their tanks, starved of fuel, became static targets.

    But the human element mattered too. The desert was a brutal theater—heat, flies, dysentery, and sandstorms, with the constant threat of mines and shelling. The Eighth Army that fought at El Alamein was not the demoralized force that had fled from Tobruk. Montgomery had rebuilt its confidence with training, new equipment, and a clear plan. The soldiers knew they had superiority; they just needed the leadership to use it. And they did.

    El Alamein was a hinge of the war—a place where the geography of a narrow strip of desert, the logistics of supply lines, and the resolve of a rebuilt army combined to halt the Axis tide. The victory did not end the war in North Africa, but it ended the Axis threat to the Suez Canal and gave the Allies their first decisive, enduring land triumph. In the long arc of World War II, it was the moment the pendulum began to swing.

    Summary

    • The First Battle of El Alamein (July 1942) was a defensive stand by Auchinleck that halted Rommel’s advance into Egypt.
    • The Second Battle (October–November 1942), commanded by Montgomery, was a decisive offensive that broke the Axis lines and forced Rommel’s retreat.
    • Montgomery’s set-piece tactics, overwhelming Allied numbers (195,000 troops, 1,029 tanks), and air superiority were decisive.
    • Ultra intelligence and the Desert Air Force’s dominance over Axis supply lines were critical to victory.
    • El Alamein was the first major permanent Allied land victory over a German-led army, boosting Allied morale ahead of Operation Torch and during the Battle of Stalingrad.

    FAQ

    Q: Why was El Alamein a turning point in World War II?
    A: It was the first major, permanent land victory by the Allies over a German-led army. It ended the Axis threat to Egypt and the Suez Canal, and it proved that the Axis could be beaten on land, giving a massive morale boost to the Allies globally.

    Q: What made the El Alamein position so defensible?
    A: The front narrowed to about 60 kilometers between the Mediterranean coast and the Qattara Depression, making a wide flanking maneuver impossible. The British also had short supply lines to Alexandria, while Rommel’s stretched thousands of kilometers back to Tripoli.

    Q: Who commanded the forces at the Second Battle of El Alamein?
    A: Lieutenant-General Bernard Montgomery commanded the British Eighth Army. The Axis forces were led by Generalfeldmarschall Erwin Rommel, though he was on sick leave in Germany when the battle began and returned on October 25.

    Q: What was Operation Lightfoot?
    A: Operation Lightfoot was the codename for the initial assault of the Second Battle of El Alamein, launched on October 23, 1942, with a massive artillery barrage and an infantry-led breach of the Axis minefields. The breakout phase was Operation Supercharge.

    Q: How many casualties were there at El Alamein?
    A: At the Second Battle, Allied casualties were about 13,500 killed, wounded, or missing. Axis casualties were 30,000–37,000, plus about 30,000 prisoners, mostly Italian.
  • The Desert Fox Versus the Master Planner: How El Alamein Broke Rommel

    The Desert Fox Versus the Master Planner: How El Alamein Broke Rommel

    In the late summer of 1942, the British Eighth Army was a force in retreat. Its commander had been sacked, its morale was in tatters, and its soldiers were looking over their shoulders at the advancing German Afrika Korps, led by the man the British press had dubbed the Desert Fox. Erwin Rommel had just captured Tobruk, taken thousands of prisoners, and driven the British back to a dusty railway halt called El Alamein, a mere 60 miles from Alexandria. If he broke through, Egypt, the Suez Canal, and the oil of the Middle East would lie open before him.

    Yet within three months, the Eighth Army had a new commander, a new spirit, and a plan. On October 23, 1942, at 9:40 p.m., a thousand British guns opened fire on the Axis lines. The bombardment was so intense that it could be heard in Alexandria. When it stopped, the infantry moved forward, and the greatest set-piece battle of the desert war began. By November 4, Rommel’s army was in full retreat, never to stop until it surrendered in Tunisia seven months later.

    This is the story of how a meticulous, arrogant, and brilliant British general named Bernard Montgomery outthought and outfought the most famous German commander of the war—and why the victory at El Alamein marked the true turning point of World War II.

    The Road to El Alamein

    The desert war had been a seesaw of sweeping advances and humiliating retreats. In late 1940, the British launched Operation Compass and drove the Italian army out of Egypt, capturing 130,000 prisoners in two months. But Hitler, alarmed at the collapse of his ally, sent a small German force under a relatively unknown general named Erwin Rommel to stiffen the Italian lines.

    Rommel was a master of mobile warfare. He attacked within days of arriving in February 1941, launching a series of surprise offensives that pushed the British back across Libya. By June 1942, he had captured the fortress of Tobruk—a prize that had held out against him for eight months the previous year—and swept into Egypt. The British Eighth Army, commanded by General Claude Auchinleck, managed to halt Rommel at the First Battle of El Alamein in July 1942, but the situation remained precarious. Churchill, desperate for a victory, replaced Auchinleck with Bernard Montgomery on August 13, 1942.

    Montgomery was a stark contrast to Rommel. Where Rommel was improvisational, Montgomery was a meticulous planner. He was also a master of morale. He addressed his troops directly, spoke of victory as an inevitability, and immediately began to rebuild the Eighth Army’s confidence. He also made a critical decision: he would not retreat. He had the Qattara Depression to his south—an impassable salt marsh that protected his flank—and he intended to use this narrow front to his advantage.

    Rommel’s Last Gamble: Alam el Halfa

    Rommel knew that time was running out. His supply lines were stretched thin, and the British were receiving fresh troops and tanks from the United States. In late August, he launched his last offensive, the Battle of Alam el Halfa. He planned to swing south around the British flank, but Montgomery, forewarned by intelligence, had laid a trap. The British tanks and anti-tank guns held their ground, and Rommel’s attack was repulsed. It was a defensive victory for Montgomery—a sign that the Eighth Army could now stand up to the Desert Fox.

    But Montgomery was not content with a mere defensive success. He began planning a massive offensive of his own. He had one overwhelming advantage: supplies. The British had access to thousands of tanks, guns, and shells from the factories of Britain and America. Rommel, by contrast, was running on fumes. His supply ships were being sunk in the Mediterranean by the Royal Navy and the air force, and he was short of fuel and ammunition.

    The Second Battle of El Alamein

    On the night of October 23, 1942, Montgomery launched Operation Lightfoot. The plan was a classic set-piece battle: a massive artillery bombardment, followed by a carefully coordinated infantry and tank advance through the Axis minefields. The goal was to break through the northern sector of the line, while a diversionary attack in the south pinned down the Italian divisions.

    The battle was brutal and attritional. The minefields were thicker than expected, and the infantry made slow progress. For days, the two armies ground against each other in a deadly stalemate. Rommel, who was on sick leave in Germany at the start of the battle, rushed back to his headquarters. He threw his last reserves into the fight, including the 21st Panzer Division, but the British superiority in numbers and firepower was overwhelming.

    On November 2, Montgomery launched Operation Supercharge, a second push designed to break through the Axis line once and for all. The British tanks poured through a gap in the minefields and into the open desert beyond. Rommel, seeing that his army was about to be encircled, began a retreat. But Hitler ordered him to stand fast, and Rommel was forced to obey—at least for a time. The inevitable could not be postponed. On November 4, the Axis line cracked. The Italian and German units were separated, and the retreat turned into a rout. The Eighth Army pursued Rommel’s forces across Libya, capturing thousands of prisoners and vast quantities of equipment.

    The casualties at El Alamein were heavy on both sides. The Axis lost approximately 30,000 men killed, wounded, or captured—the vast majority of them prisoners. The Eighth Army suffered around 13,500 casualties. But the strategic result was decisive: Rommel’s army was broken, and the Axis never regained the initiative in North Africa.

    The Aftermath: Operation Torch and the End in Tunisia

    Just days after El Alamein, the Allies launched Operation Torch, the Anglo-American landings in Morocco and Algeria on November 8, 1942. This opened a second front in North Africa, trapping Rommel’s forces between the Eighth Army advancing from the east and the new Allied forces attacking from the west. The Axis forces retreated into Tunisia, where they fought a desperate delaying action.

    Rommel’s last offensive was at the Kasserine Pass in February 1943, where he inflicted a sharp defeat on the inexperienced American forces. But it was a tactical success that could not change the strategic situation. In March, Rommel left Africa for good, officially for health reasons—though he was also disillusioned with Hitler’s refusal to allow a strategic withdrawal. On May 13, 1943, the remaining Axis forces in North Africa surrendered. Over 250,000 German and Italian soldiers were taken prisoner.

    The Rommel Myth and the Reality

    Rommel’s reputation as a brilliant and chivalrous commander was carefully cultivated by both sides. The British needed a scapegoat for their defeats, and Rommel’s skill made him a convenient villain. After the war, his image was further polished by his involvement in the July 20, 1944 plot to assassinate Hitler, which made him a hero of the German resistance in the eyes of many.

    The reality was more complex. Rommel was certainly a tactical genius—his ability to conduct mobile warfare in the desert was unmatched. But he was also strategically reckless, often overextending his supply lines and ignoring logistics. He was not the “clean” warrior of legend; he accepted Nazi decorations and turned a blind eye to the persecution of Jews in his theater. His chivalry extended only to those he considered worthy of it.

    Montgomery, on the other hand, was a cautious, methodical planner who believed in overwhelming force. He was not flashy, but he was effective. He restored the Eighth Army’s confidence, outthought Rommel at Alam el Halfa, and then crushed him at El Alamein. He may have lacked Rommel’s flair, but he had something more important: a strategy that worked.

    The Significance of El Alamein

    El Alamein was the first major, permanent land victory by the Allies over the Germans in World War II. It came before Stalingrad, which ended in February 1943, and it proved that the Wehrmacht could be beaten. It secured the Suez Canal, protected the oil of the Middle East, and opened the way for the invasion of Italy. It also gave the British people a much-needed morale boost during the darkest days of the war.

    Churchill famously said: “Before Alamein we never had a victory. After Alamein we never had a defeat.” It was an exaggeration, but it captured the moment’s significance. El Alamein was the turning point not just of the desert war, but of the entire conflict. The Desert Fox had been outfoxed, and the tide had turned.

    The desert war between Rommel and Montgomery was more than a clash of generals. It was a contest between improvisation and preparation, between a commander who relied on dash and one who relied on logistics. At El Alamein, Montgomery proved that in modern war, the side with better supplies and a disciplined plan will usually win. Rommel’s retreat from Egypt marked the beginning of the end for the Axis in North Africa, and the lessons of that battle—about the importance of supply lines, intelligence, and morale—resonate to this day.

    Summary

    • The Second Battle of El Alamein (October 23–November 4, 1942) was the first major Allied land victory over the Germans in WWII, marking a turning point in the war.
    • Montgomery’s defensive victory at Alam el Halfa (August 1942) blunted Rommel’s last offensive and set the stage for the counterattack.
    • El Alamein was won through overwhelming material superiority—the British had more tanks, guns, and supplies, while Rommel’s forces were starved of fuel and ammunition.
    • The Allied victory at El Alamein, combined with Operation Torch in November 1942, trapped the Axis forces in Tunisia and led to their surrender in May 1943.
    • Rommel’s reputation as a “clean” and chivalrous general is largely a myth; he was a tactical genius but strategically reckless and complicit in the Nazi system.

    FAQ

    Q: What was the significance of the Battle of El Alamein?
    A: It was the first major, permanent land victory by the Allies over the Germans in World War II. It secured the Suez Canal and the Middle East oil fields, and it marked the turning point in the North African campaign, leading to the Axis surrender in Tunisia in May 1943.

    Q: How did Montgomery differ from Rommel as a commander?
    A: Montgomery was a meticulous planner who emphasized preparation, logistics, and overwhelming force. Rommel was an improviser who excelled at mobile warfare but often overextended his supply lines. Montgomery’s caution contrasted with Rommel’s boldness, and at El Alamein, Montgomery’s strategy proved decisive.

    Q: What was the “Rommel myth”?
    A: The “Rommel myth” was the idea that Rommel was a brilliant, chivalrous general who fought a “clean” war without Nazi atrocities. This was promoted by Allied propaganda and by Rommel himself, but it obscures his strategic recklessness and his complicity in the Nazi system.

    Q: How did the Qattara Depression affect the battle?
    A: The Qattara Depression, an impassable salt marsh, protected the British southern flank at El Alamein. This meant that Rommel could not outflank the British by sweeping around the desert, so he was forced into a frontal assault against a well-prepared defensive line, which played into Montgomery’s hands.

    Q: What role did Operation Torch play in the North African campaign?
    A: Operation Torch (November 8, 1942) was the Anglo-American invasion of Morocco and Algeria. It created a second front in North Africa, trapping Rommel’s forces between the Eighth Army advancing from the east and the new Allied forces attacking from the west, leading to the Axis surrender in Tunisia.

  • The Ultra Secret: How Codebreaking Shortened the War

    The Ultra Secret: How Codebreaking Shortened the War

    In the summer of 1939, a few weeks before Germany invaded Poland, a small group of Polish mathematicians handed their British and French counterparts a gift that would change the course of the war: working replicas of the German Enigma machine, along with the techniques they had used to break its codes. That act of trust set in motion a secret war that would unfold in a Victorian mansion 50 miles northwest of London, where thousands of men and women would labor in silence to read the enemy’s most guarded thoughts. The intelligence they produced, codenamed Ultra, would help reroute convoys around U-boat wolfpacks, shape the timing of the Normandy invasion, and, by most estimates, shorten the war by years.

    This is the story of that secret war how a machine designed to be unbreakable was cracked, how a team of eccentric geniuses and diligent clerks turned intercepted radio signals into actionable military intelligence, and how the Allies managed to keep it all hidden for nearly three decades after the war ended.

    The Unbreakable Machine

    The Enigma machine was a marvel of engineering. About the size of a portable typewriter, it used a series of rotors and a plugboard to scramble plaintext into ciphertext. With roughly 10^23 possible settings for the three-rotor version, the Germans believed it was mathematically impossible to crack by hand. They changed the settings daily, and sometimes more often, so that even if one message was read, the next would be a fresh puzzle. German cryptographers had tested it and were confident: this was a cipher that would hold.

    But confidence can be a weakness. The Poles, who had been intercepting German radio traffic since the 1920s, refused to accept that the machine was invulnerable. In 1932, Marian Rejewski, a young mathematician at the Polish Cipher Bureau, used group theory and a method of pattern-matching to reconstruct the wiring of the Enigma rotors. He didn’t have the machine itself; he worked from intercepts and a leaked German manual. By the late 1930s, the Poles had built a mechanical device called the Bomba that could test thousands of rotor settings automatically. But as the Germans upgraded their procedures, the Poles realized they were losing ground. In July 1939, just weeks before the outbreak of war, they made a decision that would prove pivotal: they shared everything they knew with British and French intelligence at a secret meeting in the Kabaty Woods near Pyry.

    Bletchley Park: The Factory of Secrets

    Bletchley Park, known as Station X, was a sprawling estate that had been purchased quietly by the Secret Intelligence Service in 1938. It was close to Oxford and Cambridge, which made it easy to recruit academics, and it was on the main telephone and telegraph lines between London and the north. By 1944, the site would house around 9,000 to 10,000 workers, three-quarters of them women, who lived in cramped huts and worked in shifts around the clock. The atmosphere was a curious mix of intense intellectual rigor and social informality, with senior codebreakers often wearing casual clothes and setting their own hours.

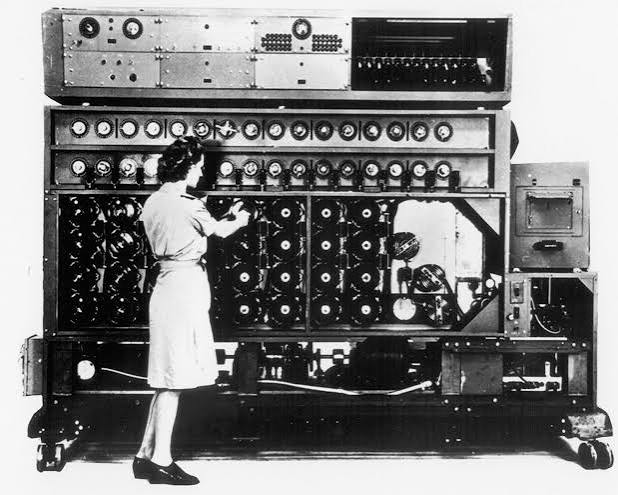
    The work was divided into specialized huts. Hut 6 handled Army and Air Force Enigma; Hut 8 tackled Naval Enigma. Alan Turing, a mathematician from Cambridge, led Hut 8 from 1940. Turing was not the stereotypical military officer. He cycled to work in a gas mask to avoid hay fever, chained his mug to a radiator to prevent theft, and sometimes wore his pajamas under his clothes. But his mind was razor-sharp. Along with Gordon Welchman, who ran Hut 6, Turing designed the Bombe, an electromechanical machine that improved on the Polish Bomba. The Bombe worked by testing possible rotor settings, using a technique called a “crib”—a guessed plaintext phrase that was likely to appear in a message, such as a weather report or “Heil Hitler.” By 1944, around 200 Bombes were humming in outbuildings across the UK, each one capable of testing thousands of combinations per second.

    Breaking the Codes

    The first sustained British breaks came in 1940, when Hut 6 began reading German Air Force Enigma traffic, codenamed “Dolphin.” This was a breakthrough, but the most critical target was the Navy. U-boats were strangling Britain’s supply lines, and the Battle of the Atlantic was a grim arithmetic of tonnage sunk versus ships built. In March 1941, Naval Enigma, codenamed “Shark,” was finally broken. The intelligence allowed convoys to be rerouted around wolfpacks, saving millions of tons of shipping. But the Germans were not static. In February 1942, they introduced a fourth rotor for the U-boat Enigma, plunging Bletchley Park into what was called the “Shark blackout.” For nearly a year, the codebreakers could not read the U-boats’ messages, and shipping losses spiked. It was not until December 1942 that the new rotor was broken, thanks to a combination of captured key material, traffic analysis, and the sheer persistence of women like Joan Clarke, a cryptanalyst in Hut 8 who had been hired despite the military’s initial reluctance to employ women in such roles.

    But Ultra was not just about breaking codes. Sometimes, even when messages could not be read, the mere volume and direction of radio traffic revealed German intentions. This was traffic analysis, and Gordon Welchman was its master. He developed the “diagonal board” for the Bombe, which allowed it to test more rotor combinations, and he pioneered the use of statistical methods to identify patterns in the intercepted traffic. Traffic analysis could reveal where a Panzer division was moving, even if the content of its orders remained encrypted.

    From Intelligence to Action

    Ultra was only useful if it reached the right people. The system that developed was elaborate and paranoid, for good reason. The Germans had to believe their codes were secure. If the Allies acted on Ultra intelligence in a way that revealed their source, the enemy would change their procedures, and the flow of information would dry up. So the intelligence was filtered through Special Liaison Units (SLUs) attached to Allied commanders. Only a handful of senior officers knew the full story; field commanders received sanitized reports, labeled “CX/MSS,” which did not reveal that they came from decrypted messages. The “Ultra rule” was simple: no operation could be launched or cancelled if doing so would tip off the enemy that their codes were broken. Sometimes, this meant allowing an attack to proceed or not acting on intelligence, even when it meant losses, to protect the secret.

    This rule was tested during the D-Day invasion. Ultra provided detailed intelligence on German troop dispositions, the location of Panzer divisions, and the enemy’s defensive plans. But the Allies could not always act on it immediately, for fear of compromising the source. For example, when Ultra revealed that the German 21st Panzer Division was moving toward the Normandy beaches on the afternoon of June 6, 1944, the Allied commanders had to weigh the risk of responding too quickly against the risk of losing the beachhead. In the end, they used sanitized reports and timing to mask the source, and the invasion succeeded. Ultra was a decisive advantage, but it was one that had to be wielded with care.

    The Debate Over the War’s Length

    How much shorter did Ultra make the war? This is a question that historians have argued about for decades. Sir Harry Hinsley, the official historian of British intelligence, estimated that Ultra shortened the war by two to four years. He pointed to the Battle of the Atlantic, where Ultra allowed convoys to avoid U-boats, and to the North Africa campaign, where Ultra intelligence helped Montgomery outmaneuver Rommel. Other historians, like David Kahn, are more cautious. They note that the Soviet Union did most of the fighting and dying on the Eastern Front, and that Allied industrial and military superiority were probably decisive in the long run. They argue that Ultra was a force multiplier, not a silver bullet.

    The truth is that Ultra was likely most decisive in the Atlantic. Without it, the U-boat campaign might have succeeded in cutting Britain’s supply lines, which would have made any invasion of Europe impossible. But even there, the advantage was not absolute. The Germans periodically changed their procedures, causing blackouts, and the balance of advantage shifted back and forth. The war’s outcome was probably not changed by Ultra—the Allies had the resources and the will to win—but the war’s length almost certainly was. Every month that the war was shortened meant fewer deaths, less destruction, and a faster return to peace.

    The Secret Kept

    After the war, the Ultra secret was buried. The codebreakers returned to their civilian lives, and many of them told no one, not even their spouses, what they had done. The equipment was dismantled, the files were classified, and the history of Bletchley Park was rewritten as a story of “operational research” or “administrative work.” The silence lasted for nearly 30 years. It was broken in 1974, when Group Captain F.W. Winterbotham, a former RAF intelligence officer, published The Ultra Secret. The book was a sensation, and it forced the British government to acknowledge what had happened. Slowly, the full story emerged: the Polish contribution, the role of Turing and Welchman, the thousands of women who worked in the huts, the sheer scale of the operation.

    Today, Bletchley Park is a museum, and the story of Ultra is celebrated as one of the great achievements of the war. But the lessons are not just historical. The codebreakers showed that when a group of brilliant, determined people are given a hard problem, not even a mathematical impossibility can stand in their way. They also showed the importance of secrecy, and the moral compromises that come with it. The Ultra rule, which sometimes meant sacrificing lives to protect the secret, is a reminder that intelligence is not a neutral tool. It has a cost, and that cost is often paid in human terms. But in the end, the secret was kept, and it helped win the war.

    The Ultra secret was one of the most closely guarded of the Second World War, and it remains one of the most consequential. It did not win the war by itself, but it shortened it, and in doing so, it saved lives that would otherwise have been lost. The codebreakers of Bletchley Park, from the genius of Turing to the diligence of the clerks, worked in obscurity and returned to obscurity, but their achievement is now part of the historical record. The war was a collective effort, and Ultra was one of its most effective weapons—a weapon made of mathematics, human ingenuity, and the will to win.

    Summary

    • Ultra was the codename for intelligence from breaking German Enigma communications, produced at Bletchley Park (Station X).
    • The work built on the earlier breakthroughs of Polish mathematicians, notably Marian Rejewski, who first cracked Enigma in 1932.
    • Key figures like Alan Turing and Gordon Welchman designed the Bombe, an electromechanical machine that accelerated codebreaking.
    • Ultra provided critical intelligence for the Battle of the Atlantic, the North Africa campaign, and D-Day, but its use was constrained by the need to protect the source.
    • Historians estimate Ultra shortened the war by 2-4 years, though the debate continues about its overall decisiveness.

    FAQ

    Q: What was the Enigma machine?
    A: The Enigma was a portable rotor cipher machine used by German military and intelligence services. It encrypted messages by scrambling letters through a series of rotors and a plugboard, with an enormous number of possible settings (around 10^23 for the three-rotor version), which the Germans believed made it unbreakable.

    Q: How did the Allies break Enigma?
    A: The Poles first broke Enigma in 1932, using mathematics and a mechanical device called the Bomba. They shared their work with the British and French in 1939. At Bletchley Park, Alan Turing and Gordon Welchman refined the Polish design to create the Bombe, which used “cribs” (guessed plaintext phrases) to test rotor settings rapidly.

    Q: Did Ultra actually shorten the war?
    A: Most historians agree it did, with estimates ranging from two to four years. Ultra was especially decisive in the Battle of the Atlantic, where it allowed convoys to avoid U-boat wolfpacks. However, some historians argue that Allied industrial and military superiority were more important in the long run.

    Q: Why was Ultra kept secret for so long?
    A: The British wanted to protect the source of the intelligence, and they also had a legal obligation to keep wartime secrets classified. Additionally, the techniques used in codebreaking, such as statistical analysis, were valuable for postwar intelligence work. The first public revelation came in 1974 with Winterbotham’s book The Ultra Secret.

    Q: What role did women play at Bletchley Park?
    A: Women made up about 75% of Bletchley Park’s workforce, around 9,000 to 10,000 people at its peak. They worked as codebreakers, like Joan Clarke in Hut 8, as well as in support roles such as operating Bombes, intercepting radio traffic, and translating messages. Their contributions were essential to the success of Ultra.

  • The Warning That Wasn’t Heard: How Intelligence Failures Doomed Pearl Harbor

    The Warning That Wasn’t Heard: How Intelligence Failures Doomed Pearl Harbor

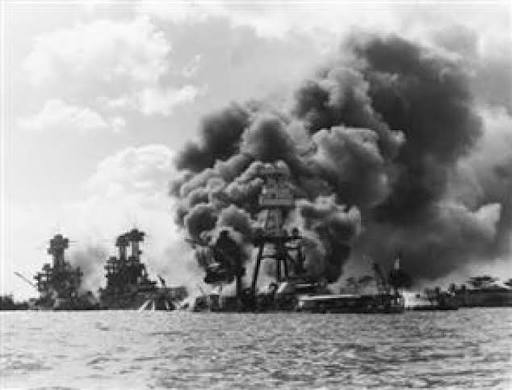
    At 7:48 a.m. on December 7, 1941, the first wave of Japanese aircraft descended on Pearl Harbor, turning a quiet Sunday morning into a scene of fire and steel. When the attack ended, 2,403 Americans lay dead, eight battleships were sunk or damaged, and the U.S. Pacific Fleet was in ruins. The question that has haunted historians ever since is not how Japan managed such a feat, but why the United States with its codebreakers, its spies, and its warnings was so completely unprepared.

    The answer lies not in a single failure, but in a cascade of them: fragmented intelligence, bureaucratic rivalry, and a stubborn belief that Pearl Harbor was an impossible target. The pieces of the puzzle were on the table, but no one assembled them in time.

    The Morning of December 7, 1941

    The first wave of 183 Japanese aircraft fighters, bombers, and torpedo planes came in low over the Ko’olau Range, catching the U.S. Pacific Fleet at anchor in Battleship Row. Within minutes, the USS Arizona was ripped apart by a 1,760-pound armor-piercing bomb that ignited its forward magazine, killing 1,177 crewmen. The USS Oklahoma capsized after multiple torpedo hits, trapping hundreds below deck. By 9:45 a.m., when the second wave of 170 aircraft withdrew, the harbor was a graveyard of smoke and oil fires.

    The official toll: 2,403 dead, 1,178 wounded, 188 aircraft destroyed. All eight battleships were either sunk or damaged though six would later be raised and refitted. The attack was a tactical masterpiece, but strategically it was a blunder: the U.S. aircraft carriers were at sea, the oil storage tanks were untouched, and the shipyards remained operational. Yet on that day, the United States had suffered its worst military disaster in history.

    The Intelligence That Was There

    The story of the intelligence failures begins long before the first bomb fell. By 1941, American cryptanalysts had achieved a remarkable feat: they had broken Japan’s highest-level diplomatic cipher, codenamed MAGIC. This gave Washington the ability to read secret messages between Tokyo and its embassies, including the Japanese embassy in Washington, D.C.

    MAGIC was a goldmine, but it had a critical blind spot: it covered diplomacy, not military operations. The Japanese Navy’s operational code, JN-25, remained largely unbroken. American codebreakers had made some progress on JN-25, but not enough to read fleet movements in real time. As a result, the U.S. could see the diplomatic tea leaves but not the naval battle fleet.

    What the U.S. did have were other clues. In late November 1941, traffic analysts at the Navy’s radio intelligence stations noticed something alarming: Japanese aircraft carriers and battleships had gone silent. The Japanese fleet had been emitting a steady stream of radio signals; suddenly, nothing. This was a classic sign of a major operation ships observing strict radio silence to hide their movement. But where were they going? The analysts couldn’t say.

    The Japanese strike force, under Vice Admiral Chuichi Nagumo, had departed Japan on November 26, taking a northern Pacific route far from commercial shipping lanes and U.S. patrols. The fleet maintained absolute radio silence throughout the 3,500-mile journey. The U.S. had no radar network in Hawaii only a mobile SCR-270 radar unit in training so there was no electronic tripwire.

    The Warnings That Were Ignored

    Between late November and December 7, a series of warnings were sent to U.S. commanders, but each was diluted by assumptions and miscommunication.

    November 27, 1941: Chief of Naval Operations Harold Stark sent a “war warning” to Pacific commanders, including Admiral Husband Kimmel in Hawaii. The message stated: “This dispatch is to be considered a war warning. Negotiations with Japan have ceased… An aggressive move by Japan is expected within the next few days.” The message went on to say that Japan might attack the Philippines, Malaya, or the Dutch East Indies—but made no mention of Pearl Harbor. Kimmel, like most officers, took the warning seriously but focused on the likely targets in Southeast Asia.

    December 6, 1941: The first 13 parts of a 14-part Japanese diplomatic message—a final note breaking off negotiations—were intercepted and decoded by U.S. intelligence. By 9:30 p.m., they were on President Roosevelt’s desk. The President read them and remarked to an aide, “This means war.” But the final, 14th part—the actual declaration of war—was not decoded until the morning of December 7. It was delivered to the White House at around 2:00 p.m., hours after the attack had begun.

    The “Winds” message was another missed signal. The Japanese had coded a hidden phrase in their radio broadcasts that would indicate whether war was imminent with the United States, Britain, or the Soviet Union. The phrase for the United States was “east wind, rain.” On December 6, American intercept stations picked up a broadcast containing the phrase, but the decoding and translation were delayed. By the time it was fully understood, the attack was already underway.

    The Fog of Bureaucracy

    Even when intelligence was available, it was siloed. The Army and Navy had separate intelligence systems that rarely shared information. In Washington, the FBI, the Office of Naval Intelligence (ONI), and Army G-2 each worked independently. In Hawaii, Admiral Kimmel and Lieutenant General Walter Short—the Army commander—had a strained relationship and communicated sparingly.

    One of the most glaring examples of this fragmentation occurred on the morning of December 7. At 7:02 a.m., a radar operator at the Opana Point mobile unit detected a large formation of aircraft approaching from the north—the first wave of the Japanese attack. The operator called the Army’s Information Center, but the officer on duty, Lieutenant Kermit Tyler, assumed it was a flight of B-17 bombers scheduled to arrive from the mainland. He told the operator, “Don’t worry about it.” The warning was never passed to the Navy. The radar contact was the last, clearest signal, and it was dismissed.

    The Investigations and the Verdict

    In the aftermath, the U.S. government launched at least nine official investigations between 1941 and 1946. The first was the Roberts Commission, appointed by Roosevelt in December 1941. It concluded that there had been “dereliction of duty” by Kimmel and Short, but it did not find a conspiracy.

    Subsequent investigations—including the Army Pearl Harbor Board, the Navy Court of Inquiry, and the Joint Congressional Committee (1945–46)—produced similar findings. They cited failures of command, communication, and judgment. The Army and Navy commanders had not taken adequate precautions, and Washington had failed to provide them with clear, actionable intelligence. But the investigations were unanimous on one point: there was no evidence that Roosevelt or other top officials had prior knowledge of the attack and deliberately withheld it.

    The “conspiracy theory” that FDR knew and allowed the attack to happen has been thoroughly debunked by historians. No credible evidence has ever surfaced to support it. The reality is more mundane and more tragic: a series of errors, assumptions, and missed signals compounded into catastrophic surprise.

    Lessons That Went Unlearned—Until Later

    The Pearl Harbor failures led to a major overhaul of U.S. intelligence. The military and civilian intelligence agencies were reorganized, and a unified command structure was created in the Pacific. The CIA was established in 1947, in part to ensure that intelligence was centralized and shared.

    But the deeper lesson—that intelligence is only as good as the people who act on it—remains as relevant today as it was in 1941. The attack on Pearl Harbor was not a failure of collection; it was a failure of analysis, communication, and imagination. The United States had the pieces, but it could not see the picture.

    The attack on Pearl Harbor was a tragedy of misjudgment, not a conspiracy. The intelligence failures that allowed the Japanese strike to succeed were rooted in human error, bureaucratic rivalry, and a strategic assumption that Pearl Harbor was an unlikely target. The lessons of December 7, 1941, are not just historical footnotes; they are a sobering reminder that even the best intelligence can be rendered useless if it is not shared, analyzed, and acted upon.

    Summary

    • The U.S. had broken Japanese diplomatic codes (MAGIC) but not the naval operational code (JN-25), leaving a critical gap in intelligence.
    • Multiple warnings were sent in late November 1941, but they focused on Southeast Asian targets, not Pearl Harbor.
    • The “Winds” message and the 14-part diplomatic note were intercepted but not fully acted upon in time.
    • A radar contact on the morning of December 7 was dismissed as a flight of B-17s.
    • Nine official investigations concluded there were failures of command and communication, but no conspiracy.

    FAQ

    Q: Did the U.S. have any warning that Japan would attack Pearl Harbor?
    A: Yes, but the warnings were indirect. The U.S. had intercepted Japanese diplomatic messages indicating a breakdown in negotiations, and a “war warning” was sent to Pacific commanders on November 27, 1941. However, none of these warnings specifically mentioned Pearl Harbor, and the U.S. military assumed Japan would strike Southeast Asia.

    Q: What was MAGIC intelligence?
    A: MAGIC was the code name for U.S. intelligence derived from breaking the Japanese diplomatic cipher machine, known as Purple. It allowed the U.S. to read high-level diplomatic messages between Tokyo and its embassies, but it did not include military or naval operational traffic.

    Q: Did President Roosevelt know about the attack in advance?
    A: No. Claims that FDR deliberately withheld intelligence to force the U.S. into war are a conspiracy theory with no supporting evidence. Multiple investigations concluded that while there were intelligence failures, there was no prior knowledge of the attack on Pearl Harbor.

    Q: Why did the U.S. not expect an attack on Pearl Harbor?
    A: The prevailing assumption was that Japan would attack British or Dutch possessions in Southeast Asia—such as Malaya or the Dutch East Indies—to secure oil and resources. Pearl Harbor was considered too far from Japan and too heavily defended for a carrier raid, so it was ruled out as a likely target.

    Q: What were the main intelligence failures?
    A: The main failures were: the inability to read JN-25, the naval code; poor communication between Army and Navy intelligence; the dismissal of the radar contact on December 7; and the delay in decoding the “Winds” message and the final part of the Japanese diplomatic note.

  • The Corpse That Fooled the Nazis: Inside Operation Mincemeat

    The Corpse That Fooled the Nazis: Inside Operation Mincemeat

    In April 1943, a dead man washed ashore on the coast of Spain, carrying a briefcase chained to his wrist. The documents inside would change the course of the war in Europe. This is the story of Operation Mincemeat, the most audacious deception of World War II.

    The Allies needed to convince Hitler that the invasion of Europe would come through Greece and Sardinia, not Sicily. Their plan: a corpse, a fake identity, and a briefcase full of lies. The body was that of Glyndwr Michael, a homeless Welshman who had died from rat poison. The British dressed him as a Royal Marines officer and set him adrift, hoping the Germans would take the bait.

    The operation was the brainchild of two intelligence officers, Charles Cholmondeley and Ewen Montagu, who turned a grim necessity into a masterpiece of misdirection. It would ultimately save thousands of Allied lives and pave the way for the invasion of Sicily.

    The Strategic Trap

    In early 1943, the Allies had swept through North Africa and were gearing up for the next big move. Sicily was the obvious target—it would open the Mediterranean and serve as a launchpad for the invasion of Italy. The Germans knew this. They had fortified the island and were ready to repel an assault.

    The Allies needed a way to make Hitler look elsewhere. The plan was to convince the German High Command that the real invasion would come in the Balkans, with Greece and Sardinia as the primary objectives. If the Germans bought it, they would divert troops away from Sicily, leaving the island vulnerable.

    The challenge was to make the deception stick. Wireless transmissions could be intercepted and analyzed. Double agents could be exposed. But a dead body carrying forged documents? That was a different kind of gamble.

    The idea had been floating around since 1939, when Lieutenant Commander Ian Fleming—yes, the future James Bond author—suggested using a corpse with false papers. In 1942, Charles Cholmondeley of MI5 proposed a similar scheme. The two concepts were merged, and Operation Mincemeat was born.

    The Man Who Never Was

    The operation needed a body that would pass as a drowning victim, not a murder or a disease. The planners found their man in Glyndwr Michael, a 34-year-old Welsh laborer who had died in London from ingesting rat poison. His death was tragic, but it was perfect for the deception—phosphorus poisoning would be hard to detect after days in the sea.

    Michael’s family was never told. His body was taken to a coroner’s office and kept on ice until it was ready. He was given a new identity: Major William Martin, Royal Marines. The fictional major was given a personality through the documents in his pockets and the letters in his briefcase. He had a fiancée, Pamela, whose photograph and love letters were included to make him seem human. He even had a ticket stubs and a letter from his bank about an overdraft.

    The key documents were two letters. One was from General Sir Archibald Nye, Vice-Chief of the Imperial General Staff, to General Sir Harold Alexander, the Allied commander in North Africa. The other was from Admiral Louis Mountbatten to Admiral Sir Andrew Cunningham. Both referenced a plan called “Operation Husky”—the real codename for the Sicily invasion—and suggested that it was a cover for the true targets: Greece and Sardinia.

    The letters were crafted with deliberate care. They hinted at Allied intentions without being too explicit. The Germans would have to read between the lines, and they did.

    The Drop and the Bite

    On April 30, 1943, the submarine HMS Seraph surfaced off the coast of Huelva, Spain. The crew launched a canister labeled as an “optical instrument,” containing Major Martin’s body, dressed in his Royal Marines uniform, with the briefcase chained to his wrist. The tide carried him to shore.

    Spain was officially neutral, but it was sympathetic to the Axis. The local authorities found the body and the documents. Before returning them to the British, they allowed German intelligence—the Abwehr—to photograph and study them. This was exactly what the British had hoped for.

    The Germans were fooled. They examined the letters and concluded that the Allied invasion would come in Greece and Sardinia. Hitler ordered reinforcements to the Balkans and the Aegean. Troops were diverted away from Sicily, and the island was left with a skeleton defense.

    On July 9, 1943, the Allies landed in Sicily. They achieved complete tactical surprise. The invasion was a success, and the door to Italy was open.

    The Aftermath

    The operation remained a secret for years. It was revealed to the public in 1950, when Ewen Montagu published The Man Who Never Was, which was later made into a film. But the true identity of the body—Glyndwr Michael—was not disclosed until 1996, when historian Roger Morgan uncovered the records.

    Michael’s story is a footnote in history, but his sacrifice was immense. He never knew the role he would play, and his family never knew what happened to him. In a way, he became the ultimate unsung hero of the war.

    Operation Mincemeat is now studied as a classic example of strategic deception. It showed that sometimes, the most effective weapon is not a bomb or a bullet, but a lie, carefully crafted and delivered with conviction.

    Operation Mincemeat remains one of the most brilliant and audacious deceptions in military history. It proved that a single corpse, a fictional identity, and a briefcase of forged documents could alter the course of a war. The success of the operation saved countless lives and demonstrated the power of creative intelligence work. Glyndwr Michael, the man who never was, helped turn the tide in Europe—his story is a testament to the strange and often tragic ways war is fought.

    Summary

    • Operation Mincemeat was a British deception operation in 1943, aimed at convincing the Germans that the Allies would invade Greece and Sardinia, not Sicily.
    • The operation used the corpse of Glyndwr Michael, a homeless man who had died from rat poison, dressed as a Royal Marines officer named Major William Martin.
    • The body was dropped off the coast of Spain, where German intelligence gained access to the forged documents and was deceived.
    • As a result, Hitler diverted troops away from Sicily, allowing the Allied invasion on July 9, 1943, to achieve tactical surprise.
    • The operation was revealed in 1950, but the true identity of the corpse was only disclosed in 1996.

    FAQ

    Q: Who was the real person behind the corpse?
    A: The corpse was that of Glyndwr Michael, a 34-year-old Welsh homeless man who died from ingesting rat poison. His identity was concealed, and he was given the fictional identity of Major William Martin.

    Q: What was in the briefcase chained to the body?
    A: The briefcase contained forged personal documents, including love letters from a fictional fiancée, and two crucial letters from high-ranking British officers that discussed the Allied invasion plans, suggesting Greece and Sardinia as targets.

    Q: How did the Germans get hold of the documents?
    A: The body washed ashore in Huelva, Spain, a region with a known German agent. The Spanish authorities, who were sympathetic to the Axis, allowed German intelligence to examine the documents before returning them to the British.

    Q: Did Operation Mincemeat actually succeed?
    A: Yes, the Germans were deceived. They reinforced the Balkans and Sardinia, diverting troops away from Sicily, which allowed the Allied invasion of Sicily to achieve tactical surprise and succeed.

    Q: When was the operation revealed to the public?
    A: The operation was declassified and revealed in 1950 through Ewen Montagu’s book, The Man Who Never Was. The true identity of the body was not disclosed until 1996.

  • The Cauldron at Kiev: How 665,000 Soviet Soldiers Were Trapped in History’s Largest Encirclement

    The Cauldron at Kiev: How 665,000 Soviet Soldiers Were Trapped in History’s Largest Encirclement

    In the late summer of 1941, the largest encirclement in military history was not a single dramatic clash but a slow, grinding trap that closed over weeks. By the time it snapped shut, nearly 700,000 Soviet soldiers were caught inside, and the entire Southwestern Front had ceased to exist. The Battle of Kiev was not just a battle—it was a catastrophe that reshaped the Eastern Front and forced a bitter reckoning within the German High Command.

    The Salient and the Stubborn Stand

    By August 1941, the German Army Group South had slogged through the Ukraine, facing fierce Soviet counterattacks. The Soviet Southwestern Front, commanded by General Mikhail Kirponos, held a massive bulge around Kiev that jutted westward into German lines. This salient was a tempting target a huge concentration of Soviet forces ripe for envelopment.

    But Stalin refused to yield. Despite repeated pleas from his generals to withdraw from the salient to avoid encirclement, Stalin ordered the defense of Kiev at all costs. He believed the Germans would not risk a major operation there. He was wrong.

    The Great Debate

    Within the German command, a furious argument raged. Hitler insisted on seizing Ukraine for its grain and coal, and destroying the Soviet forces in the Kiev salient before advancing on Moscow. His generals Heinz Guderian, Fedor von Bock, Franz Halder wanted to push straight for Moscow, the political and logistical heart of the USSR. They argued that diverting south would waste precious time and allow the Soviets to reinforce the capital.

    Hitler overruled them. On August 21, he issued Directive No. 33, ordering the turn south. Guderian’s Panzer Group 2 was detached from Army Group Center and sent south to meet Ewald von Kleist’s Panzer Group 1 coming north. The plan was a classic double envelopment a Kesselschlacht, or cauldron battle.

    The Trap Closes

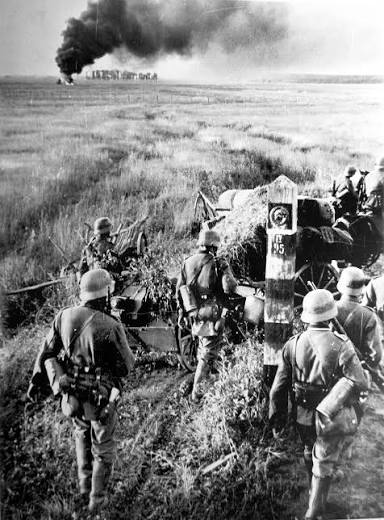
    From August 23 to September 12, Guderian’s tanks drove south from the Gomel area, while Kleist’s forces struck north from the Kremenchug bridgehead on the Dnieper River. The two pincers moved relentlessly, and on September 14–16, they met at Lokhvitsa, about 120 miles east of Kiev. The pocket was sealed.

    Inside were five Soviet armies the 21st, 5th, 37th, 26th, and part of the 38th roughly 452,000 to 700,000 soldiers. They were trapped, but not yet defeated. For the next ten days, the Germans methodically reduced the pocket. The Soviets attempted breakout after breakout, but the ring held. On September 20, General Kirponos was killed in action. By September 26, the last organized resistance ended.

    The numbers are staggering. The Germans claimed 665,000 prisoners a figure that even conservative Soviet-era estimates exceed 450,000. They also captured over 3,000 artillery pieces, 900 tanks, and 400 aircraft. Soviet losses for the entire operation reached roughly 600,000 to 700,000 killed, wounded, captured, or missing. German casualties were a fraction of that: about 100,000 to 128,000 total.

    The Aftermath and the Controversy

    Kiev fell on September 19, 1941. The victory opened the road to the Donbas and Crimea, and it secured the southern flank for the German advance. But it also delayed the drive on Moscow. Operation Typhoon, the assault on the capital, did not begin until October 2—a month later than originally planned.

    That delay became one of the most debated strategic questions of the war. Guderian and Halder later argued that the Kiev detour was a fatal mistake, allowing the Red Army to bring fresh Siberian divisions west, which contributed to the German defeat at the gates of Moscow in December 1941.

    But historian David Stahel and others counter that Army Group Center was too weak to take Moscow in 1941 regardless. The Kiev victory, they argue, was necessary to secure the southern flank and resources. The debate remains unresolved, but the scale of the encirclement is not in question.

    The Human Cost

    The Battle of Kiev was a catastrophe for the Soviet Union. The entire Southwestern Front was effectively destroyed, and the loss of life was immense. The prisoners taken at Kiev were marched into captivity, many to die in German camps. The battle stands as a grim reminder of the cost of strategic stubbornness and the brutality of the Eastern Front.

    For the Germans, it was a triumph—a textbook example of operational art. But it was also a warning. The sheer number of prisoners taken was a sign of the Red Army’s resilience: even after losing hundreds of thousands of men, the Soviets continued to fight. The cauldron at Kiev was the largest encirclement in history, but it would not be the last.

    The Battle of Kiev remains the largest encirclement in military history, a brutal demonstration of the scale of war on the Eastern Front. It was a German victory that came at a strategic cost, and a Soviet defeat that was avoidable. The cauldron at Kiev closed on nearly 700,000 men, and its legacy is a study in the consequences of high-stakes decision-making under fire.

    Summary

    • The Battle of Kiev (August 23 – September 26, 1941) was the largest encirclement in history, trapping over 450,000 Soviet soldiers.
    • Hitler ordered a turn south to seize Ukraine, overriding his generals’ push for Moscow.
    • Guderian’s and Kleist’s panzer groups met at Lokhvitsa, sealing the pocket.
    • The Soviet Southwestern Front was destroyed, with ~600,000 total casualties and ~665,000 prisoners taken.
    • The victory delayed the German assault on Moscow, sparking a lasting strategic debate.

    FAQ

    Q: What was the largest encirclement in military history?
    A: The Battle of Kiev in 1941, where German forces trapped over 450,000 Soviet soldiers, with some estimates exceeding 665,000 prisoners.

    Q: Why did Hitler divert forces to Kiev instead of Moscow?
    A: Hitler prioritized Ukraine’s agricultural and industrial resources and wanted to destroy the Soviet forces in the Kiev salient before advancing on Moscow.

    Q: How did the Soviets end up encircled?
    A: Stalin refused to allow withdrawal from the Kiev salient, leaving the Southwestern Front in place, which allowed the Germans to execute a double envelopment.

    Q: What was the outcome of the Battle of Kiev?
    A: A decisive German victory, with the entire Soviet Southwestern Front destroyed, opening the road to the Donbas and Crimea.

    Q: Did the Battle of Kiev contribute to the German defeat at Moscow?
    A: Many historians argue that the delay caused by the Kiev operation allowed the Soviets to reinforce Moscow, contributing to the German failure in December 1941, though others dispute this.

  • The Battle of Monte Cassino: A Four-Month Siege That Turned an Abbey into Rubble

    The Battle of Monte Cassino: A Four-Month Siege That Turned an Abbey into Rubble

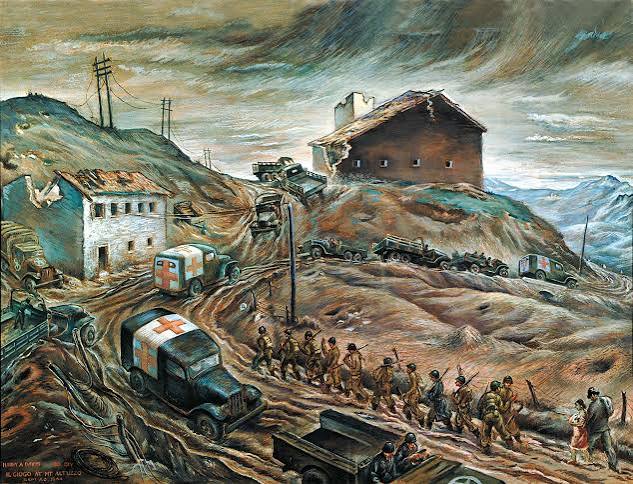
    Second World War fight to protect Monte Cassino Abbey was a battle over Europe's history

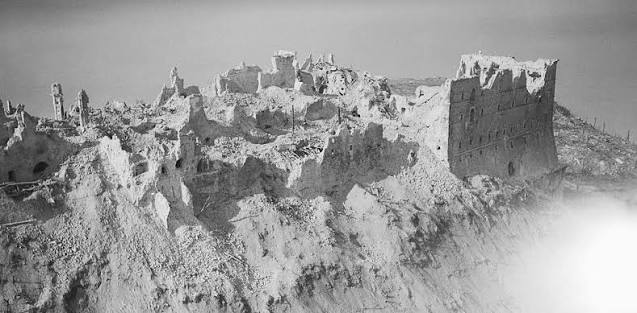
    On February 15, 1944, 229 B-17 Flying Fortresses darkened the sky over Monte Cassino. In a single morning, they dropped 1,400 tons of bombs on a 1,400-year-old Benedictine monastery, reducing it to a heap of broken stone and dust. The decision to bomb would become one of the most controversial acts of the Italian campaign and it would hand the German defenders an advantage they exploited ruthlessly.

    What followed was a four-month ordeal of blood and mud, a series of four Allied assaults against the Gustav Line, the formidable German defensive wall anchoring on that ruined hilltop. By the time the fighting ended on May 18, 1944, roughly 55,000 Allied soldiers and 20,000 Germans had been killed, wounded, or gone missing. The abbey, once a symbol of faith and learning, had become a graveyard.

    The Gates of Italy

    After the Allied invasion of Italy in September 1943, the Germans fell back to a chain of fortifications stretching across the boot from the Tyrrhenian Sea to the Adriatic. This was the Gustav Line, and its keystone was Monte Cassino a 520-meter peak 130 kilometers southeast of Rome, commanding the entrance to the Liri Valley. The terrain was a defender’s dream: steep mountains, narrow valleys, and winter rain that turned the ground to sludge.

    On the summit stood a monastery founded in 529 AD by St. Benedict himself. The abbey was the birthplace of the Benedictine order, a treasure house of manuscripts, art, and relics. For centuries, it had survived Lombards, Saracens, and earthquakes. Now it faced a new kind of destruction.

    The German command had promised the Vatican they would not occupy the abbey, and they kept that promise initially. But its position made it a natural observation post, and the Allies, suspecting the worst, prepared to eliminate it.

    The First Battle: A Bloody Introduction

    The first assault began on January 17, 1944. U.S. II Corps and British X Corps tried to outflank the position, pushing up the Rapido River and across the mountains. The weather was brutal cold rain, fog, and snow. The Germans, entrenched in bunkers and minefields, held their ground. After nearly a month of fighting, the Allies had gained almost nothing but casualties. The first battle was a failure.

    The second battle opened with a decision that would echo through history. On February 15, the bombers came. The official justification: intelligence suggested German observation posts in the abbey. That intelligence was flawed. The abbey was empty of German troops.

    The bombing killed hundreds of Italian civilians who had taken refuge inside—estimates suggest around 2,000 civilians died in the bombing and the ensuing chaos. Survivors fled into the mountains or into the German lines. When the smoke cleared, the abbey was rubble. And only then did the Germans move in—not because they had been driven out, but because the ruins offered perfect defensive cover.

    The Second Battle: Rubble as a Fortress

    The infantry assault that followed the bombing was a disaster. The Allies expected the ruins to be easy to take; instead, the rubble created a labyrinth of defensive positions. German paratroopers of the elite 1st Parachute Division moved into the ruins and made them impregnable. The second battle ended in failure.

    The third battle, in March, saw New Zealand Corps hammer the town of Cassino below the abbey with a massive artillery barrage, then fight house-to-house through the streets. It was brutal, close-quarters combat, but the abbey held. The third battle, too, failed.

    The Fourth Battle: Breaking the Line

    The final assault, Operation Diadem, began on May 11. This time, the Allies coordinated a multi-national offensive. French forces under General Juin broke through the mountains to the north, punching a hole in the German line. British and Indian troops fought through the town. And Polish II Corps, commanded by General Władysław Anders, attacked the abbey from the northeast.

    The Poles had a personal stake: many were veterans who had been deported to Siberia, then freed to fight for their homeland. They attacked the heights with fury. The German paratroopers, exhausted and out of ammunition, finally fell back. On May 18, Polish soldiers raised their flag over the ruins.

    The Gustav Line had collapsed. Rome was liberated on June 4, just two days before D-Day.

    The Aftermath: Rebuilding and Remembering

    The cost was staggering: about 55,000 Allied casualties and 20,000 German. Add roughly 2,000 dead civilians. The abbey itself lay in ruins, its treasures—many evacuated to the Vatican by German officers before the bombing—survived the war in crates.

    After the war, the monastery was rebuilt using original materials where possible. The Italian government and private donors funded the reconstruction, which was completed in the 1950s. Today, it stands again, a place of prayer and memory, though the scars of 1944 remain visible in the surrounding cemetery and the town below.

    The debate over the bombing has never fully settled. Was it a military necessity, or a tragic mistake that killed civilians and made the German defense stronger? Many historians argue it was a strategic error—the rubble was more defensible than the intact abbey would have been. Others point to the fog of war, the genuine fear of observation posts, and the pressure to break the stalemate. What is certain is that the Battle of Monte Cassino became a symbol of the Italian campaign’s brutality: a four-month siege where the ancient and the modern collided, and the ancient lost.

    The Battle of Monte Cassino was not a single engagement but a series of four, each more desperate than the last. It ended not with a strategic masterstroke but with the grinding advance of infantry and the courage of soldiers from Poland, India, France, Britain, and the United States. The abbey they fought over was rebuilt, but the memory of what happened there—the bombing, the rubble, the thousands of graves—endures as a reminder of what war costs.

    Summary

    • The Battle of Monte Cassino was a four-month series of assaults (January 17 – May 18, 1944) to break the German Gustav Line in Italy.
    • The Allies bombed the ancient Benedictine abbey on February 15, 1944, with 1,400 tons of bombs, turning it into rubble and inadvertently creating a stronger defensive position for the Germans.
    • Four major battles were fought, with Polish II Corps finally capturing the ruins on May 18, 1944.
    • Casualties were heavy: ~55,000 Allied and ~20,000 German dead, wounded, or missing, plus ~2,000 Italian civilian deaths.
    • The abbey was rebuilt after the war, and the bombing remains a controversial decision debated by historians.

    FAQ

    Q: Why was the abbey bombed?
    A: The Allies believed German observation posts were located in the abbey, which would have allowed artillery spotting over the front lines. Intelligence later proved this was not the case; the abbey was unoccupied at the time of the bombing.

    Q: Did the Germans use the abbey before the bombing?
    A: No. German commanders, including Field Marshal Albert Kesselring, had agreed with the Vatican to keep the abbey out of the defensive line. They only occupied the ruins after the bombing, using the rubble as a fortress.

    Q: How many civilians died?
    A: Approximately 2,000 Italian civilians, many of whom had taken refuge in the abbey, were killed during the bombing and the subsequent fighting.

    Q: What was the outcome of the battle?
    A: The Allies broke the Gustav Line, opening the road to Rome, which was captured on June 4, 1944. The battle was a costly but strategic success.

    Q: Is the abbey still standing today?
    A: Yes, the abbey was rebuilt in the 1950s using original materials where possible, and it functions as a monastery and a memorial to those who died in the battle.

  • The Muddy, Bloody Italian Campaign: 20 Months That History Forgot

    The Muddy, Bloody Italian Campaign: 20 Months That History Forgot

    On September 9, 1943, as American troops waded ashore at Salerno, they expected a quick march up Italy’s boot. Instead, they walked into a meat grinder that would chew up 20 months of their lives and 312,000 Allied casualties. The Italian Campaign became the longest, muddiest, and most brutal slog of the Western war yet it barely registers in popular memory.

    Why? Because the day Rome finally fell June 4, 1944 was the day before D-Day. The headlines, and history, moved on to Normandy. But the soldiers who fought from Sicily to the Alps knew: Italy was no soft underbelly. It was a fortress of mountains, mud, and German steel.

    A Soft Underbelly? Churchill’s Miscalculation

    Winston Churchill called Italy the “soft underbelly” of the Axis. He convinced the Allies at the Casablanca Conference in January 1943 that knocking Italy out would open the Mediterranean, secure shipping lanes, and force Germany to divert divisions from the Eastern Front. The Americans, led by General George Marshall, saw it as a distraction from the cross-Channel invasion they wanted. The compromise: invade Italy, but with limited resources Overlord would remain the priority.

    That compromise would haunt every Allied soldier who fought in Italy. They got just enough troops to start a campaign, but never enough to finish it quickly. By the time the fighting ended, Italy had become a secondary theater, stripped of divisions for other fronts, yet still expected to pin down German forces.

    Kesselring’s Genius: Turning Mountains into Fortresses

    Field Marshal Albert Kesselring, Germany’s defensive mastermind, did what Hitler initially thought impossible: he turned the Italian peninsula into a fortress. Rather than retreating to the Alps, Kesselring chose to defend south of Rome, using the Apennine Mountains a spine of ridges and peaks running the length of Italy as natural defensive lines.

    He built not one, but six successive lines: the Volturno, Barbara, Bernhardt, Winter, Gustav, and finally the Gothic Line. Each was a network of bunkers, minefields, pre-registered artillery, and interlocking fields of fire. Kesselring’s strategy was simple: delay, bleed, and make the Allies pay for every inch. He demolished roads, blew bridges, and flooded valleys. His troops counterattacked viciously, and his artillery was so well-coordinated that Allied soldiers learned to fear the whistle of incoming shells.

    The Gustav Line, anchored on the ancient Benedictine monastery of Monte Cassino, was the strongest. It blocked the road to Rome, and for four months in early 1944, it stopped the Allies cold.

    The Four Battles of Monte Cassino: Blood on the Mountain

    Monte Cassino was a 1,700-foot peak dominating the Liri Valley. The Germans had dug into the slopes, and from the summit, they could see every Allied move. Four times the Allies threw themselves against it.

    The first battle, in January 1944, was a series of frontal assaults across the Rapido River. The 36th Texas Division tried to cross under machine-gun fire and artillery, losing over 2,000 men in a single day. The second battle, in February, saw the Allies bomb the ancient monastery to rubble—but the Germans simply moved into the ruins, making the position even stronger. The third and fourth battles, in March and May, finally broke through with the help of Polish, Indian, and Free French troops. The Polish Corps raised their flag over the ruins on May 18, 1944. But by then, the mountain was a lunar landscape, and the Allied casualty count was over 50,000.

    Anzio: The Amphibious Gamble That Stalled

    In January 1944, the Allies tried to outflank the Gustav Line with a surprise landing at Anzio, 40 miles south of Rome. The plan was bold: land troops behind German lines, cut their supply routes, and force them to abandon Monte Cassino. But the Allied commander, Major General John Lucas, moved cautiously, fearing a repeat of Salerno. He paused to consolidate, and that pause was fatal.

    Kesselring reacted with shocking speed, rushing reinforcements to ring the beachhead. For four months, the Allies were trapped in a pocket, bombarded by artillery and counterattacked relentlessly. The beach was nicknamed “the largest self-supporting POW camp in the world.” It wasn’t until May 1944, when the Allies finally broke out and linked up with the main advance, that the Anzio stalemate ended. The breakout cost 30,000 Allied casualties.

    The Mud: The Third Enemy

    If the Germans were the first enemy, the mud was the second. Autumn 1943 and winter 1944 were among the wettest in Italian history. Roads turned to quagmires, vehicles bogged down to their axles, and infantry slogged through knee-deep muck that clung to boots and froze at night. A Canadian officer wrote: “The mud is not just mud. It’s a thick, sticky paste that swallows men whole.”

    Supplies had to be carried by mules and men over mountains. Artillery pieces sank into the earth, and tanks were useless off the roads. At Cassino, the Rapido River flooded, turning the valley into a swamp. The weather was as much an enemy as Kesselring, and it never let up.

    Rome Falls—But Nobody Notices

    On June 4, 1944, American troops of the 5th Army entered Rome. The city was free, the first Axis capital to fall. But the celebration was short-lived. Two days later, on June 6, Allied forces landed in Normandy. The news cycle, and history, moved on. The Italian Campaign was suddenly old news.

    General Mark Clark, commanding the 5th Army, chose to drive on Rome rather than trap the retreating German 10th Army at the Hitler Line. That decision has been debated ever since. Clark wanted the glory of taking Rome, but it let Kesselring escape with his forces to fight another day. The fall of Rome was a victory, but it was a hollow one—the war in Italy would drag on for another 11 months.

    The Gothic Line: The Stalemate That Almost Broke the Allies

    After Rome, the Allies pushed north, but they were exhausted and under-resourced. In August 1944, Operation Dragoon—the invasion of southern France—pulled seven Allied divisions out of Italy. The campaign was now a sideshow.

    Kesselring retreated to the Gothic Line, a massive defensive belt across the Apennines near Florence. The Allies threw themselves against it in September 1944, breaking through at the Gothic Line’s weakest point in the east, but then stalled. The winter of 1944–45 was one of the coldest on record. Snow buried the mountains, and both sides dug in. The fighting ground to a halt, with neither side able to move.

    The Final Push: Operation Grapeshot

    In April 1945, the Allies launched their final offensive, Operation Grapeshot. With the war in Europe nearly over, they finally had the resources to end it. The British 8th Army and the U.S. 5th Army, now including Brazilian, Indian, Polish, and Italian co-belligerent units, broke through the Gothic Line and drove into the Po Valley. On April 28, Italian partisans captured and executed Mussolini. On May 2, German forces in Italy surrendered unconditionally—two days after Hitler’s death in Berlin.

    The campaign was over. It had lasted 20 months, longer than North Africa and Normandy combined, and had cost over 312,000 Allied casualties and 434,000 German. Tens of thousands of Italian civilians had died in the crossfire, and the country’s infrastructure and cultural heritage lay in ruins.

    Why “Forgotten”?

    The Italian Campaign has been called the “forgotten front” for good reason. It was overshadowed by D-Day, which happened the day after Rome fell. It was drained of resources for the sake of Overlord and Dragoon. And it never delivered the decisive strategic payoff Churchill promised. Instead, it became a grinding war of attrition, a series of bloody fights for hills and rivers that didn’t even have names most people recognize.

    But the soldiers who fought there never forgot. They remembered the mud, the mountains, and the unrelenting German defense. They remembered that Italy was not a soft underbelly—it was a hard shell, and cracking it cost more than anyone expected.

    The Italian Campaign may not have the iconic imagery of D-Day or the Bulge, but it was one of the most brutal theaters of World War II. It proved that no front was easy, and that the cost of victory is often paid in forgotten places. The mud of Italy washed away the blood, but the memory of those 20 months lives on in the men who fought there—and in the history that finally remembers them.

    Summary

    • The Italian Campaign lasted 20 months (July 1943–May 1945), longer than North Africa or Normandy-to-Elbe.
    • Allied casualties were ~312,000; German ~434,000; Italian civilians in the tens of thousands.
    • Kesselring’s defensive lines, especially the Gustav Line at Monte Cassino, turned Italy into a fortress.
    • The fall of Rome on June 4, 1944, was overshadowed by D-Day on June 6.
    • After Operation Dragoon, Italy became a secondary theater, yet still pinned down hundreds of thousands of Germans.

    FAQ

    Q: Why is the Italian Campaign called the ‘forgotten front’?
    A: Because it was overshadowed by D-Day (which occurred two days after Rome fell), drained of resources for other fronts, and lacked a decisive strategic payoff. The popular narrative focused on Normandy and the Eastern Front.

    Q: What was the toughest part of fighting in Italy?
    A: The combination of mountainous terrain, relentless mud, and a brilliant German defensive strategy. The Apennines and rivers made every advance a brutal uphill fight, and the winter weather made conditions miserable.

    Q: How did the Allies finally win?
    A: Through overwhelming resources in the final offensive (Operation Grapeshot, April 1945), combined with German forces being weakened by the broader collapse of the Third Reich. The Germans surrendered on May 2, 1945.

    Q: What was the role of Italian partisans?
    A: They fought a guerrilla war against German and Fascist forces, harassing supply lines and eventually capturing and executing Mussolini on April 28, 1945.

    Q: Did the campaign achieve its strategic goals?
    A: Partially. It knocked Italy out of the war and tied down German divisions, but it didn’t lead to a quick victory. The Allies’ resources were diverted to Overlord, and Italy became a secondary front.

  • Kursk 1943: The Clash That Broke the Wehrmacht’s Back

    Kursk 1943: The Clash That Broke the Wehrmacht’s Back

    On the morning of July 5, 1943, the quiet fields around the Russian city of Kursk erupted in fire. Over 2 million soldiers, 6,000 tanks, and 5,000 aircraft were about to collide in the largest armored battle in history. The outcome would decide not just the fate of the Eastern Front, but the entire war.

    A Salient in the Steppe

    The winter of 1942–43 had been catastrophic for Germany. Stalingrad had shattered the Sixth Army, and the Red Army’s counteroffensive had pushed the front line westward. By spring, a massive bulge 150 miles wide and 100 miles deep had formed around Kursk, a city in western Russia. It was a tempting target for Hitler: pinch it off, and he would shorten his lines, destroy several Soviet armies, and regain the initiative.

    Operation Citadel was born. But the Germans waited. They waited for new weapons the Panther tank, the Ferdinand tank destroyer, and improved Tigers. The delay, from May to July, was fatal. It gave the Soviets time to dig in.

    Meanwhile, Soviet intelligence both the “Lucy” spy ring in Switzerland and intercepts of German communications had laid the German plan bare, down to the hour of the attack. Marshal Georgy Zhukov and his commanders decided on a bold strategy: let the Germans exhaust themselves against deep defenses, then unleash their own offensives.

    The Soviets built not one, not two, but three successive defensive belts, stretching up to 100 miles deep. They dug over 3,000 miles of trenches, laid 400,000 mines, and created thousands of anti-tank strongpoints. Behind the salient, they massed the Steppe Front, a strategic reserve of over half a million men ready to counterattack.

    The Storm Breaks

    At dawn on July 5, 1943, the Germans struck. In the north, General Walter Model’s 9th Army pushed south. In the south, Field Marshal Erich von Manstein’s 4th Panzer Army and Army Detachment Kempf drove north. Their goal: meet east of Kursk and trap the entire Soviet defense.

    The Germans expected speed. They found a wall. In the north, they advanced only 6 to 9 miles in eleven days. In the south, they pushed 20 to 25 miles, but at a terrible cost. The Panthers broke down, the Ferdinands were vulnerable to infantry attacks, and the minefields were denser than anything the Wehrmacht had seen.

    By July 11, the southern pincer had reached the village of Prokhorovka. There, on July 12, the climax came.

    Prokhorovka: The Cauldron of Steel

    History remembers Prokhorovka as a single, epic charge of Soviet tanks into the German line. The reality was more chaotic. Roughly 600 to 800 Soviet tanks from the 5th Guards Tank Army slammed into 300 to 400 German tanks from the II SS Panzer Corps. But it was not a neat battle line; it was a series of confused, close-range engagements, often at distances of less than 100 yards.

    Tanks fired point-blank. Crews abandoned their vehicles, some to be crushed by the advancing columns. The dust and smoke were so thick that commanders lost sight of their own units. By day’s end, the Germans had lost perhaps 100 tanks, the Soviets more than 300. Tactically, it was a German success. Strategically, it was a Soviet victory: the German advance had been stopped dead.

    Recent scholarship, including the work of Karl-Heinz Frieser and Valeriy Zamulin, has reframed Prokhorovka as a “tactical draw” or even a German tactical win. But the outcome was unambiguous. The Wehrmacht never again launched a strategic offensive in the East.

    The Turning of the Tide

    Even as the tanks clashed at Prokhorovka, the Soviets were launching their own offensives. Operation Kutuzov struck the German-held Orel salient to the north on July 12. Operation Rumyantsev followed on August 3, targeting Belgorod and Kharkov. The Germans, already bleeding from Citadel, were forced into a fighting retreat.

    By August 23, when the battle officially ended, the Red Army had pushed the front line back decisively. The Soviet Union had won its first summer offensive of the war. The strategic initiative passed permanently to the Soviets, never to return.

    The cost was staggering. Soviet casualties ranged from 180,000 to 250,000 killed, missing, or wounded—some estimates go higher. The Germans lost 50,000 to 60,000 men, with 700 to 1,200 tanks destroyed or damaged beyond repair. But the numbers tell only part of the story.

    The Human Cost

    Behind the statistics were soldiers like the conscripted peasants and workers who filled the Red Army’s ranks. They fought with extraordinary bravery, often with little training and less equipment. They held their ground against the Panzer divisions, sometimes with nothing more than anti-tank rifles and Molotov cocktails. Their sacrifice was enormous, but it was not in vain.

    The German soldiers, too, fought with skill and determination. But their army was overstretched, short on fuel and replacements, and now facing a Red Army that had learned the bitter lessons of 1941 and 1942.

    The Battle of Kursk was not just a battle of machines; it was a battle of will. And in the end, the Soviet will proved stronger.

    Why Kursk Matters

    Kursk was the largest tank battle in history, but it was also the turning point of the war in Europe. Before Kursk, the Wehrmacht had always managed to regain the initiative after a setback. After Kursk, it never did. The Red Army’s victory set the stage for the march to Berlin.

    For historians, Kursk remains a rich field of study. The debate over Prokhorovka—was it a Soviet triumph or a German tactical success?—continues to this day. What is not in doubt is the outcome: the largest armored clash in history ended in a decisive Soviet strategic victory, and the course of World War II was changed forever.

    Lessons from the Steppe

    The battle also offers enduring lessons. Intelligence and preparation mattered more than technological superiority. The Germans had better tanks, but the Soviets had better intelligence, better defenses, and better reserves. The delay to wait for new weapons gave the enemy time to prepare, a classic mistake. And the ability to absorb losses and keep fighting—that, too, was a decisive factor.

    As the dust settled over the Kursk salient, the world knew: the war had turned. The Red Army was coming west, and nothing would stop it.

    Kursk was the last great German offensive, and the first Soviet summer victory. It broke the Wehrmacht’s back and set the stage for the Red Army’s march to Berlin. The largest tank battle in history was more than a battle; it was the moment the Eastern Front shifted forever.

    Summary

    • The Battle of Kursk, from July 5 to August 23, 1943, was the largest armored engagement in history, involving over 2 million troops and 6,000–8,000 tanks.
    • The Germans delayed Operation Citadel to wait for new tanks, giving the Soviets time to build three defensive belts with 3,000 miles of trenches and 400,000 mines.
    • The climactic tank clash at Prokhorovka on July 12, 1943, was a tactical draw but a strategic Soviet victory, halting the German advance.
    • The Soviet counter-offensives (Kutuzov and Rumyantsev) forced the Germans into retreat, and the Red Army won its first summer offensive, seizing permanent initiative.
    • Casualties were heavy: 180,000–250,000 Soviet and 50,000–60,000 German troops, with 700–1,200 German tanks lost.

    FAQ

    Q: Why is the Battle of Kursk considered the largest tank battle?
    A: It involved an estimated 6,000 to 8,000 tanks and self-propelled guns from both sides, more than any other battle in history, including the earlier tank engagements of World War II.

    Q: Was the tank battle at Prokhorovka a Soviet victory?
    A: Tactically, the Germans may have inflicted higher losses, but strategically, the Soviets stopped the German advance. Recent scholarship calls it a tactical draw or even a German tactical success, but it was a Soviet operational victory.

    Q: What role did intelligence play in the Soviet victory?
    A: Soviet intelligence, including the “Lucy” spy ring and intercepts, provided detailed warning of the German plan, allowing the Soviets to prepare extensive defenses and mass reserves.

    Q: How many casualties were there at Kursk?
    A: Soviet losses were between 180,000 and 250,000 killed, missing, or wounded (some estimates up to 800,000 including sick). German losses were about 50,000 to 60,000, with 700 to 1,200 tanks destroyed.

    Q: What was the outcome of the Battle of Kursk?
    A: It was a decisive Soviet strategic victory. The Wehrmacht’s last major offensive capability on the Eastern Front was broken, and the Red Army seized the strategic initiative permanently.

  • The Battle of Stalingrad: 163 Days That Turned the Tide of World War II

    The Battle of Stalingrad: 163 Days That Turned the Tide of World War II

    On August 23, 1942, the Luftwaffe unleashed a hell of fire and steel on the city of Stalingrad. In a single day, waves of bombers dropped thousands of tons of explosives, turning the industrial metropolis on the Volga River into a moonscape of craters and burning rubble. Tens of thousands of civilians perished in the inferno, their bodies buried under collapsed buildings. That morning, the German 6th Army had reached the city’s outskirts; by nightfall, Stalingrad was a funeral pyre.

    What followed was not a conventional battle but a brutal, 163-day ordeal that would consume over two million lives. The Battle of Stalingrad, fought from August 23, 1942, to February 2, 1943, remains the bloodiest single engagement in human history. It was a clash of titans Nazi Germany and the Soviet Union locked in a struggle that would decide the fate of Europe. This is the story of how a city that bore Stalin’s name became the graveyard of the German Wehrmacht and the turning point of World War II.

    The City That Had to Be Taken

    Stalingrad was not just a city; it was a symbol. It bore the name of the Soviet dictator, and its factories churned out tanks, artillery, and small arms that fueled the Red Army. Strategically, it sat astride the Volga River, a vital artery for transporting oil from the Caucasus and supplies from the north. If Hitler could seize Stalingrad, he would cut the Soviet Union in half and secure the flanks of his drive toward the oil fields.

    For Hitler, the capture of Stalingrad was personal. He saw it as a propaganda coup that would demoralize the Soviets and cement his own myth of invincibility. For Stalin, losing the city would be a catastrophic blow to his prestige. In July 1942, he issued Order No. 227: “Not a step back!” The order forbade retreat under penalty of death, establishing penal battalions and blocking detachments that would shoot any soldier who fled. Both leaders had staked their reputations on a city that would become a meat grinder.

    The German summer offensive, codenamed Case Blue, had been launched in June 1942. Army Group South split into two prongs: one aimed for the Caucasus oil fields, the other, the 6th Army under General Friedrich Paulus, drove toward Stalingrad. By late August, Paulus’s forces, numbering over 300,000 men, were poised to take the city.

    The Bombing and the Rat War

    The Luftwaffe’s bombing on August 23 was designed to break the city’s will. It succeeded in killing thousands and leveling buildings, but it also created ideal defensive terrain. The rubble became a labyrinth of bunkers, sniper nests, and ambush points. The Soviet 62nd Army, commanded by General Vasily Chuikov, adopted a strategy that defied conventional military logic: hug the enemy.

    Chuikov’s doctrine was simple: keep Soviet lines so close to German lines that the Luftwaffe and artillery could not bomb without hitting their own troops. This turned the battle into a close-quarters brawl, fought with grenades, knives, and submachine guns. Soldiers engaged in what became known as the “rat war” fighting in sewers, basements, and the skeletons of buildings. Sniper duels became legendary; Vasily Zaytsev, a Soviet sniper, reportedly killed over 200 Germans, his exploits immortalized in the film Enemy at the Gates.

    By November, the Germans controlled about 90% of the city, but they could not dislodge the Soviet defenders from a narrow strip along the Volga’s western bank. Reinforcements and supplies crossed the river under constant fire, often at night. The eastern bank was held at all costs, becoming a lifeline that kept the defense alive.

    The Encirclement: Operation Uranus

    While the world’s attention was fixed on the street fighting, the Soviet high command was planning a massive counteroffensive. Generals Georgy Zhukov and Aleksandr Vasilevsky conceived Operation Uranus, a bold double envelopment designed to trap the German 6th Army. They amassed over a million troops, hidden through a masterful deception campaign (maskirovka) that fooled German intelligence about Soviet reserves.

    On November 19, 1942, the Red Army struck north and south of Stalingrad, smashing through the Romanian and Italian armies that protected the German flanks. Within four days, the pincers met at Kalach, encircling nearly 300,000 Axis troops in a pocket that stretched across the Volga steppe. The German high command was stunned. Hitler, in his bunker in East Prussia, refused to authorize a breakout, declaring that the 6th Army would hold the city and be resupplied by air.

    That promise proved hollow. The Luftwaffe’s transport fleet, already strained, could not deliver the required 700 tons of supplies per day. At its peak, it delivered only about 100–120 tons daily, a fraction of what was needed. The encircled army began to starve and freeze. Soldiers suffered frostbite, dysentery, and the gnawing agony of hunger. Horses were eaten, then pets, then rats.

    The Relief Attempt and the Siege’s End

    In December, Field Marshal Erich von Manstein launched Operation Winter Storm, a desperate attempt to break through to the trapped 6th Army. German tanks advanced to within 30 miles of the pocket before being halted by Soviet counterattacks. Hitler again forbade Paulus from attempting an exit, believing that holding Stalingrad was a matter of honor. It was a death sentence.

    By January 1943, the pocket had shrunk to a few square miles. The sick, wounded, and frostbitten huddled in cellars, surviving on scraps of bread and melted snow. The Red Army tightened the noose, capturing airfields and overwhelming the starving defenders. On January 31, Paulus was promoted to Field Marshal by Hitler—a clear signal that he should commit suicide rather than surrender. No German field marshal had ever been captured. Paulus chose life over honor.

    The northern pocket surrendered on February 2, 1943. Of the ~300,000 Axis troops encircled, about 91,000 were taken prisoner, including 24 generals. They were marched into captivity in the Soviet Union, a journey that most would not survive. Only about 5,000–6,000 ever returned to Germany.

    The Human Cost

    The numbers are staggering: combined military and civilian casualties ranged from 1.8 to 2.5 million. The Axis lost about 800,000–850,000 killed, wounded, or captured, while the Soviets suffered approximately 1.1–1.2 million casualties. Civilians bore the brunt of the initial bombing and the subsequent starvation; estimates of civilian deaths range from 40,000 to over 100,000. In the end, the city was a wasteland, its population decimated, its buildings reduced to hollow shells.

    The Battle of Stalingrad was not just a military defeat for Germany; it was a psychological and moral catastrophe. The myth of German invincibility was shattered. For the first time, the Wehrmacht had lost an entire army, and the tide of World War II in Europe had turned irrevocably. The Red Army would never lose the strategic initiative again, driving westward all the way to Berlin.

    For the soldiers who fought, Stalingrad was a descent into the abyss. Diaries and letters from both sides speak of the relentless horror: the stench of death, the constant shelling, the faces of comrades who vanished in a flash of fire. A German officer, Kurt Reuber, drew a charcoal sketch of a mother and child surrounded by darkness, titled the “Stalingrad Madonna,” a symbol of hope in the midst of despair.

    The Legacy

    Today, Volgograd—renamed in 1961 during de-Stalinization—stands as a monument to the battle. The Mamayev Kurgan hill, the site of some of the fiercest fighting, is crowned by a colossal statue, “The Motherland Calls.” It rises 85 meters above the city, a testament to the sacrifice of millions.

    Stalingrad remains a lesson in the dangers of overreach, the folly of hubris, and the terrible cost of war. It was a battle where the theories of generals collided with the grim reality of urban combat, where the will of a people proved stronger than the tanks of an invader. The blood of Stalingrad soaked into the Volga steppe, and from that blood rose a new world order.

    The battle’s outcome shaped the rest of the 20th century. It marked the beginning of the end for Nazi Germany and set the stage for the Cold War. For those who endured it, it was an experience that defied description. As one Soviet veteran wrote: “We who survived Stalingrad will never be the same. We have seen the face of war, and it is a face of utter ruin.”

    The Battle of Stalingrad was more than a military engagement; it was a crucible of fire and blood that forged the fate of nations. It demonstrated that even the most powerful army could be broken, and that the human spirit, when pushed to the brink, could endure unimaginable suffering. The names of Paulus, Chuikov, and Zaytsev are etched in history, but the countless anonymous soldiers and civilians who perished in the rubble are the true heroes of that epic struggle. As the world remembers the 80th anniversary of this cataclysm, we do well to reflect on the cost of hubris and the fragile value of peace.

    Summary

    • The Battle of Stalingrad (August 23, 1942 – February 2, 1943) was the bloodiest battle in history, with 1.8–2.5 million total casualties.
    • The German 6th Army was encircled by Soviet forces in Operation Uranus, leading to the surrender of ~91,000 soldiers, only a few thousand of whom survived captivity.
    • The battle marked a strategic turning point in World War II, ending the German advance into the Soviet Union.
    • Key tactics included Soviet “rat war” in the ruins and Chuikov’s “hug the enemy” strategy to neutralize German air superiority.
    • The Luftwaffe’s failed air supply operation doomed the encircled 6th Army, which suffered starvation and frostbite before surrendering.

    FAQ

    Q: Why is Stalingrad considered a turning point in World War II?
    A: Stalingrad was the first major defeat of the German Wehrmacht, resulting in the loss of an entire army. It shattered the myth of German invincibility and gave the Soviet Union the strategic initiative, which it never lost until Berlin fell in 1945.

    Q: How many people died in the Battle of Stalingrad?
    A: Estimates vary, but combined military and civilian casualties range from 1.8 to 2.5 million. The Axis suffered about 800,000–850,000 casualties, while the Soviet Union lost approximately 1.1–1.2 million soldiers and tens of thousands of civilians.

    Q: What was the “rat war”?
    A: The “rat war” referred to the brutal, close-quarters fighting in the ruins of Stalingrad, where soldiers battled in basements, sewers, and collapsed buildings. It was characterized by sniper duels, grenade attacks, and hand-to-hand combat, often at point-blank range.

    Q: Why did Hitler forbid the 6th Army from breaking out?
    A: Hitler believed that holding Stalingrad was essential for both strategic and propaganda reasons. He was confident the Luftwaffe could supply the army by air, but that proved impossible. He also promoted Paulus to Field Marshal, expecting him to commit suicide rather than surrender.

    Q: What was the fate of German prisoners of war from Stalingrad?
    A: Of the ~91,000 German soldiers taken prisoner, only about 5,000–6,000 survived Soviet captivity. Many died from disease, starvation, and the harsh conditions of labor camps during and after the war.

  • The Longest Retreat: How the Forgotten Army Turned the Tide in Burma

    The Longest Retreat: How the Forgotten Army Turned the Tide in Burma

    In March 1942, the British Empire suffered its longest retreat in history. Outnumbered and outmaneuvered, Allied forces trudged over 1,000 miles from Rangoon back to India, leaving Burma to the Japanese. The monsoon rains turned the roads to mud, and disease cut down more men than enemy fire. For the soldiers who survived, it was a humiliating low point of the war.

    Yet within two years, the same force now rebuilt and renamed the Fourteenth Army would shatter the Japanese Army at Imphal and Kohima, a battle often called the ‘Stalingrad of the East.’ This is the story of how a forgotten army, composed mostly of Indian soldiers, stopped the Japanese advance and reclaimed Burma.

    The Fall of Burma: A Disaster in the Jungle

    Japan’s invasion of Burma began in January 1942, just weeks after the attack on Pearl Harbor. The British forces in Burma were woefully unprepared. They lacked jungle training, had no air cover, and their commanders dismissed tanks as useless in the dense terrain. The RAF was outnumbered ten to one. Within months, Rangoon fell, and the British began a desperate retreat.

    The retreat was a humanitarian catastrophe. Thousands of civilians British, Anglo-Indian, and Indian fled on foot over the mountains, carrying what they could. Many died of starvation, disease, or exhaustion. The army itself lost most of its equipment and morale. By the time the survivors reached India, they were a shattered remnant.

    The Birth of the Fourteenth Army

    In 1943, General William Slim took command of the newly formed Fourteenth Army. He faced a daunting task: rebuild a demoralized force, train it for jungle warfare, and do it all with minimal resources. Burma was a secondary theater; the priority was Europe and the Pacific.

    Slim’s solution was revolutionary. He emphasized air supply using transport planes to drop food, ammunition, and medicine to troops deep in the jungle. This freed the army from vulnerable ground supply lines. He also insisted on aggressive patrolling and sent his men to jungle training schools. Morale slowly improved as soldiers gained confidence in their ability to fight in the terrain that had once seemed impenetrable.

    The Fourteenth Army grew into the largest Commonwealth army of the war, peaking at over one million men. The backbone was the Indian Army, which had expanded from 200,000 in 1939 to over 2.5 million by 1945. These were volunteers Hindus, Muslims, Sikhs, and Gurkhas who fought for the British Empire while their homeland was under colonial rule.

    The Battle of the Admin Box: A New Way of Fighting

    In February 1944, the Japanese launched a local offensive in the Arakan region, aiming to cut off Allied supply lines. They surrounded a division at a position called the Admin Box. In previous battles, encirclement meant disaster. But this time, the Allies held their ground.

    Supplied entirely by air, the troops inside the box fought off repeated Japanese attacks. The Japanese, accustomed to surrounding and destroying isolated units, found themselves facing a determined defense that refused to break. After two weeks, the Japanese withdrew, having suffered heavy losses. The Battle of the Admin Box proved that the Allies could defeat the Japanese at their own game—if they had the right tactics and logistics.

    Imphal and Kohima: The Turning Point

    In March 1944, the Japanese launched Operation U-Go, a major offensive aimed at invading India and sparking a rebellion against British rule. Their target was the town of Imphal, the gateway to India. The plan was bold: cross the Chindwin River, cut off the Allied supply lines, and force a decisive battle.

    The Japanese were confident. They had a new ally: Subhas Chandra Bose and the Indian National Army (INA), composed of Indian prisoners of war who had switched sides to fight for Indian independence. For the British Indian Army, this created a moral dilemma—they were fighting their own countrymen who wanted the same thing they did: freedom from colonial rule.

    But the INA was poorly equipped and never fully integrated into Japanese strategy. The Japanese also underestimated the Allied air supply. When they surrounded Imphal and the nearby town of Kohima, they expected the Allies to starve. Instead, the Allies flew in supplies and reinforcements, sustaining a defense that ground the Japanese down.

    The fighting was brutal. At Kohima, the battle raged around the tennis court of the Deputy Commissioner’s bungalow, with the front line shifting back and forth for weeks. By July 1944, the Japanese offensive had collapsed. They retreated in disarray, losing an estimated 50,000 men—many to starvation and disease. The Allies reaped a decisive victory, and the initiative passed permanently to them.

    The Reconquest of Burma

    With the Japanese broken, Slim’s army surged forward. They crossed the Irrawaddy River and fought a series of battles to capture Mandalay in March 1945. The Japanese, cut off from supplies and reinforcements, fell back in chaos. Rangoon was taken in May, just as the monsoon broke.

    The campaign was not without cost. The Japanese lost over 150,000 men, many from disease and starvation during their retreat. Allied casualties were lower—around 30,000 to 40,000—but every death was felt. The Burmese civilian population suffered immensely, caught between two armies and subjected to Allied bombing and Japanese repression.

    The Aftermath: A Complex Legacy

    The Burma Campaign ended in August 1945 with Japan’s surrender. But the war had sown the seeds of change. The Indian soldiers who had fought so bravely returned to a country that was on the brink of independence. The trials of INA officers in Delhi in 1945-46 sparked massive protests, accelerating the end of British rule.

    In Burma, Aung San—who had initially collaborated with the Japanese—switched sides in March 1945 and helped the Allies. He would later negotiate Burma’s independence in 1948. The British return to Burma was brief; they had neither the will nor the resources to re-impose colonial rule.

    The Fourteenth Army was disbanded, its soldiers returning to their homes. For decades, their achievements were overshadowed by other theaters of war. But the campaign was a testament to the courage and resilience of the ordinary soldier—especially the Indian soldier—who fought in a forgotten corner of the world and helped stop the Japanese tide.

    The Burma Campaign was a brutal struggle fought in the shadow of more famous battles. But it was here that the Japanese Army was first broken on land, and it was here that the British Empire demonstrated its ability to adapt and fight back. The story of the Fourteenth Army is not just one of military victory, but of human endurance—of soldiers who overcame disease, terrain, and despair to achieve what seemed impossible. Their legacy lives on in the independent nations of India, Burma, and the Commonwealth, and in the memory of a war that changed the world.

    Summary

    • The Burma Campaign (1942-1945) began with the fall of Rangoon and the longest retreat in British military history.
    • General William Slim rebuilt the defeated army into the Fourteenth Army, using air supply and jungle training to transform its fortunes.
    • The Battles of Imphal and Kohima (1944) were the turning point, breaking the Japanese offensive and forcing a disastrous retreat.
    • The Fourteenth Army was the largest Commonwealth army of the war, with over 1 million men, mostly Indian soldiers.
    • The campaign had far-reaching consequences, including the weakening of British colonial rule in India and Burma.

    FAQ

    Q: Why is the Burma Campaign called the ‘Forgotten Army’?
    A: The Fourteenth Army fought in a secondary theater, with resources going to Europe and the Pacific. Its soldiers felt forgotten by the rest of the world, and later by history.

    Q: What was the Battle of the Admin Box?
    A: It was a February 1944 battle where Allied troops, supplied by air, held a defensive position against Japanese encirclement, proving that the Allies could beat the Japanese at their own tactics.

    Q: Who was Subhas Chandra Bose and what was the Indian National Army?
    A: Bose was an Indian nationalist who led the INA, formed from Indian prisoners of war who switched sides to fight for Indian independence. They fought alongside the Japanese against the British.

    Q: What was the role of the Indian Army in the Burma Campaign?
    A: The Indian Army was the backbone of the Fourteenth Army, providing over a million soldiers who fought bravely in the jungle. Their contributions were crucial to the Allied victory.

    Q: How did the campaign end and what was its impact?
    A: The Allies reconquered Burma in 1945, but the war weakened British colonial power and accelerated the independence of India and Burma. The INA trials sparked protests that led to India’s independence.

  • The Aleutian Islands Campaign: The Forgotten Battle on American Soil

    The Aleutian Islands Campaign: The Forgotten Battle on American Soil

    In the cold, fog-shrouded Aleutian Islands, a battle raged that most Americans have never heard of. It was the only World War II battle fought on North American soil, a campaign of brutal weather and fierce combat that lasted 14 months and claimed thousands of lives. Yet, it remains overshadowed by the simultaneous Battle of Midway, a name that echoes in history while the Aleutians are forgotten.

    This is the story of a forgotten war, where the enemy was as much the weather as the Japanese, where the fog could hide an entire evacuation, and where American soldiers fought and died on their own continent. It is a tale of strategic feints, heroic sacrifices, and the harsh lessons learned in a place described as ‘a place where the wind never stops and the fog never lifts.’

    As we explore the Aleutian Islands Campaign, we uncover a critical chapter of WWII that shaped the Pacific War and taught the U.S. military costly lessons that would prove vital in the island-hopping campaigns to come. This is the battle on American soil that time forgot.

    The Aleutians: A Strategic Afterthought

    When the Japanese attacked Dutch Harbor on June 3, 1942, they struck a remote U.S. naval base in the Aleutian Islands, a volcanic archipelago stretching over 1,000 miles from mainland Alaska. The attack was not a desperate gamble but a calculated feint. Japan’s primary objective was Midway Island, where they hoped to lure the U.S. Pacific Fleet into a decisive battle. The Aleutian assault was designed to draw American carriers north, away from Midway, and to establish a defensive perimeter against potential U.S. bombing raids on Japan via Alaska.

    The Aleutians sit along the Great Circle Route, the shortest air path between North America and Asia, making them strategically valuable. The U.S. feared Japan would use the islands as a staging ground to attack the West Coast or interdict the Alaska-Siberia lend-lease air route. So, when Japanese troops landed unopposed on Kiska and Attu on June 6–7, 1942, the U.S. had no choice but to respond.

    But the attack on Dutch Harbor and the invasions of Attu and Kiska were a diversion. And the Americans, thanks to codebreakers, knew it. They did not divert forces from Midway, and Japan lost four carriers there. The Aleutian campaign, however, was just beginning, and it would become a long, arduous fight in one of the most inhospitable places on Earth.

    The Battle of Attu: Blood and Ice

    The first major confrontation came in May 1943, when U.S. forces landed on Attu. The 7th Infantry Division, trained for desert warfare, was ill-prepared for the Aleutian tundra. They expected a quick victory over a small Japanese garrison, but they faced entrenched defenders in the mountains, and the weather was a relentless adversary.

    From May 11 to May 30, the Battle of Attu raged. The Japanese, led by Colonel Yasuyo Yamasaki, fought from fortified positions. The U.S. troops suffered from frostbite, trench foot, and pneumonia, with more casualties from weather than from enemy fire. The fog prevented air support and naval bombardment, leaving the infantry to fight a brutal, close-quarters battle.

    On May 29, Yamasaki launched a final banzai charge, one of the largest of the war. It broke through U.S. lines before being annihilated. Nearly all of the 2,500 Japanese defenders died, with only 28 captured. The U.S. lost 549 killed and 1,148 wounded, with over 2,100 casualties from weather-related causes. The battle was a sobering preview of the bloody island campaigns to come in the Pacific.

    The Battle of Attu was the only land battle fought on American soil during WWII, and its cost was high. It taught the U.S. military valuable lessons about amphibious assaults, logistics, and the importance of adapting to extreme environments. But the Aleutians were not done with the Americans yet.

    The Ghost of Kiska: Evacuation and Friendly Fire

    Following Attu, the Allies turned their attention to Kiska, the larger Japanese base. For weeks, the U.S. subjected Kiska to relentless bombing, with over 1,200 sorties, making it the most heavily bombed island in the Pacific relative to its size. But the Japanese, under the cover of fog, had secretly evacuated on July 28, 1943, using cruisers and destroyers. The U.S. Navy never detected the evacuation.

    On August 15, 1943, a force of 34,000 U.S. and Canadian troops landed on Kiska, expecting a fierce battle. Instead, they found an empty island. The Japanese had vanished, leaving behind booby traps and abandoned equipment. In the confusion and fog, Allied forces fired on each other, triggering booby traps, and suffering accidents. In the end, 313 Allied casualties were incurred, all from friendly fire, booby traps, and accidents. The Japanese had evacuated without a single combat loss.

    The Kiska landing was a humiliating anti-climax, but it ended the Aleutian campaign. On August 24, 1943, Kiska was declared secure, and the only battle on North American soil was over.

    The Legacy: Lessons Learned and Forgotten

    The Aleutian Islands Campaign is often overshadowed by Midway, but its significance extends beyond its place in history. It was the first major amphibious assault by U.S. forces in the Pacific, providing critical lessons in amphibious warfare, logistics, and the challenges of fighting in extreme environments. The mistakes made at Attu, from inadequate clothing to poor coordination, were addressed in later campaigns.

    Strategically, the campaign secured the northern flank of the Pacific theater, preventing Japan from using the islands as a staging ground for attacks on the West Coast or disruptions of shipping lanes. It also demonstrated the vital role of intelligence, as the U.S. was able to anticipate Japanese moves.

    Yet, the campaign remains forgotten. The veterans of Attu and Kiska returned to a nation that didn’t know they had fought on American soil. The fog that hid the Japanese evacuation also hid the campaign’s memory. Today, the Aleutian Islands are a remote, windswept outpost, but they hold the graves of hundreds of Americans who died to defend their country. It is time to remember them.

    The Aleutian Islands Campaign is a reminder that war is not just about grand battles and famous names. It is about soldiers fighting in freezing fog, on islands few could locate on a map, for reasons that seemed distant and abstract. Yet, their sacrifice was real, and their victory secured the northern frontier of the United States. As we honor the veterans of WWII, let us not forget those who fought in the forgotten battle on American soil. The wind still blows across Attu and Kiska, but the memory of their courage should not be lost to the mist.

    Summary

    • The Aleutian Islands Campaign was the only WWII battle fought on North American soil, lasting from June 1942 to August 1943.
    • Japanese forces bombed Dutch Harbor and occupied Attu and Kiska as a diversion from the Battle of Midway.
    • The Battle of Attu in May 1943 resulted in nearly all 2,500 Japanese defenders killed, with 549 U.S. deaths and thousands of weather-related casualties.
    • The invasion of Kiska in August 1943 found the island abandoned, with 313 Allied casualties from friendly fire and booby traps.
    • The campaign provided crucial lessons in amphibious warfare and secured the northern Pacific flank.

    FAQ

    Q: Why is the Aleutian Islands Campaign often forgotten?
    A: It occurred simultaneously with the Battle of Midway, a turning point in the Pacific War, and the campaign’s remote location and harsh conditions made it difficult to report. Additionally, the Kiska landing’s anti-climactic end (finding the island empty) overshadowed the earlier fighting.

    Q: What was the strategic importance of the Aleutian Islands?
    A: The islands sat along the Great Circle Route, the shortest air path between North America and Asia. They were valuable for staging attacks and defending against potential Japanese strikes on the U.S. West Coast or disruption of shipping lanes.

    Q: How did the weather affect the campaign?
    A: The Aleutians are notorious for dense fog, storms, and freezing temperatures. More U.S. casualties on Attu came from weather-related injuries like frostbite and trench foot than from Japanese fire. Fog also hampered air support and naval bombardment and enabled the Japanese evacuation of Kiska.

    Q: What lessons were learned from the Aleutian campaign?
    A: The campaign was the first major U.S. amphibious assault in the Pacific. It highlighted the need for proper cold-weather gear, better coordination, and the importance of intelligence. These lessons were applied in later island-hopping campaigns.

    Q: Were there any civilians in the Aleutian Islands during the campaign?
    A: Yes, a small U.S. weather station on Attu was captured, and the Japanese took prisoners. Additionally, the U.S. evacuated the native Aleut population from the islands for their safety, but they were relocated to internment camps in Alaska, a tragic episode in itself.

  • The Jeep: How a Simple Vehicle Became the Icon of the Allied War Effort

    The Jeep: How a Simple Vehicle Became the Icon of the Allied War Effort

    In the summer of 1940, as German Panzers rolled through France, the U.S. Army realized it had a mobility problem. Its reconnaissance fleet was a patchwork of motorcycles, sidecars, and modified civilian cars none of which could keep pace with a modern mechanized army. So the Army drafted a spec for a small, rugged, four-wheel-drive vehicle that could go almost anywhere. The result, after a frantic competition among three automakers, was a machine that would become as recognizable as the rifle: the Jeep.

    By the war’s end, American factories had produced over 640,000 of them. They landed on Normandy beaches, crossed the Rhine, clawed through Pacific jungles, and rolled into Berlin. But the Jeep was more than a vehicle it was a symbol of industrial might, a mobile command post, and a lifeline for soldiers who needed to move fast and hit hard.

    The Spec That Started It All

    The Army’s initial request, issued in 1940, was deceptively simple: a lightweight reconnaissance car weighing no more than 1,300 pounds, with a payload of 600 pounds and a wheelbase under 75 inches. But the requirements quickly grew more demanding four-wheel drive, a crew of three, and the ability to be air-dropped. The weight limit was later revised to 2,160 pounds, which still seemed impossibly tight for a vehicle that needed to haul troops, machine guns, and radio gear.

    Three companies answered the call: the American Bantam Car Company, Willys-Overland, and Ford. Bantam, a small Pennsylvania firm, delivered the first working prototype in September 1940 a feat of engineering speed that earned it a place in history. But Bantam lacked the production capacity to build thousands of vehicles. Willys won the main contract, thanks to its more powerful engine: a 60-horsepower L-head four-cylinder nicknamed the “Go-Devil.” Ford, with its enormous factories, built the same vehicle under license. The result was near-identical: the Willys MB and the Ford GPW.

    Between 1941 and 1945, they rolled off assembly lines at a staggering pace—363,000 from Willys, 277,000 from Ford. Bantam, after losing the contract, mostly built trailers. The Jeep, as it was soon called, was standardized, reliable, and cheap. Its flat hood doubled as a map table. Its 80-inch wheelbase let it turn on a dime. And its 4×4 drivetrain could climb a 40-degree slope, ford a stream, or plow through mud that would swallow a truck.

    The Name: A Myth and a Mystery

    Everyone knows the Jeep’s name came from “GP”—General Purpose. But that’s likely a myth. Ford’s “GPW” designation stood for “Government, 80-inch wheelbase, Willys design,” not “General Purpose.” The word “jeep” was already in American slang before the vehicle existed: it appeared in Popeye comic strips in the 1930s and was used by soldiers to describe new recruits or unproven equipment.

    The name stuck to the vehicle after a 1941 Washington Daily News article described a soldier test-driving a prototype and calling it a “jeep.” The Army officially adopted the name in 1942. Whatever its true origin, the name was perfect—short, tough, and impossible to forget.

    Mobility for the Small Unit

    The Jeep’s greatest military contribution wasn’t any single battle. It was the way it transformed small-unit mobility. Before the Jeep, a squad on patrol had to walk or pile into a truck that couldn’t leave the road. The Jeep gave them wings—or at least wheels that could go almost anywhere.

    In North Africa, British Long Range Desert Group patrols mounted machine guns and extra fuel cans on Jeeps to raid Axis airfields hundreds of miles behind the lines. In Burma, Brigadier Orde Wingate’s Chindits used Jeeps to move deep into jungle territory, resupplying by air and striking at Japanese supply lines. On D-Day, Jeeps rolled off landing craft onto Omaha Beach, some fitted with waterproofing kits to wade ashore. In the Battle of the Bulge, Jeeps hauled ammunition, food, and radio equipment to surrounded American units at Bastogne.

    The Jeep was also a weapons platform. A .30-caliber machine gun mounted on the passenger side turned it into a light attack vehicle. Some crews added a .50-caliber for heavier firepower. Others stripped the doors and windshield for better visibility, or welded on armor plate for protection.

    But the Jeep’s versatility went beyond combat. Medics used them as field ambulances, carrying wounded on stretchers across the hood and rear. Officers used them as mobile command posts, with radios bolted to the dash. Engineers used them to pull anti-tank guns and trailers. And when roads were destroyed, the Jeep could be fitted with flanged wheels to run on railroad tracks—a trick that proved invaluable in Italy and France.

    The Logistical Workhorse

    Some historians argue the Jeep’s most important role was logistical. With thousands of vehicles in the field, the Army needed a machine that was easy to maintain and repair. The Jeep was that machine. Its engine was simple, its parts were standardized, and a mechanic with basic tools could fix most problems in the field. This reliability reduced the strain on supply lines and kept units moving.

    The Jeep was also easy to transport. It could be air-dropped by parachute, loaded into gliders, or lashed to the deck of a landing craft. In the Pacific, where islands were small and airstrips scarce, this was critical. A Jeep could be delivered to a unit that had no road at all.

    Lend-Lease shipments spread the Jeep across the globe. The Soviet Union received about 50,000 Jeeps, which they used for everything from reconnaissance to towing artillery. British forces used them in North Africa, Burma, and Europe. Free French, Chinese, and Polish units all received Jeeps. For many soldiers, the Jeep was their first taste of American industrial production—and it was a taste they never forgot.

    A Symbol for the GI

    Beyond its practical utility, the Jeep became a cultural icon. Its open body, flat hood, and rugged simplicity matched the image of the American GI: informal, resourceful, and a little bit irreverent. War correspondents photographed Jeeps everywhere, from the sands of Iwo Jima to the ruins of Berlin. Newsreels showed GIs driving Jeeps through liberated villages, waving to crowds. The Jeep appeared in cartoons, on posters, and in the letters soldiers sent home.

    But the Jeep wasn’t universally loved by the men who drove it. It was noisy, cold, and drafty. Its brakes were weak, and its high center of gravity made it prone to tipping. Soldiers complained about the hard ride and the lack of doors. Many modified their Jeeps with improvised heaters, extra padding, or battle-scarred armor.

    Still, the Jeep’s strengths outweighed its flaws. It started in cold weather, climbed steep hills, and kept running when other vehicles broke down. For the GI, it was a lifeline—a way to get from one place to another without walking, and a way to carry the gear that made survival possible.

    The Postwar Legacy

    When the war ended, thousands of Jeeps were left behind in Europe and Asia. Some were sold to civilians. Others were shipped home with returning soldiers. The Jeep’s rugged design inspired a new generation of civilian 4×4 vehicles: the Willys CJ series, the Land Rover, and the Toyota Land Cruiser all trace their lineage to the wartime Jeep.

    The Jeep also left a mark on popular culture. It starred in TV shows like MASH and The Rat Patrol*, and became a staple of veteran reunions and military museums. Today, the word “Jeep” is a brand, a style, and a symbol—but it all started with a simple spec and a desperate need for mobility.

    The Truth About Bantam

    One of the most persistent myths about the Jeep is that Bantam invented it and was cheated out of the contract. The truth is more complicated. Bantam built the first prototype, but the Army required a company that could produce tens of thousands of vehicles. Bantam, with its small factory in Butler, Pennsylvania, simply couldn’t scale up. Willys and Ford had the capacity and the engineering resources to meet the demand.

    The Army didn’t cheat Bantam—it made a pragmatic choice. But Bantam’s contribution was real. Its engineers, led by Karl Probst, worked around the clock to design the prototype in just 49 days. That prototype set the template for everything that followed. Bantam may have lost the contract, but its name is forever linked to the Jeep’s origin.

    The Jeep in the Pacific and Beyond

    The Jeep proved its worth in every theater, but the Pacific presented unique challenges. Dense jungles, narrow trails, and island terrain demanded a vehicle that could squeeze through tight spaces and handle muddy, rutted tracks. The Jeep did both. Marines used them to haul supplies across beaches, to tow artillery pieces, and to evacuate wounded from forward positions.

    In the Aleutians and the frozen north, Jeeps struggled with extreme cold, but still managed to start and run. In the deserts of North Africa, they outran German patrols and outlasted their supply lines. In the mountains of Italy, they climbed switchbacks that would stall a truck.

    By 1945, the Jeep was everywhere. It was the workhorse of the Allied war effort—not glamorous, but essential. It carried messages, ammunition, food, and wounded men. It pulled guns, hauled trailers, and even served as a mobile field kitchen. The Jeep didn’t win the war alone, but it helped win it in ways that are easy to overlook.

    The Enduring Icon

    The Jeep’s story is a reminder that sometimes the simplest tools are the most important. It wasn’t the fastest, the most comfortable, or the most powerful vehicle of the war. But it was reliable, versatile, and everywhere. It connected the front lines to the rear, the soldier to his supplies, and the Allied armies to each other.

    After the war, the Jeep became a symbol of freedom and adventure. It inspired a global 4×4 industry and a culture of off-road exploration. But for the veterans who drove it, the Jeep was more than a symbol—it was a piece of home, a reliable friend, and a reminder that even in the chaos of war, American industry could build something that worked.

    The Jeep is still with us today, in various forms, on roads and trails around the world. But its greatest legacy is not the vehicles that bear its name. It’s the memory of the soldiers who drove it, the battles it fought, and the simple idea that a lightweight, four-wheel-drive car could change the course of history.

    The Jeep was a simple vehicle that became an icon because it was exactly what the Allies needed at exactly the right moment. It was fast to produce, easy to maintain, and capable of going almost anywhere. More than that, it was a symbol of American ingenuity and industrial might. As the historian Paul Fussell once wrote, the Jeep was “one of the few good things to come out of the war.” It remains a testament to the power of design, the value of simplicity, and the enduring bond between a soldier and his machine.

    Summary

    • The Jeep was developed from a 1940 Army spec for a lightweight, 4×4 reconnaissance car, with prototypes from Bantam, Willys, and Ford.
    • Willys won the main contract due to its powerful “Go-Devil” engine, and Ford built the same vehicle under license, producing over 640,000 units combined.
    • The name “Jeep” likely came from Army slang and a 1941 newspaper article, not from “General Purpose” as commonly believed.
    • The Jeep’s versatility made it essential in every theater: scout car, ambulance, weapons platform, radio car, and even a rail vehicle.
    • Post-war, the Jeep inspired the civilian 4×4 market, including the Land Rover and Toyota Land Cruiser.

    FAQ

    Q: Where did the Jeep’s name come from?
    A: The name likely came from Army slang and a 1941 newspaper article, not from “General Purpose.” The “GP” in Ford’s GPW stood for “Government, 80-inch wheelbase, Willys design.”

    Q: How many Jeeps were produced during World War II?
    A: Over 640,000 units were built between 1941 and 1945—about 363,000 by Willys and 277,000 by Ford.

    Q: Did Bantam invent the Jeep?
    A: Yes, Bantam built the first prototype, but the Army chose Willys and Ford for mass production due to their larger manufacturing capacity.

    Q: What was the Jeep used for in the war?
    A: The Jeep was used as a scout car, ambulance, weapons platform, radio car, command vehicle, artillery tractor, and even a makeshift rail vehicle.

    Q: How did the Jeep affect post-war vehicles?
    A: The Jeep’s design inspired civilian 4×4 vehicles like the Willys CJ series, the Land Rover, and the Toyota Land Cruiser.

  • The Proximity Fuze: The Secret Weapon That Stopped the Kamikazes

    The Proximity Fuze: The Secret Weapon That Stopped the Kamikazes

    The Allies' Billion-dollar Secret: The Proximity Fuze of World War II

    In the spring of 1945, off the coast of Okinawa, a U.S. Navy sailor watched a Japanese Zero dive toward his ship. The anti-aircraft guns opened fire, but the shells weren’t aimed to hit the plane—they were set to explode in the air, filling the sky with shrapnel. Yet this time, something was different. The shells didn’t burst at a pre-set altitude. They waited until the plane was close, then detonated with deadly precision, shredding the Zero before it could release its payload or crash into the deck.

    That difference was the proximity fuze, a tiny radar inside each shell that made it ‘smart’ for the first time in history. Developed in utmost secrecy, it was arguably as important as the atomic bomb in ending World War II and it was the key to stopping the kamikaze onslaught that threatened to turn the tide in the Pacific.

    The Problem: A Shell That Couldn’t Hit a Plane

    By 1940, aircraft had become faster and more maneuverable than ever. Anti-aircraft guns fired shells that exploded either on impact or after a preset time, calculated by a gunner who had to guess the aircraft’s speed, altitude, and direction. Against a diving Zero or a high-flying bomber, that guess was often wrong. A shell that exploded too early produced a harmless puff of smoke; too late, and it fell into the sea. The U.S. Navy calculated that it took about 2,500 rounds of standard 5-inch ammunition to down a single aircraft. That was an unacceptable ratio when Japanese planes were intentionally crashing into American ships.

    The solution required a fundamental change: a fuze that could sense the target and detonate at the optimal moment. That meant putting a radar transmitter and receiver inside a shell small enough to fit in a 5-inch gun, rugged enough to survive the 20,000g shock of being fired, and cheap enough to produce by the millions.

    The Innovation: A Radar in Every Shell

    The idea was proposed by British scientists, who shared their cavity magnetron—a device that generated high-frequency radio waves with the United States in 1940 as part of the Tizard Mission. This breakthrough made it possible to miniaturize radar. The U.S. Navy’s National Defense Research Committee, under the leadership of Dr. Merle Tuve at Johns Hopkins University’s Applied Physics Laboratory, took on the challenge.

    The result was the VT fuze, short for ‘variable time.’ Each fuze contained a tiny radio transmitter that sent out a signal. When the shell approached a target, the signal bounced back, and the fuze detonated the shell within 20 to 70 feet of the aircraft close enough for the shrapnel to be lethal. The first successful test was in January 1942, and by 1943, factories were mass-producing them.

    The Secret Weapon: Guarding the Secret

    The proximity fuze was one of the most closely guarded secrets of World War II. The U.S. military was terrified that if an unexploded shell fell into enemy hands, the Germans or Japanese would reverse-engineer the technology. So, the fuze was used only over water where the shells would sink into the ocean and only against aircraft. Its use over land was forbidden until the Battle of the Bulge in December 1944, when the U.S. Army, desperate against a surprise German offensive, got permission to use VT-fuzed artillery. The results were devastating: shells that exploded in the air above German infantry in the open caused horrific casualties and helped break the offensive.

    The secrecy extended even to allies. The British had helped develop the technology, but the U.S. initially restricted sharing details, a source of tension. Only after the fuze’s success was undeniable did the U.S. relax the restrictions.

    The Kamikaze Crisis: A Turning Point at Okinawa

    The kamikaze campaign began in earnest in October 1944, during the Battle of Leyte Gulf. By the time the U.S. invaded Okinawa in April 1945, the Japanese were launching mass waves of suicide planes. The attacks were devastating: in the first weeks, kamikazes sank or damaged dozens of ships, killing thousands of sailors. The U.S. Navy was facing a crisis that threatened the entire invasion.

    The proximity fuze was the answer. When VT-fuzed shells were used in the anti-aircraft guns, the kill probability per round increased by four to five times. The Navy’s radar-directed fire control, combined with VT fuzes, meant that a shell didn’t have to hit the plane it just had to get close. Japanese pilots reported that American shells seemed to ‘explode in their faces’ with uncanny accuracy, a psychological blow as much as a physical one. By the end of Okinawa, the VT fuze had helped the Navy shoot down thousands of kamikaze planes, turning the tide.

    The Industrial Miracle: A Billion-Dollar Investment

    Developing the fuze was only half the battle. Producing it in the quantities needed was another. The program cost roughly $1 billion in 1940s dollars comparable to the Manhattan Project. By 1945, U.S. factories, including those run by Sylvania and Raytheon, were producing over 1 million fuzes per month. Each one contained fragile vacuum tubes that had to survive the shock of being fired. It was a triumph of industrial engineering, turning a complex electronic device into a cheap, reliable component.

    The Legacy: From War to Peace

    After the war, the proximity fuze’s technology found peacetime uses. It was adapted for weather radar, air traffic control, and modern artillery. But its greatest impact was on the battlefield. Some historians, like Ralph Baldwin, argue that it was the second most important secret weapon of World War II, after the atomic bomb. While the bomb ended the war, the proximity fuze saved countless American lives and helped secure victory in the Pacific.

    The proximity fuze was a weapon of genius, born of scientific collaboration and industrial might. It didn’t just improve anti-aircraft fire it transformed it, turning a desperate defense into a lethal shield. In the dark days of the kamikaze campaign, it was the difference between defeat and victory. And yet, it remains one of the least-known secrets of the war, a silent hero that saved thousands of lives and helped end the conflict.

    Summary

    • The proximity fuze (VT fuze) used a miniature radar to detonate shells near targets, making anti-aircraft fire 4-5 times more effective.
    • Developed in secret by the U.S. Navy and NDRC, it cost ~$1 billion and was produced at a rate of 1 million per month by 1945.
    • It played a crucial role against kamikazes at Okinawa, where it helped shoot down thousands of planes.
    • Its use was restricted to over-water operations to keep it secret, until the Battle of the Bulge.
    • Post-war, the technology was adapted for weather radar and air traffic control.

    FAQ

    Q: What is a proximity fuze?
    A: A proximity fuze, or VT fuze, is a radar-based detonator that explodes a shell when it comes within 20-70 feet of its target, rather than on impact or after a preset time.

    Q: How did the proximity fuze work?
    A: Each fuze contained a tiny radio transmitter and receiver. The transmitter sent out a signal; when it bounced back off a target, the fuze triggered the explosion.

    Q: Why was it so secret?
    A: The U.S. feared that if an unexploded shell fell into enemy hands, they could reverse-engineer the technology. So it was only used over water until late in the war.

    Q: How effective was it against kamikazes?
    A: VT-fuzed shells increased kill probability by 4-5 times compared to time fuzes, and were a primary defense at Okinawa, helping to defeat the kamikaze campaign.

    Q: What was the post-war impact?
    A: The technology was adapted for weather radar, air traffic control, and modern artillery, leaving a lasting legacy beyond the battlefield.

  • The T-34 Tank: How Soviet Engineering Outmatched the German Panzer

    The T-34 Tank: How Soviet Engineering Outmatched the German Panzer

    In the summer of 1941, German panzer crews advancing through the Ukrainian steppes encountered a sight that unsettled even the most battle-hardened veterans. A squat, green tank, its armor angled like a diamond, shrugged off shells that should have killed it and kept coming. This was the T-34, a machine that would redefine armored warfare and help turn the tide on the Eastern Front.

    The T-34 was not the most powerful tank of World War II, nor the most heavily armored. But it was the right tank at the right time a synthesis of mobility, protection, and firepower that could be produced in staggering numbers. Against the technically impressive but often over-engineered German panzers, the T-34’s simplicity and ruggedness proved decisive.

    The Shock of 1941

    When Germany launched Operation Barbarossa in June 1941, its intelligence estimated the Soviet Union had about 10,000 tanks. In reality, the Red Army possessed over 23,000, including roughly 1,000 T-34s and KV-1 heavy tanks. These new Soviet tanks were a revelation. The T-34’s 45mm of sloped armor, angled at 60 degrees, provided the equivalent of 90mm of vertical protection enough to resist the standard German anti-tank guns of the time. German infantry anti-tank rounds bounced off, earning the T-34 the nickname “the invincible tank” among bewildered soldiers.

    The T-34’s 76.2mm gun could penetrate the armor of any German tank in 1941, including the Panzer III and IV. Its wide tracks and powerful diesel engine allowed it to traverse mud and snow that bogged down German vehicles. The psychological impact was immediate. German officers reported “T-34 shock” (T-34-Schreck), a term that captured the demoralizing effect of encountering a tank that seemed to outclass their own.

    Yet the T-34 was far from perfect. Early models lacked radios, forcing crews to communicate with flags. The two-man turret meant the commander had to load the gun, a serious tactical disadvantage. Poor optics made target acquisition difficult. These weaknesses, combined with poorly trained crews and disastrous Soviet tactics, resulted in horrific losses. In 1941, the Red Army lost thousands of tanks, often to mechanical breakdown or fuel shortage as much as to enemy fire.

    The Design That Changed the War

    The T-34’s design was the work of Mikhail Koshkin, an engineer at the Kharkiv Locomotive Factory. Koshkin and his team combined several innovative ideas into a single, coherent package. The Christie suspension, licensed from American designer J. Walter Christie, gave the T-34 outstanding cross-country mobility. The sloped armor, though not new, was applied more effectively than in any previous tank. The V-2 diesel engine, a 12-cylinder powerplant producing 500 horsepower, offered a range of 400 kilometers on roads double that of most German tanks—and was less likely to catch fire than gasoline engines.

    Perhaps most importantly, the T-34 was designed for mass production. Its hull was cast and welded from simple, flat armor plates. The engine was robust and easy to maintain. When German forces threatened Kharkiv in late 1941, entire factories were dismantled and moved east of the Ural Mountains. Workers in Chelyabinsk, Nizhny Tagil, and Omsk resumed production within months, often working in unheated buildings in subzero temperatures. This logistical miracle meant that Soviet factories could churn out T-34s faster than the Germans could destroy them.

    In 1942, Soviet industry produced approximately 24,000 T-34s. German tank production for all types that year was about 9,300. This disparity was the core of the T-34’s strategic impact. The Wehrmacht could win battles, but it could not survive a war of attrition. The T-34 was cheap, reliable, and available in numbers that overwhelmed German defenses.

    The T-34 vs. the Panzer

    German tanks were, in many ways, superior on a one-on-one basis. The Panzer III and IV were well-armed and well-protected for their time, and by 1943, the introduction of the Tiger I and Panther raised the bar further. The Tiger’s 88mm gun could destroy a T-34 at ranges beyond 2,000 meters, while its 100mm frontal armor was nearly impenetrable to the T-34’s 76mm gun. The Panther, with its long 75mm cannon and sloped armor, was arguably the best tank of the war in terms of firepower and protection.

    But these tanks were expensive and complex. The Tiger weighed 57 tons, consumed vast amounts of fuel, and required extensive maintenance. Production of the Tiger never exceeded 1,347 units total. The Panther, though more numerous at about 6,000 units, suffered from mechanical breakdowns and engine fires. German tanks were also built to a high standard, which meant they took longer to produce and were harder to repair in the field.

    The T-34, by contrast, was a study in pragmatism. It was less comfortable, less accurate, and less survivable in a direct duel. But it was available. When a German tank was knocked out, it stayed knocked out. When a T-34 was destroyed, another was often already rolling off the production line. Soviet losses in 1941–42 were staggering—some estimates put the ratio at 4:1 or worse but the Red Army could absorb those losses. The Wehrmacht could not.

    The T-34/85: Restoring the Balance

    By 1943, the appearance of the Tiger and Panther rendered the T-34’s 76mm gun obsolete. The Soviet response was the T-34/85, which mounted an 85mm gun derived from an anti-aircraft weapon. The new turret, larger and with a three-man crew, allowed the commander to focus on commanding rather than loading. The 85mm gun could penetrate the Tiger’s frontal armor at combat ranges, though the Tiger retained an advantage at long distances.

    The T-34/85 entered production in late 1943 and quickly became the standard Soviet tank. It retained the same hull and engine as its predecessor, so production lines were not disrupted. By 1945, it was the most numerous tank in the Red Army, and it continued to serve in Soviet and allied armies for decades after the war.

    The T-34’s influence extended far beyond World War II. Its design principles—sloped armor, diesel engine, Christie suspension—were adopted by post-war Soviet tanks like the T-54/55, which became the most-produced tank in history. Western designers also took note; the British Centurion and the German Leopard 1 incorporated lessons learned from the T-34’s success.

    The Human Cost

    Behind the statistics of production and loss are the men who crewed these machines. Soviet tank crews were often rushed through training, sometimes in just a few weeks. In the chaotic early years, many went into battle with little more than a basic understanding of their vehicle. The lack of radios meant that coordinated attacks were nearly impossible. The two-man turret of the T-34/76 forced the commander to double as loader, slowing the rate of fire and distracting him from observing the battlefield.

    Despite these handicaps, skilled crews achieved remarkable results. Dmitry Lavrinenko, the top Soviet tank ace, destroyed 58 German tanks in a T-34 before his death in 1941. Aleksandr Burda, another ace, used the T-34’s mobility to outmaneuver and destroy enemy armor. These men proved that in the right hands, the T-34 could match any tank in the world.

    But the cost was immense. Soviet tank crews suffered casualties that dwarfed those of their German counterparts, especially in the first two years of the war. The T-34’s armor, while effective against early German guns, was vulnerable to the Tiger’s 88mm and the Panther’s long 75mm. Crews had little protection if the tank caught fire; the ammunition stowage was poorly protected, and the diesel fuel, while less flammable than gasoline, could still ignite.

    The Verdict

    Was the T-34 truly superior to the German panzer? The answer depends on the measure. In a duel between individual vehicles, a Tiger or Panther would usually win. But war is not fought by individual vehicles; it is fought by armies, economies, and industrial capacities. The T-34 was designed not to win every engagement but to win the war. It was simple enough to be built by thousands of semi-skilled workers, reliable enough to operate in the brutal conditions of the Eastern Front, and cheap enough to be mass-produced. That combination proved decisive.

    The T-34’s legacy is not one of technological brilliance but of pragmatic engineering. It was a tank that could be built in the snow, driven by a farmer turned soldier, and repaired with basic tools. It was a tank that, in the hands of a determined crew, could outfight and outlast the finest panzers Germany could produce. And it was a tank that, in the end, helped win the largest land war in history.

    The T-34 was not the most sophisticated tank of World War II, but it was the most effective. Its design philosophy—simplicity, reliability, and mass production—outmatched the German approach of building smaller numbers of highly advanced machines. The T-34’s story is a reminder that in war, victory often goes not to the most brilliant weapon, but to the one that can be produced in the greatest numbers and used by ordinary soldiers to achieve extraordinary results.

    Summary

    • The T-34 combined sloped armor, a diesel engine, and Christie suspension into a design that was both mobile and well-protected for its era.
    • German intelligence underestimated Soviet tank numbers by more than half, leading to the “T-34 shock” in 1941.
    • Soviet factories produced about 24,000 T-34s in 1942 alone, while German tank production was only about 9,300 units.
    • The T-34/85, introduced in 1943, restored parity against the Tiger and Panther with its 85mm gun.
    • The T-34’s legacy influenced post-war tank design worldwide, including the T-54/55 and Western tanks like the Leopard 1.

    FAQ

    Q: Was the T-34 better than the German Tiger and Panther tanks?
    A: In a one-on-one duel, the Tiger or Panther usually had the advantage in firepower and armor. However, the T-34 was produced in much larger numbers, was more reliable, and was easier to maintain, which gave the Soviet Union a strategic advantage that outweighed individual tank superiority.

    Q: How many T-34 tanks were built?
    A: Over 84,000 T-34s were produced in all variants from 1940 to 1958, making it the second-most-produced tank in history after the T-54/55.

    Q: What made the T-34’s armor so effective?
    A: The T-34’s 45mm armor was sloped at a 60-degree angle, which increased its effective thickness to about 90mm. This slope also caused incoming shells to deflect, especially when combined with the tank’s speed and maneuverability.

    Q: Why did Soviet tank crews suffer such high casualties?
    A: Early T-34s lacked radios, had poor optics, and used a two-man turret, which made coordination and situational awareness difficult. Additionally, many crews were rushed through training, and the tank’s ammunition storage was not well protected, leading to catastrophic fires when hit.

    Q: What was the “T-34 shock”?
    A: “T-34 shock” (T-34-Schreck) was a term used by German forces to describe the psychological impact of encountering the T-34 in 1941. German anti-tank guns and tank guns often failed to penetrate its armor, while the T-34’s gun could destroy German tanks with ease, demoralizing crews and commanders.