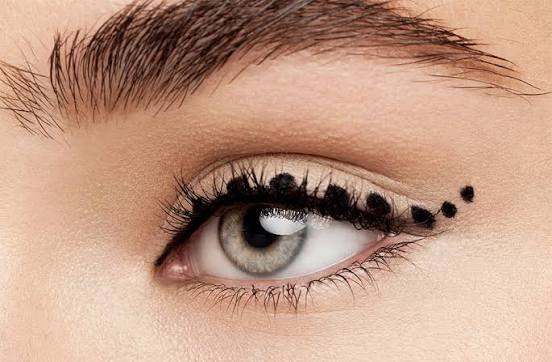
Winged eyeliner, also known as a cat eye or flick, is a timeless makeup technique that can instantly elevate your look. From ancient Egypt to modern red carpets, this style has endured because it elongates the eyes, adds symmetry, and creates a polished finish. Whether you’re aiming for a subtle daily flick or a dramatic evening wing, mastering this skill is a game-changer.
But let’s be honest: achieving the perfect wing can be tricky. Many beginners struggle with symmetry, angle, and shaky hands. The good news? With the right tools, a few simple steps, and a bit of practice, anyone can learn to apply winged eyeliner like a pro. This guide breaks down the process into easy-to-follow steps, addresses common mistakes, and offers tips for different eye shapes.
What You’ll Need
Before you start, gather the right tools. The type of eyeliner you choose can make a big difference:
- Liquid eyeliner (pen or pot with brush) – ideal for precise, sharp wings.
- Gel eyeliner (with an angled brush) – offers great control and a smooth finish.
- Cream eyeliner – similar to gel, often in a pot.
- Pencil eyeliner – less precise but good for a smudged, soft wing.
For beginners, a felt-tip liquid liner pen is often the easiest to handle. It gives you a fine tip and doesn’t require dipping or loading.
Step-by-Step Tutorial
Step 1: Prep Your Eyelids
Start with a clean, dry eyelid. If you use eyeshadow, apply it first. A primer can help the liner glide on smoothly and last longer. For oily lids, a bit of translucent powder can prevent smudging.
Step 2: Draw the Lash Line
Using your chosen liner, draw a thin line along your upper lash line, starting from the inner corner and working outward. Keep it as close to the lashes as possible. This line will be the base of your wing.
Step 3: Mark the Wing Tip
Now, look straight into a mirror. Imagine a line extending from the outer corner of your eye toward the end of your eyebrow. This is the angle for your wing. Place the liner tip at the outer corner and draw a small dot or short line upward along that imaginary line. This marks where your wing will end.
Step 4: Connect the Wing
From the wing tip, draw a line back down to the lash line, creating a triangle shape. The bottom edge of the triangle should follow the natural curve of your lower lash line. This connection is what creates the wing.
Step 5: Fill In the Triangle
Carefully fill in the triangle with your liner. Use small strokes to avoid overloading the brush. If you make a mistake, don’t panic – you can clean it up with a cotton swab dipped in makeup remover.
Step 6: Refine and Perfect
Once the liner is dry (usually 30–60 seconds), check both eyes. Use a cotton swab or a bit of concealer on a flat brush to sharpen the edges and even out any asymmetry. Remember, perfect symmetry isn’t necessary – aim for visual balance.
Common Mistakes to Avoid
- Drawing the wing first: Many beginners draw the wing before the lash line, resulting in a disconnected look. Always start with the lash line, then add the wing.
- Using too much product: Overloading the brush leads to smudging and uneven lines. Build up thin layers instead.
- Expecting perfect symmetry: Faces are naturally asymmetrical. Slight differences are normal and often unnoticeable. Focus on balance, not identical wings.
- Ignoring your eye shape: The same wing doesn’t work for everyone. Adjust the angle and thickness based on your eye shape (see below).
Tips for Different Eye Shapes
- Hooded eyes: Draw the wing with your eye open to avoid it being hidden in the crease. A ‘bat wing’ technique – drawing the wing slightly above the crease – can help.
- Monolids: A thicker, straighter wing works well. The flick may need to be more horizontal to be visible.
- Round eyes: A longer, sharper wing can elongate the eye.
- Downturned eyes: Angle the wing upward more aggressively to lift the eye.
- Close-set eyes: Keep the wing shorter and focus the line on the outer half of the eye.
- Deep-set eyes: Keep the line thin to avoid overwhelming the socket.
Tools and Techniques for Easier Application
If you struggle with hand steadiness or symmetry, try these aids:
- Tape method: Place a small piece of tape (or a business card) from the outer corner of your eye toward your brow. Use it as a stencil for a crisp edge.
- Dot method: Mark the wing tip with a dot first, then connect it to the lash line.
- Wing stamps: Pre-shaped wing stamps are available for those who want a quick, symmetrical result.
For people with tremors or arthritis, adaptive tools like stabilizing grips or winged eyeliner guides can make application easier. And remember, a slightly imperfect wing is perfectly acceptable – beauty is not about perfection.
Safety and Hygiene
- Don’t share eyeliner: Sharing can spread infections.
- Check expiration dates: Expired products can harbor bacteria.
- Avoid the waterline: Applying liner to the waterline can clog meibomian glands and cause irritation.
- Choose ophthalmologist-tested products: If you have sensitive eyes, look for hypoallergenic formulas.
Removal
At the end of the day, remove your winged eyeliner gently. Oil-based makeup removers or micellar water work best, especially for waterproof formulas. Soak a cotton pad and hold it over your closed eye for a few seconds to dissolve the liner, then wipe away without rubbing.
Winged eyeliner is a versatile skill that can transform your makeup routine. With practice, you’ll find the technique that works best for your eye shape and style. Start simple, be patient with yourself, and soon you’ll be creating beautiful wings with confidence.
Summary
- Start with the lash line: Draw a thin line along the upper lash line before adding the wing.
- Mark the wing tip: Use the natural angle toward the end of your eyebrow as a guide.
- Connect and fill: Create a triangle by connecting the wing tip to the lash line, then fill it in.
- Adjust for eye shape: Tailor the wing’s angle and thickness to your eye shape (hooded, round, etc.).
- Practice makes perfect: Use tools like tape or stamps if needed, and don’t aim for perfect symmetry – balance is key.
FAQ
Q: How do I make my winged eyeliner symmetrical?
A: Perfect symmetry is not necessary – faces are naturally asymmetrical. Aim for visual balance by checking both eyes in the mirror and making small adjustments with a cotton swab or concealer.
Q: What’s the best eyeliner for beginners?
A: A felt-tip liquid liner pen is often easiest for beginners because it provides a fine tip and doesn’t require dipping. Gel liner with an angled brush is also a good option for control.
Q: Can I use tape to get a sharp wing?
A: Yes! Place a small piece of tape from the outer corner of your eye toward your brow, then draw along the edge for a crisp line. Remove the tape gently after applying.
Q: How do I apply winged eyeliner on hooded eyes?
A: Draw the wing with your eye open to see where it will land. You may need to use a ‘bat wing’ technique – drawing the wing slightly above the crease – so it’s visible when your eyes are open.
Q: How do I remove waterproof winged eyeliner?
A: Use an oil-based makeup remover or micellar water. Soak a cotton pad and hold it over your closed eye for a few seconds to dissolve the liner, then wipe away gently.
Leave a Reply