Tag: beauty

  • How AI Search Is Changing the Way We Find Beauty Products

    How AI Search Is Changing the Way We Find Beauty Products

    Finding the right foundation or skincare product online has always been a gamble. You can’t test the texture, see the exact shade on your skin, or know if it will irritate your sensitive complexion. Traditional search engines only understand keywords, so typing ‘best moisturizer’ gives you generic results, not something tailored to your oily, acne-prone skin.

    AI search in beauty is changing that. Instead of scrolling through endless product pages, you can now upload a selfie to get a skin analysis, snap a photo of a celebrity to find a dupe for their lipstick, or type a conversational query like ‘something for dry skin with SPF 30 under $30.’ This technology is growing fast, with the global AI in beauty market valued at $3–4 billion in 2023 and projected to grow 20–25% annually through 2030. Here’s how it works, why it matters, and what it means for shoppers and brands alike.

    The Problem: Beauty Search Is Broken

    Beauty is a tricky category to shop for online. Unlike buying a book or a pair of jeans, you can’t easily know if a product will work for you. Shade names are inconsistent—what one brand calls ‘Sand’ another calls ‘Beige.’ Ingredients have multiple names, and skin concerns vary wildly from person to person.

    This leads to high return rates—estimated at 20–30% for cosmetics—and a lot of abandoned carts. Shoppers face ‘analysis paralysis’ with thousands of options and no clear way to narrow them down. Traditional search engines fail because they match keywords, not meaning. A query like ‘best foundation for oily skin’ returns generic lists, not personalized recommendations.

    How AI Solves It: Visual, Conversational, and Personalized Search

    AI search uses computer vision, natural language processing, and recommendation algorithms to understand what you actually need. Here are the main applications:

    Visual Search: Find Products by Photo

    You can upload a photo of a product, a celebrity, or even your own face. For example, point your camera at a friend’s lipstick and the AI identifies the brand and shade, or finds a dupe. Google Lens and Amazon’s app both offer this. It’s like having a beauty expert who never sleeps and has seen every product ever made.

    Skin Analysis: Know Your Skin, Get Better Recommendations

    Take a selfie and AI scans your face for concerns like acne, pigmentation, wrinkles, and hydration. L’Oréal’s ModiFace and Perfect Corp’s YouCam are leaders here. The AI assesses your skin’s condition and recommends products that address your specific issues. This goes beyond a generic quiz—it’s a personalized assessment based on visual data.

    Conversational Search: Talk to a Virtual Assistant

    Instead of typing keywords, you can chat with an AI assistant. Amazon’s Rufus is an example—it answers questions like ‘What’s a good sunscreen for sensitive skin?’ or ‘Show me a hydrating serum with hyaluronic acid under $50.’ The AI understands natural language and can handle complex, multi-part queries.

    Personalized Recommendations: Beyond Basic Filters

    AI can combine your visual data, purchase history, and stated preferences to recommend products. Sephora’s Color IQ matches foundation shades precisely, and Ulta’s GLAMLab lets you try on makeup virtually. These tools use AI to cut through the noise and present a curated selection just for you.

    The Growth of Long-Tail Searches

    Search volume for AI beauty is growing, but it’s the long-tail queries that are exploding. Head terms like ‘best foundation’ have high volume but low specificity—everyone searches them, but they don’t lead to conversions. Long-tail terms like ‘dupe for Charlotte Tilbury Pillow Talk for fair neutral skin’ are lower volume individually, but collectively they make up the majority of searches. And they convert much better because the searcher knows exactly what they want.

    AI search is perfect for long-tail queries. It can parse them and return precise results. It can even generate new long-tail queries—for example, you might ask ‘show me products for combination skin with niacinamide and no fragrance,’ and the AI will understand and find matches. This is something traditional search can’t do well.

    Why Brands Are Investing Heavily

    Beauty brands have massive datasets—customer photos, purchase history, reviews—that fuel AI training. This gives them a moat. L’Oréal acquired ModiFace in 2018 to get AR try-on and skin diagnostics. Perfect Corp partners with Estée Lauder and Shiseido. Procter & Gamble uses AI for skin analysis. Sephora and Ulta have their own AI tools.

    The payoff is real: brands report 2–3x higher conversion rates with visual search compared to standard search. Lower return rates mean better margins. And AI generates rich customer data that helps with cross-selling and personalized marketing.

    Consumer Concerns: Privacy and Bias

    Not everything is rosy. Uploading face photos raises privacy concerns. Users worry about how their images are stored and used. There’s also the risk of biased recommendations—if the training data skews toward certain skin tones, the AI might not work well for others. Trust is higher for shade matching than for medical advice, so AI should not replace dermatologists.

    The Future: More Conversational, More Integrated

    As generative AI improves, expect more conversational search. You’ll be able to have a back-and-forth with an AI that remembers your preferences and adjusts recommendations in real time. AR will become more integrated—Apple’s Vision Pro is already exploring beauty demos. And as AI gets better, it will handle even more complex queries, making beauty shopping feel more like having a personal shopper in your pocket.

    AI search in beauty is transforming a frustrating shopping experience into a personalized, efficient one. For consumers, it means less guessing and more confidence. For brands, it’s a competitive advantage that drives sales. As the technology matures, the line between searching and shopping will blur—and the beauty industry will never look the same.

    Summary

    • AI search uses visual recognition, natural language processing, and recommendation algorithms to help shoppers find beauty products.
    • Applications include visual search (photo-based), skin analysis (selfie scans), conversational search (chatbots), and personalized recommendations.
    • The AI in beauty market was worth $3–4 billion in 2023 and is growing at 20–25% annually.
    • Long-tail queries (specific, detailed searches) are growing faster than head terms and are where AI excels.
    • Brands like L’Oréal, Sephora, and Amazon are investing heavily, with conversion rates up to 2–3x higher with visual search.

    FAQ

    Q: Is AI search in beauty accurate?
    A: For shade matching and skin analysis, yes, it’s quite accurate—many tools are trained on diverse datasets. However, it’s not a substitute for professional dermatological advice, and accuracy can vary by skin tone.

    Q: Do I have to upload a selfie to use AI beauty search?
    A: Not always. Some tools work with product photos or text queries. But features like skin analysis or virtual try-on require a selfie, which raises privacy considerations.

    Q: Are AI beauty recommendations biased?
    A: There’s a risk if training data isn’t diverse. Some companies are working to improve inclusivity, but it’s an ongoing challenge. Always test products yourself when possible.

    Q: How do I know if a brand uses AI search?
    A: Look for features like ‘virtual try-on,’ ‘skin analysis,’ ‘shade finder,’ or a chat assistant on their website or app. These are typically powered by AI.

    Q: Will AI replace beauty advisors?
    A: It complements them. AI handles routine queries and data analysis, but human advisors are still valuable for nuanced advice and building trust.
  • How to Apply Winged Eyeliner: A Step-by-Step Guide for Beginners

    How to Apply Winged Eyeliner: A Step-by-Step Guide for Beginners

    Winged eyeliner, also known as a cat eye or flick, is a timeless makeup technique that can instantly elevate your look. From ancient Egypt to modern red carpets, this style has endured because it elongates the eyes, adds symmetry, and creates a polished finish. Whether you’re aiming for a subtle daily flick or a dramatic evening wing, mastering this skill is a game-changer.

    But let’s be honest: achieving the perfect wing can be tricky. Many beginners struggle with symmetry, angle, and shaky hands. The good news? With the right tools, a few simple steps, and a bit of practice, anyone can learn to apply winged eyeliner like a pro. This guide breaks down the process into easy-to-follow steps, addresses common mistakes, and offers tips for different eye shapes.

    What You’ll Need

    Before you start, gather the right tools. The type of eyeliner you choose can make a big difference:

    • Liquid eyeliner (pen or pot with brush) – ideal for precise, sharp wings.
    • Gel eyeliner (with an angled brush) – offers great control and a smooth finish.
    • Cream eyeliner – similar to gel, often in a pot.
    • Pencil eyeliner – less precise but good for a smudged, soft wing.

    For beginners, a felt-tip liquid liner pen is often the easiest to handle. It gives you a fine tip and doesn’t require dipping or loading.

    Step-by-Step Tutorial

    Step 1: Prep Your Eyelids

    Start with a clean, dry eyelid. If you use eyeshadow, apply it first. A primer can help the liner glide on smoothly and last longer. For oily lids, a bit of translucent powder can prevent smudging.

    Step 2: Draw the Lash Line

    Using your chosen liner, draw a thin line along your upper lash line, starting from the inner corner and working outward. Keep it as close to the lashes as possible. This line will be the base of your wing.

    Step 3: Mark the Wing Tip

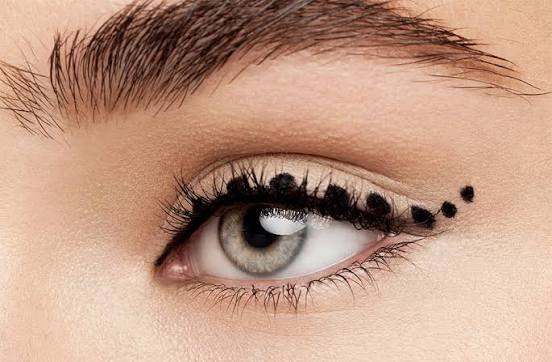
    Now, look straight into a mirror. Imagine a line extending from the outer corner of your eye toward the end of your eyebrow. This is the angle for your wing. Place the liner tip at the outer corner and draw a small dot or short line upward along that imaginary line. This marks where your wing will end.

    Step 4: Connect the Wing

    From the wing tip, draw a line back down to the lash line, creating a triangle shape. The bottom edge of the triangle should follow the natural curve of your lower lash line. This connection is what creates the wing.

    Step 5: Fill In the Triangle

    Carefully fill in the triangle with your liner. Use small strokes to avoid overloading the brush. If you make a mistake, don’t panic – you can clean it up with a cotton swab dipped in makeup remover.

    Step 6: Refine and Perfect

    Once the liner is dry (usually 30–60 seconds), check both eyes. Use a cotton swab or a bit of concealer on a flat brush to sharpen the edges and even out any asymmetry. Remember, perfect symmetry isn’t necessary – aim for visual balance.

    Common Mistakes to Avoid

    • Drawing the wing first: Many beginners draw the wing before the lash line, resulting in a disconnected look. Always start with the lash line, then add the wing.
    • Using too much product: Overloading the brush leads to smudging and uneven lines. Build up thin layers instead.
    • Expecting perfect symmetry: Faces are naturally asymmetrical. Slight differences are normal and often unnoticeable. Focus on balance, not identical wings.
    • Ignoring your eye shape: The same wing doesn’t work for everyone. Adjust the angle and thickness based on your eye shape (see below).

    Tips for Different Eye Shapes

    • Hooded eyes: Draw the wing with your eye open to avoid it being hidden in the crease. A ‘bat wing’ technique – drawing the wing slightly above the crease – can help.
    • Monolids: A thicker, straighter wing works well. The flick may need to be more horizontal to be visible.
    • Round eyes: A longer, sharper wing can elongate the eye.
    • Downturned eyes: Angle the wing upward more aggressively to lift the eye.
    • Close-set eyes: Keep the wing shorter and focus the line on the outer half of the eye.
    • Deep-set eyes: Keep the line thin to avoid overwhelming the socket.

    Tools and Techniques for Easier Application

    If you struggle with hand steadiness or symmetry, try these aids:

    • Tape method: Place a small piece of tape (or a business card) from the outer corner of your eye toward your brow. Use it as a stencil for a crisp edge.
    • Dot method: Mark the wing tip with a dot first, then connect it to the lash line.
    • Wing stamps: Pre-shaped wing stamps are available for those who want a quick, symmetrical result.

    For people with tremors or arthritis, adaptive tools like stabilizing grips or winged eyeliner guides can make application easier. And remember, a slightly imperfect wing is perfectly acceptable – beauty is not about perfection.

    Safety and Hygiene

    • Don’t share eyeliner: Sharing can spread infections.
    • Check expiration dates: Expired products can harbor bacteria.
    • Avoid the waterline: Applying liner to the waterline can clog meibomian glands and cause irritation.
    • Choose ophthalmologist-tested products: If you have sensitive eyes, look for hypoallergenic formulas.

    Removal

    At the end of the day, remove your winged eyeliner gently. Oil-based makeup removers or micellar water work best, especially for waterproof formulas. Soak a cotton pad and hold it over your closed eye for a few seconds to dissolve the liner, then wipe away without rubbing.

    Winged eyeliner is a versatile skill that can transform your makeup routine. With practice, you’ll find the technique that works best for your eye shape and style. Start simple, be patient with yourself, and soon you’ll be creating beautiful wings with confidence.

    Summary

    • Start with the lash line: Draw a thin line along the upper lash line before adding the wing.
    • Mark the wing tip: Use the natural angle toward the end of your eyebrow as a guide.
    • Connect and fill: Create a triangle by connecting the wing tip to the lash line, then fill it in.
    • Adjust for eye shape: Tailor the wing’s angle and thickness to your eye shape (hooded, round, etc.).
    • Practice makes perfect: Use tools like tape or stamps if needed, and don’t aim for perfect symmetry – balance is key.

    FAQ

    Q: How do I make my winged eyeliner symmetrical?
    A: Perfect symmetry is not necessary – faces are naturally asymmetrical. Aim for visual balance by checking both eyes in the mirror and making small adjustments with a cotton swab or concealer.

    Q: What’s the best eyeliner for beginners?
    A: A felt-tip liquid liner pen is often easiest for beginners because it provides a fine tip and doesn’t require dipping. Gel liner with an angled brush is also a good option for control.

    Q: Can I use tape to get a sharp wing?
    A: Yes! Place a small piece of tape from the outer corner of your eye toward your brow, then draw along the edge for a crisp line. Remove the tape gently after applying.

    Q: How do I apply winged eyeliner on hooded eyes?
    A: Draw the wing with your eye open to see where it will land. You may need to use a ‘bat wing’ technique – drawing the wing slightly above the crease – so it’s visible when your eyes are open.

    Q: How do I remove waterproof winged eyeliner?
    A: Use an oil-based makeup remover or micellar water. Soak a cotton pad and hold it over your closed eye for a few seconds to dissolve the liner, then wipe away gently.