Tag: tutorial

  • Canva for Beginners: A Step-by-Step Guide to Your First Design

    A beginner's guide to using Canva

    Have you ever stared at a blank page, wanting to create a beautiful flyer, social media post, or presentation, but felt overwhelmed by complex design software? You’re not alone. For years, graphic design was a skill reserved for professionals with expensive tools and years of training. But in 2012, a small startup in Sydney, Australia, set out to change that. Canva was born with a simple mission: make design accessible to everyone.

    Today, Canva is used by over 170 million people every month, from teachers and small business owners to students and social media influencers. Its drag-and-drop interface, thousands of templates, and generous free plan have made it the go-to tool for anyone who needs to create visual content without a design degree. In this guide, we’ll walk you through everything you need to know to create your first design, from setting up your account to downloading your finished masterpiece.

    Getting Started: Creating Your Canva Account

    The first step is to create a free account. Go to canva.com and click the “Sign up” button. You can sign up with your email address, Google account, or Facebook account. Choose whichever is most convenient for you. Once you’ve signed up, you’ll be taken to the Canva home screen.

    Navigating the Canva Dashboard

    The dashboard is your command center. On the left side, you’ll see a sidebar with options like “Home,” “Templates,” “Projects,” and “Brand.” In the center, you’ll see a search bar and a grid of design types. This is where you can start a new design or browse templates.

    Take a moment to explore. Click on “Templates” to see the vast library of pre-designed layouts. You can search for specific types like “Instagram Post,” “Resume,” or “Birthday Invitation.” Don’t worry about making a mess—you can’t break anything. Just click around to get comfortable.

    Choosing Your First Template

    Templates are the fastest way to create a professional-looking design. For this tutorial, let’s create a simple social media post. Click on “Social Media” in the design types, then choose “Instagram Post.” You’ll see a grid of templates. Pick one that catches your eye—maybe a quote graphic or a promotional post. Click on it, and it will open in the editor.

    The Canva Editor: A Quick Tour

    The editor is where the magic happens. Here’s a breakdown of the main areas:

    • Left Panel: This has tabs for Templates, Photos, Elements, Text, and more. You can search for specific items or browse categories.
    • Canvas: The main area in the center where your design appears. You can click on any element to select it.
    • Top Toolbar: This has buttons for undo/redo, file, resize, and download. When you select an element, the toolbar changes to show formatting options.
    • Right Panel: When you select an element, this panel shows properties like color, font, and transparency.

    Editing Text: Making It Yours

    Click on the text in your template. You’ll see a text box appear with handles. You can drag it to move it, or use the corner handles to resize. In the right panel, you can change the font, size, color, and alignment. Double-click the text to edit the actual words. Type in your own message, like “Welcome to My Page!” or “Sale This Weekend!”

    Changing Colors and Fonts

    To change the color of a text or shape, click on it, then in the right panel, click the color box. You can choose from the preset colors or use the custom color picker. For fonts, click the font dropdown and scroll through the hundreds of options. Canva suggests font pairings that look good together, so you can click “Pairings” to see recommendations.

    Adding Images and Elements

    To add an image, go to the left panel and click “Photos.” You can search for free stock photos or upload your own by clicking “Uploads.” Drag a photo onto your canvas. You can resize and reposition it. To add shapes, icons, or illustrations, click “Elements” and search for what you need. For example, search “stars” to add some decorative stars.

    Using the Position and Arrange Tools

    If you have multiple elements overlapping, you can control which one is on top. Click on an element, then in the top toolbar, click “Position.” You’ll see options like “Bring forward” and “Send backward.” This is useful when you want text to appear in front of a shape, or an image behind text.

    Downloading Your Design

    Once you’re happy with your design, it’s time to download it. Click the “Share” button in the top right, then select “Download.” You’ll see a menu with file types. For most purposes, PNG is a good choice because it’s high quality and supports transparent backgrounds. JPG is smaller but doesn’t support transparency. PDF is great for printing. Choose PNG, select the size (we recommend the default), and click “Download.”

    Saving and Organizing Your Projects

    Your design is automatically saved to your Canva account as you work. You can find it later by clicking “Projects” in the sidebar. You can create folders to organize your designs. For example, create a folder called “Social Media” and move your design there.

    Next Steps: Explore and Experiment

    Now that you’ve created your first design, the possibilities are endless. Try making a presentation, a flyer, or a YouTube thumbnail. Experiment with different templates and tools. Canva also offers free tutorials and courses through Canva Design School if you want to learn more.

    Remember, the key to getting better is practice. Don’t be afraid to make mistakes—you can always undo. And with Canva’s intuitive interface, you’ll be designing like a pro in no time.

    Canva has truly democratized design, putting powerful tools in the hands of anyone with an idea. By following this step-by-step guide, you’ve learned the basics: creating an account, navigating the dashboard, using templates, editing text and images, and downloading your work. Now it’s time to unleash your creativity. Whether you’re designing for business, school, or fun, Canva is your canvas—go paint something amazing.

    Summary

    • Canva is a free, cloud-based design tool with over 170 million users.
    • Start by creating an account and exploring the dashboard.
    • Use templates to quickly create professional designs.
    • Edit text, colors, images, and elements with the drag-and-drop editor.
    • Download your design as PNG, JPG, or PDF, and organize projects in folders.

    FAQ

    Q: Is Canva really free?
    A: Yes, Canva has a free plan that includes thousands of templates, 5GB of storage, and basic design tools. There are no watermarks on free designs. Pro features like brand kits and background remover require a paid subscription.

    Q: Can I use Canva on my phone?
    A: Absolutely. Canva has apps for iOS and Android, so you can design on the go. Your projects sync across devices.

    Q: What file formats can I download from Canva?
    A: You can download as PNG, JPG, PDF, SVG (Pro), GIF, MP4, and PPTX (Pro). PNG is best for images with transparent backgrounds.

    Q: How do I remove the background from an image?
    A: The background remover is a Pro feature. If you’re on the free plan, you can use the “BG Remover” app in Canva, but it’s limited. Alternatively, you can use a free online tool and then upload the image.

    Q: Can I use Canva for commercial purposes?
    A: Yes, you can use Canva designs for commercial use, even on the free plan. However, some elements and templates may have restrictions, so check the license for each item. Canva provides a content license that allows most uses.
  • How to Apply Winged Eyeliner: A Step-by-Step Guide for Beginners

    Beauty Basics: How to Do Winged Eyeliner | Beautylish

    Winged eyeliner, also known as a cat eye or flick, is a timeless makeup technique that can instantly elevate your look. From ancient Egypt to modern red carpets, this style has endured because it elongates the eyes, adds symmetry, and creates a polished finish. Whether you’re aiming for a subtle daily flick or a dramatic evening wing, mastering this skill is a game-changer.

    But let’s be honest: achieving the perfect wing can be tricky. Many beginners struggle with symmetry, angle, and shaky hands. The good news? With the right tools, a few simple steps, and a bit of practice, anyone can learn to apply winged eyeliner like a pro. This guide breaks down the process into easy-to-follow steps, addresses common mistakes, and offers tips for different eye shapes.

    What You’ll Need

    Before you start, gather the right tools. The type of eyeliner you choose can make a big difference:

    • Liquid eyeliner (pen or pot with brush) – ideal for precise, sharp wings.
    • Gel eyeliner (with an angled brush) – offers great control and a smooth finish.
    • Cream eyeliner – similar to gel, often in a pot.
    • Pencil eyeliner – less precise but good for a smudged, soft wing.

    For beginners, a felt-tip liquid liner pen is often the easiest to handle. It gives you a fine tip and doesn’t require dipping or loading.

    Step-by-Step Tutorial

    Step 1: Prep Your Eyelids

    Start with a clean, dry eyelid. If you use eyeshadow, apply it first. A primer can help the liner glide on smoothly and last longer. For oily lids, a bit of translucent powder can prevent smudging.

    Step 2: Draw the Lash Line

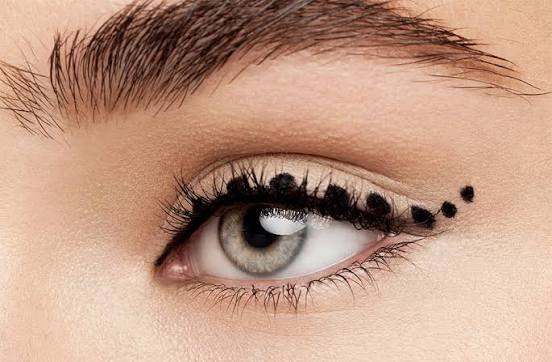
    Using your chosen liner, draw a thin line along your upper lash line, starting from the inner corner and working outward. Keep it as close to the lashes as possible. This line will be the base of your wing.

    Step 3: Mark the Wing Tip

    Now, look straight into a mirror. Imagine a line extending from the outer corner of your eye toward the end of your eyebrow. This is the angle for your wing. Place the liner tip at the outer corner and draw a small dot or short line upward along that imaginary line. This marks where your wing will end.

    Step 4: Connect the Wing

    From the wing tip, draw a line back down to the lash line, creating a triangle shape. The bottom edge of the triangle should follow the natural curve of your lower lash line. This connection is what creates the wing.

    Step 5: Fill In the Triangle

    Carefully fill in the triangle with your liner. Use small strokes to avoid overloading the brush. If you make a mistake, don’t panic – you can clean it up with a cotton swab dipped in makeup remover.

    Step 6: Refine and Perfect

    Once the liner is dry (usually 30–60 seconds), check both eyes. Use a cotton swab or a bit of concealer on a flat brush to sharpen the edges and even out any asymmetry. Remember, perfect symmetry isn’t necessary – aim for visual balance.

    Common Mistakes to Avoid

    • Drawing the wing first: Many beginners draw the wing before the lash line, resulting in a disconnected look. Always start with the lash line, then add the wing.
    • Using too much product: Overloading the brush leads to smudging and uneven lines. Build up thin layers instead.
    • Expecting perfect symmetry: Faces are naturally asymmetrical. Slight differences are normal and often unnoticeable. Focus on balance, not identical wings.
    • Ignoring your eye shape: The same wing doesn’t work for everyone. Adjust the angle and thickness based on your eye shape (see below).

    Tips for Different Eye Shapes

    • Hooded eyes: Draw the wing with your eye open to avoid it being hidden in the crease. A ‘bat wing’ technique – drawing the wing slightly above the crease – can help.
    • Monolids: A thicker, straighter wing works well. The flick may need to be more horizontal to be visible.
    • Round eyes: A longer, sharper wing can elongate the eye.
    • Downturned eyes: Angle the wing upward more aggressively to lift the eye.
    • Close-set eyes: Keep the wing shorter and focus the line on the outer half of the eye.
    • Deep-set eyes: Keep the line thin to avoid overwhelming the socket.

    Tools and Techniques for Easier Application

    If you struggle with hand steadiness or symmetry, try these aids:

    • Tape method: Place a small piece of tape (or a business card) from the outer corner of your eye toward your brow. Use it as a stencil for a crisp edge.
    • Dot method: Mark the wing tip with a dot first, then connect it to the lash line.
    • Wing stamps: Pre-shaped wing stamps are available for those who want a quick, symmetrical result.

    For people with tremors or arthritis, adaptive tools like stabilizing grips or winged eyeliner guides can make application easier. And remember, a slightly imperfect wing is perfectly acceptable – beauty is not about perfection.

    Safety and Hygiene

    • Don’t share eyeliner: Sharing can spread infections.
    • Check expiration dates: Expired products can harbor bacteria.
    • Avoid the waterline: Applying liner to the waterline can clog meibomian glands and cause irritation.
    • Choose ophthalmologist-tested products: If you have sensitive eyes, look for hypoallergenic formulas.

    Removal

    At the end of the day, remove your winged eyeliner gently. Oil-based makeup removers or micellar water work best, especially for waterproof formulas. Soak a cotton pad and hold it over your closed eye for a few seconds to dissolve the liner, then wipe away without rubbing.

    Winged eyeliner is a versatile skill that can transform your makeup routine. With practice, you’ll find the technique that works best for your eye shape and style. Start simple, be patient with yourself, and soon you’ll be creating beautiful wings with confidence.

    Summary

    • Start with the lash line: Draw a thin line along the upper lash line before adding the wing.
    • Mark the wing tip: Use the natural angle toward the end of your eyebrow as a guide.
    • Connect and fill: Create a triangle by connecting the wing tip to the lash line, then fill it in.
    • Adjust for eye shape: Tailor the wing’s angle and thickness to your eye shape (hooded, round, etc.).
    • Practice makes perfect: Use tools like tape or stamps if needed, and don’t aim for perfect symmetry – balance is key.

    FAQ

    Q: How do I make my winged eyeliner symmetrical?
    A: Perfect symmetry is not necessary – faces are naturally asymmetrical. Aim for visual balance by checking both eyes in the mirror and making small adjustments with a cotton swab or concealer.

    Q: What’s the best eyeliner for beginners?
    A: A felt-tip liquid liner pen is often easiest for beginners because it provides a fine tip and doesn’t require dipping. Gel liner with an angled brush is also a good option for control.

    Q: Can I use tape to get a sharp wing?
    A: Yes! Place a small piece of tape from the outer corner of your eye toward your brow, then draw along the edge for a crisp line. Remove the tape gently after applying.

    Q: How do I apply winged eyeliner on hooded eyes?
    A: Draw the wing with your eye open to see where it will land. You may need to use a ‘bat wing’ technique – drawing the wing slightly above the crease – so it’s visible when your eyes are open.

    Q: How do I remove waterproof winged eyeliner?
    A: Use an oil-based makeup remover or micellar water. Soak a cotton pad and hold it over your closed eye for a few seconds to dissolve the liner, then wipe away gently.

  • How to Remove a Background in Photoshop: 3 Easy Methods for Beginners

    How To Remove a Background In Photoshop [For Beginners!]

    Removing a background is one of the most common tasks in Photoshop, whether you’re preparing product photos for an online store, creating social media graphics, or just cleaning up a portrait. It’s a skill that every designer, photographer, and content creator needs to master. Fortunately, modern Photoshop makes this easier than ever, thanks to AI-powered tools that can do the heavy lifting in a single click.

    In this tutorial, we’ll walk you through three straightforward methods for removing backgrounds: the one-click Select Subject, the Remove Background button, and the more hands-on Quick Selection Tool. You’ll learn the pros and cons of each, so you can choose the right approach for your specific image. We’ll also cover best practices like using layer masks and saving with transparency, so your results look clean and professional.

    Method 1: Select Subject (One-Click AI)

    Select Subject is Photoshop’s AI-powered tool that automatically detects the main subject in your image and creates a selection around it. It’s perfect for images with a clear subject against a simple background.

    How to Use It:

    1. Open your image in Photoshop.
    2. Click on the Select menu at the top and choose Subject. Alternatively, you can use the keyboard shortcut Ctrl+Alt+S (Windows) or Cmd+Option+S (Mac).
    3. Photoshop will analyze the image and create a selection (shown as marching ants) around the subject.
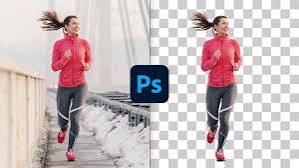
    4. With the selection active, click on the Add Layer Mask icon at the bottom of the Layers panel. This will hide the background, leaving your subject on a transparent background.

    When to Use It:

    • Best for: Images with a clear subject and a relatively simple background, such as a person standing against a plain wall.
    • Pros: Fast, requires no manual work, and is non-destructive (the original image is preserved).
    • Cons: It may struggle with complex edges like hair or fur, or when the subject blends into the background.

    Pro Tip:

    After using Select Subject, zoom in to check the edges. If you see any rough spots, you can refine them using the Select and Mask workspace (right-click the selection and choose Select and Mask). This lets you smooth, feather, or shift the edge for a more natural look.

    Method 2: Remove Background (One-Click Button)

    Photoshop also has a dedicated Remove Background button that does exactly what it says—it removes the background in one click. This tool is available in the Properties panel when you have a layer selected.

    How to Use It:

    1. Open your image and select the layer you want to edit.
    2. Go to the Properties panel (if it’s not visible, go to Window > Properties).
    3. Click the Remove Background button. Photoshop will automatically create a layer mask that hides the background.
    4. You can then refine the mask manually if needed.

    When to Use It:

    • Best for: Quick edits when you need a fast result, especially for simple images.
    • Pros: Super fast, one-click, and non-destructive (it creates a mask, not a permanent deletion).
    • Cons: Like Select Subject, it may not handle complex edges perfectly. It also gives you less control compared to manual methods.

    Pro Tip:

    After clicking Remove Background, you can still edit the mask. Use the Brush Tool with black or white to paint over areas you want to hide or reveal. This is a great way to clean up any mistakes.

    Method 3: Quick Selection Tool (Manual Control)

    For images where the AI tools struggle, the Quick Selection Tool gives you manual control. It works by painting over the areas you want to select, and Photoshop automatically expands the selection to similar pixels.

    How to Use It:

    1. Select the Quick Selection Tool from the toolbar (or press W).
    2. In the options bar at the top, choose a brush size. Start with a medium size and adjust as needed.
    3. Paint over the subject. You’ll see a selection (marching ants) appear. The tool will automatically snap to edges.
    4. If you accidentally select too much, hold Alt (Windows) or Option (Mac) and paint over the area to subtract it from the selection.
    5. Once you’re happy with the selection, click Add Layer Mask to hide the background.

    When to Use It:

    • Best for: Images with complex edges, such as hair, fur, or objects with lots of detail.
    • Pros: You have full control, and you can refine the selection as much as you want.
    • Cons: It takes more time and practice, especially for tricky edges.

    Pro Tip:

    After making your selection, go to Select > Select and Mask to fine-tune the edges. Use the Refine Edge brush to paint over hair or fur for a more natural cutout.

    Why Use Layer Masks Instead of Deleting?

    When you remove a background, you might be tempted to just delete the background pixels. But that’s a destructive edit—once you delete, you can’t get the background back without undoing multiple steps. Instead, use a layer mask. A mask is like a stencil that hides parts of the layer without actually removing them. This means you can always go back and edit the mask later, making it the professional standard.

    Saving Your Image with Transparency

    After removing the background, you’ll want to save your image in a format that supports transparency. PNG is the most common choice for web graphics, while PSD preserves all your layers for future editing. JPEG does not support transparency, so if you save as JPEG, the background will appear white or black.

    To save as PNG:

    1. Go to File > Export > Export As.
    2. Choose PNG from the format dropdown.
    3. Make sure the Transparency checkbox is checked.
    4. Click Export.

    Common Mistakes to Avoid

    • Not zooming in: Always zoom in to 200-400% to check the edges for halos or stray pixels.
    • Using JPEG for transparent backgrounds: Remember, JPEG doesn’t support transparency. Use PNG.
    • Forgetting to refine edges: AI tools are great, but they’re not perfect. Take the time to refine edges, especially around hair.
    • Deleting pixels instead of using masks: Masks are non-destructive and give you more flexibility.

    Removing backgrounds in Photoshop doesn’t have to be intimidating. With the AI-powered tools like Select Subject and Remove Background, you can get great results in seconds. For more complex images, the Quick Selection Tool gives you the control you need. Remember to always use layer masks for non-destructive editing, and save your final image as a PNG to preserve transparency. With a little practice, you’ll be a background-removal pro in no time.

    Summary

    • Select Subject is a one-click AI tool that works best for simple backgrounds.
    • Remove Background is a one-click button in the Properties panel that creates a mask instantly.
    • Quick Selection Tool offers manual control for complex edges like hair.
    • Always use layer masks to keep your edits non-destructive.
    • Save as PNG to preserve transparency; JPEG does not support it.

    FAQ

    Q: Can I use these methods in older versions of Photoshop?
    A: Select Subject was introduced in Photoshop CC 2018, and Remove Background in CC 2021. If you have an older version, you can use the Quick Selection Tool or the Magic Wand instead.

    Q: What’s the difference between Select Subject and Remove Background?
    A: Select Subject creates a selection that you can refine or mask. Remove Background directly creates a layer mask. Both are AI-powered, but Remove Background is more automated.

    Q: How do I fix rough edges after using an AI tool?
    A: Use the Select and Mask workspace. You can smooth, feather, or use the Refine Edge brush to improve the selection.

    Q: Can I use Photoshop to remove backgrounds from images with transparent objects?
    A: Yes, but it’s tricky. You may need to use manual tools and refine the edges carefully. The AI tools might not handle transparency well.

    Q: Is there a free alternative to Photoshop for background removal?
    A: Yes, there are online tools like Remove.bg and Canva, but they offer less control. Photoshop gives you the highest quality results, especially for complex images.