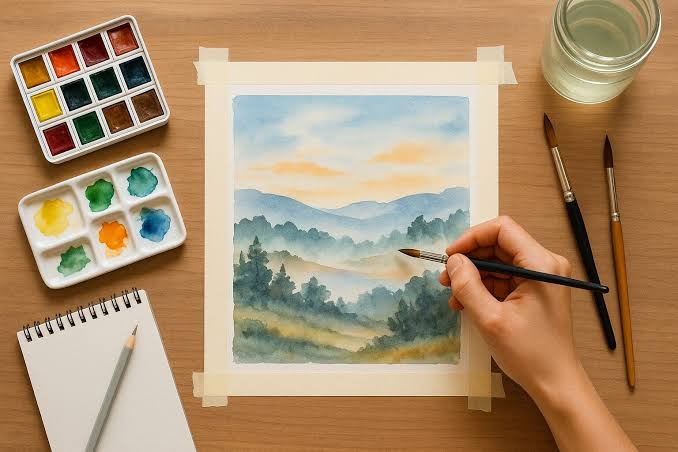
Watercolor painting has a reputation for being both magical and intimidating. The way pigments bloom across damp paper can feel like alchemy, but the fear of making a mess often stops beginners before they even start. The truth is, watercolor is one of the most forgiving and accessible mediums you can try—you just need to know a few basics.
This guide will walk you through the essential materials, core techniques, and common pitfalls, so you can pick up a brush with confidence. Whether you’re looking for a relaxing hobby, a way to document your travels, or a foundation for more advanced art, watercolor offers a world of creative possibility.
What Makes Watercolor Unique?
Unlike acrylics or oils, watercolor relies on the white of the paper to create luminosity. The paint is transparent, so light bounces off the paper and through the pigment, giving your work a glow that’s hard to replicate with other media. This transparency is both the beauty and the challenge: you build color through layers, not by piling on thick paint.
Watercolor also has a mind of its own. Pigments can granulate, settling into the paper’s texture to create subtle speckles, or they can flow and blend in unpredictable ways. Learning to work with these behaviors—rather than against them—is part of the joy.
Your Starter Kit: What You Really Need
You don’t need to splurge on professional supplies to begin. Here’s a budget-friendly setup that will take you far:
- Paints: Start with a basic set of 12 colors in tubes or pans. Student-grade brands like Cotman or Van Gogh are perfect for learning. You can always upgrade to professional-grade (like Winsor & Newton or Daniel Smith) later when you know your preferences.
- Brushes: One good round brush in a medium size (like a #8 or #10) can handle most tasks. Add a flat brush for washes and a liner for details as you grow. Synthetic brushes are affordable and work well.
- Paper: This is non-negotiable—use actual watercolor paper. A 140 lb (300 gsm) cold-pressed paper is the most versatile for beginners. It handles both wet and dry techniques without buckling. Avoid printer paper; it will warp and bleed.
- Extras: A palette for mixing, two water containers (one for rinsing, one for clean water), paper towels, and a spray bottle for rewetting paint.
Core Techniques to Practice
Wet-on-Wet
This technique involves applying paint to wet paper. The result is soft, diffused edges—perfect for skies, backgrounds, and gentle transitions. To try it, wet your paper with a clean brush, then drop in color and watch it spread. It’s a beautiful, slightly unpredictable process.
Wet-on-Dry
Here, you apply paint to dry paper for crisp, controlled edges. This is your go-to for details, sharp shapes, and building up layers. It’s also more forgiving if you need to take your time.
Washes
A flat wash is an even layer of color, great for filling large areas. A graded wash fades from dark to light, ideal for skies or water. Practice both by loading your brush with pigment and sweeping it across the paper in even strokes.
Dry Brush
Use a nearly dry brush with minimal paint to create scratchy, textured effects—think tree bark or rough grass. It adds character and variety.
Lifting
One of watercolor’s superpowers is that you can lift paint off the paper while it’s still damp. Use a damp brush or a tissue to dab away color, creating highlights or correcting mistakes.
Glazing
This is the secret to rich, luminous color. By layering thin, transparent washes on top of each other (letting each dry first), you build depth and complexity. It’s like stacking colored glass.
Common Pitfalls (and How to Avoid Them)
- Muddy colors: Overmixing on your palette leads to dull, muddy hues. Limit yourself to 2–3 colors per mix, and let the layers do the work.
- Overusing black: Black can kill the vibrancy of your painting. Instead, mix dark tones from complementary colors, like ultramarine and burnt sienna.
- Using the wrong paper: As mentioned, regular paper won’t hold up. Invest in watercolor paper—it makes a world of difference.
- Thinking you must be fast: Wet-on-wet requires speed, but wet-on-dry lets you work slowly and deliberately. Both are valid; practice both paces.
- Neglecting brush care: Rinse your brushes thoroughly, reshape them, and store them flat or upright. A well-cared-for brush lasts years.
A Simple First Project: A Leaf
Start with something forgiving, like a single leaf. Sketch a simple outline, then:
- Wet the leaf shape with clean water.
- Drop in a mix of yellow and green, letting the colors blend naturally.
- While it’s still damp, add a touch of blue at the base for shadow.
- Let it dry, then add a few veins with a dry brush and darker green.
This exercise teaches you wet-on-wet, wet-on-dry, and layering—all in one go.
The Mindset Shift
Watercolor is not about perfection. It’s about embracing the flow, learning from accidents, and enjoying the process. Many beginners get frustrated when their painting doesn’t match their vision, but remember: every brushstroke is practice. Keep a sketchbook, try small studies, and don’t be afraid to make “ugly” paintings. They’re stepping stones.
As you gain confidence, you can explore more advanced techniques, try different papers, and develop your own style. The journey is as rewarding as the destination.
Watercolor is a medium that rewards patience, curiosity, and a willingness to let go of control. With a few basic supplies and a playful attitude, you can create beautiful, luminous paintings—and have fun along the way. So grab a brush, wet your paper, and see where the water takes you.
Summary
- Start simple: A basic set of 12 colors, one round brush, and 140 lb cold-pressed paper is enough to begin.
- Master key techniques: Wet-on-wet, wet-on-dry, washes, and glazing form the foundation.
- Avoid common mistakes: Don’t overmix colors, skip black paint, and always use watercolor paper.
- Embrace imperfection: Watercolor is forgiving—you can lift paint and incorporate accidents.
- Practice regularly: Small studies and a sketchbook help you improve faster than trying to create a masterpiece every time.
FAQ
Q: Do I need expensive paints to start?
A: No. Student-grade paints like Cotman or Van Gogh are perfect for learning. They have lower pigment concentration but are still high quality. Upgrade later if you want more vibrancy.
Q: Can I use any paper for watercolor?
A: No. Regular paper will buckle and bleed. Use watercolor paper—140 lb (300 gsm) cold-pressed is a great all-purpose choice.
Q: How do I fix mistakes in watercolor?
A: You can lift wet paint with a damp brush or tissue. For dried paint, you can rewet and scrub gently. Masking fluid can protect areas you want to keep white.
Q: Why do my colors look muddy?
A: Mud usually comes from overmixing or using too many colors. Stick to 2–3 colors per mix and let layers build color instead of trying to mix everything at once.
Q: Is watercolor hard to learn?
A: It’s easy to start but takes practice to master. The key is learning water control and embracing the medium’s unpredictability. Start with simple subjects and be patient with yourself.