Tag: organization

  • 6 Clever Storage Hacks for Small Apartments That Actually Work

    6 Clever Storage Hacks for Small Apartments That Actually Work

    Living in a small apartment often means making peace with limited closets, no pantry, and a serious lack of cabinet space. The average American home spans about 1,500 square feet, but many studios and one-bedrooms squeeze into half that—or less. The result? Constant clutter, and the nagging feeling that your space is shrinking around you.

    But the fix isn’t always buying more furniture or launching a renovation. With a few clever storage hacks, you can turn dead zones into functional storage, make your walls work harder, and create a home that feels twice as big. These six strategies are renter-friendly, budget-conscious, and designed to maximize every inch without sacrificing style.

    1. Go Vertical: Shelving Above Doorways and Floor-to-Ceiling Units

    When floor space is scarce, the walls are your best friend. Install floating shelves above doorways, windows, or along the top of a wall to store items you don’t need daily—like extra linens, seasonal decor, or book collections. A floor-to-ceiling bookcase or shelving unit can double your storage capacity by using the full height of the room.

    Renter tip: If you can’t drill into walls, use freestanding ladder shelves that lean against the wall—they require no mounting and add a stylish, modern touch.

    2. Under-Bed Storage: The Ultimate Dead Zone

    The space under your bed is prime real estate, often overlooked. Invest in rolling bins, vacuum-sealed bags for off-season clothes, or a platform bed with built-in drawers. If your bed lacks clearance, bed risers can lift it a few inches—just enough to slide in storage containers.

    Watch out: Bed risers can make the bed too high for some people, especially children or older adults. Always test the height before committing. And remember: under-bed storage is only useful if you can easily access and remember what’s stored there.

    3. Over-the-Door Organizers: Not Just for Shoes

    Over-the-door organizers are versatile and inexpensive. Hang one on a closet door for shoes, but also consider them for cleaning supplies, pantry items, or toiletries. They work great on bathroom doors, pantry doors, and even bedroom doors.

    Proceed with caution: Not all doors are compatible. Thick doors, sliding doors, or doors with handles may not fit. Check weight limits—overloading can damage the door or the organizer. And test adhesive hooks in an inconspicuous spot first, as they can peel paint in humid or older buildings.

    4. Multi-Functional Furniture: Double Duty in Every Piece

    In a small apartment, every piece of furniture should serve at least two purposes. An ottoman with hidden storage can hold blankets or toys. A coffee table with a lift-top provides a workspace and a place to eat. A sofa bed or futon offers a guest sleeping spot without a dedicated guest room.

    Quality matters: Some convertible pieces are flimsy or uncomfortable. Test any sofa bed for sitting comfort before buying—it will be your primary couch, after all. Look for sturdy mechanisms and quality materials.

    5. Magnetic Strips and Pegboards: Wall-Mounted Magic

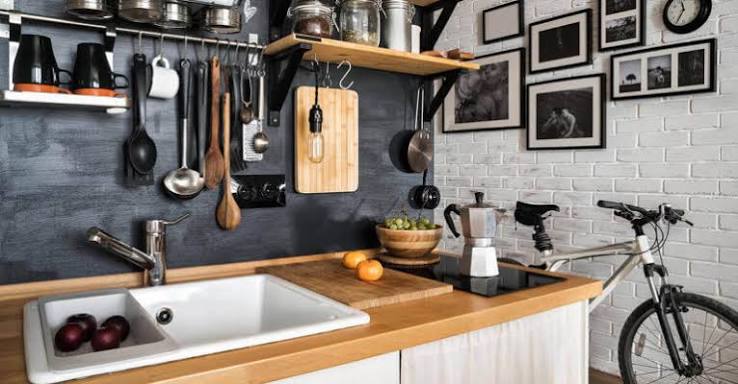
    Magnetic strips are perfect for storing metal items that often clutter counters: kitchen knives, spice tins, tools, or makeup brushes. Mount one on a wall or inside a cabinet to free up drawer space. Pegboards are equally versatile—install one in the kitchen for utensils, in the office for supplies, or in a craft area for tools. They’re highly customizable and easy to adapt as your needs change.

    Design tip: Choose a pegboard in a bold color or wood finish to make it a decorative feature, not just functional storage.

    6. Tension Rods and Corner Shelves: Use Every Nook and Cranny

    Tension rods aren’t just for shower curtains. Install one inside a cabinet to create an extra shelf for plates or pans. Use them under the sink to hang spray bottles, or in a closet to add a second rod for shorter items. Corner shelves and lazy Susans make use of awkward corner spaces in kitchens, bathrooms, or living rooms, turning wasted areas into functional storage.

    Pro tip: For a low-cost DIY, repurpose a shower caddy as a kitchen organizer, or use a wine rack to store rolled towels in the bathroom.

    The best storage hack isn’t just about buying more organizers—it’s about using what you already have and thinking vertically. By decluttering first, then applying these clever tricks, you can transform your small apartment into a spacious, stress-free sanctuary. Which hack will you try first?

    Summary

    • Maximize vertical space with floor-to-ceiling shelving and wall-mounted storage above doorways.
    • Use under-bed storage with rolling bins, vacuum-sealed bags, or platform beds with drawers.
    • Over-the-door organizers work for shoes, cleaning supplies, and pantry items—check fit and weight limits.
    • Invest in multi-functional furniture like storage ottomans, lift-top coffee tables, and sofa beds.
    • Mount magnetic strips and pegboards to declutter counters and keep tools within reach.
    • Add tension rods and corner shelves to utilize every nook, from inside cabinets to under sinks.

    FAQ

    Q: Are storage hacks worth it if I rent?
    A: Absolutely. Most hacks are renter-friendly—they use tension rods, adhesive hooks, or freestanding units that don’t require drilling. Always test adhesives in an inconspicuous spot and choose damage-free options.

    Q: What’s the best storage hack for a tiny kitchen?
    A: Use a pegboard for utensils and pots, install a tension rod under the sink to hang spray bottles, and add a lazy Susan in corner cabinets. Over-the-door organizers on the pantry door can hold spices and canned goods.

    Q: How can I store clothes without a closet?
    A: Use a freestanding clothing rack (or a wardrobe) plus under-bed storage for off-season items. Over-the-door hooks can hold belts, scarves, and accessories. Consider a platform bed with built-in drawers for extra clothing storage.

    Q: Do storage hacks actually reduce clutter?
    A: Only if you declutter first. Storage hacks help organize what you own, but they aren’t a substitute for editing your possessions. Start by sorting and donating items you no longer use.

    Q: What’s the most underrated storage hack?
    A: Tension rods in unexpected places—inside cabinets to create shelves, under sinks to hang bottles, or in closets to double the hanging space. They’re cheap, removable, and surprisingly versatile.
  • The Ultimate Spring Cleaning Checklist: A Room-by-Room Guide to a Fresh Start

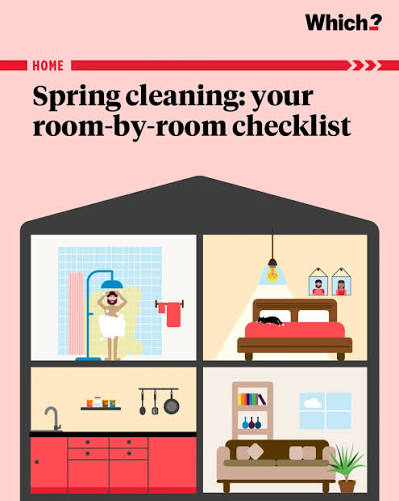
    The Ultimate Spring Cleaning Checklist: A Room-by-Room Guide to a Fresh Start

    As winter fades and daylight stretches longer, there’s an almost instinctive urge to throw open the windows and clear out the dust of the past months. Spring cleaning is more than a chore—it’s a ritual that spans cultures and centuries, from the Persian ‘khaneh tekouni’ before Nowruz to the Jewish tradition of removing chametz before Passover. It’s a chance to reset your living space and, in turn, your mind.

    But a full-home deep clean can feel overwhelming. Where do you start? How do you avoid burnout? The key is a smart, systematic approach. This guide breaks down the ultimate spring cleaning checklist into manageable, room-by-room tasks, with practical tips to make the process efficient, eco-friendly, and even enjoyable. Whether you’re a minimalist, a busy parent, or a renter, you’ll find a plan that works for you.

    Before You Begin: The Prep Phase

    Spring cleaning isn’t just about scrubbing—it’s about strategy. Before you dive in, set yourself up for success.

    Declutter first, clean second. Cleaning around clutter is like sweeping a dusty floor with a broom that’s full of holes. Go through each room and sort items into four piles: keep, donate, sell, or trash. Be honest with yourself—if you haven’t used it in a year, it’s probably time to let it go. This step alone can save you hours of dusting and wiping.

    Gather your supplies. You don’t need a cabinet full of chemical products. A few basics will handle most tasks: white vinegar (for glass and hard surfaces), baking soda (for scrubbing and deodorizing), dish soap, microfiber cloths, a mop, a vacuum with attachments, and a duster with an extension pole. For eco-friendly cleaning, add castile soap and reusable rags made from old t-shirts.

    Set a realistic timeline. A full-home deep clean can take 8 to 20+ hours, depending on your space. Don’t try to do it all in one day. Break it into sessions—one room per day, or a few hours each weekend. Use a timer to stay focused: 25 minutes of work, 5-minute break (the Pomodoro technique works wonders for cleaning).

    Follow the golden rules. Clean from top to bottom (dust ceiling fans before floors) and dry to wet (dust before wiping). Tackle the most dreaded task first—once it’s done, the rest feels easier.

    The Kitchen: Tackle Grease and Grime

    The kitchen is the heart of the home, but it’s also a magnet for grease, crumbs, and hidden grime. Start here if you want a visible transformation.

    • Empty and wipe cabinets. Remove everything from your cabinets, wipe down the shelves with a damp cloth and mild soap, and toss expired items. While they’re empty, line shelves with fresh paper or shelf liner.
    • Deep-clean the fridge. Pull out all food, discard anything past its prime, and wipe down every shelf and drawer with a vinegar-water solution. Don’t forget the rubber seals and the top of the fridge.
    • Degrease the range and oven. Use a baking soda paste on the stovetop and inside the oven (avoid commercial oven cleaners if you’re eco-conscious). Let it sit, then scrub and wipe. Clean the vent hood filter—soak it in hot, soapy water.
    • Wipe down backsplash and counters. Use a gentle cleaner suitable for your surface (avoid vinegar on natural stone like granite or marble).
    • Clean small appliances. Unplug and wipe down the microwave inside and out, toaster crumb tray, coffee maker (run a vinegar cycle), and blender base.
    • Sweep and mop the floor. Move the fridge and stove if possible to clean behind them—you’ll be surprised what’s lurking there.

    Bathrooms: Sparkle and Sanitize

    Bathrooms need extra attention to tackle soap scum, hard water stains, and mildew.

    • Clear and clean surfaces. Remove everything from counters, shelves, and the medicine cabinet. Wipe down all surfaces with a disinfectant or vinegar solution.
    • Scrub the tub and shower. Use a baking soda paste or a non-abrasive cleaner on the tub, tiles, and shower door. Clean the showerhead by soaking it in vinegar overnight.
    • Clean the toilet inside and out. Use a toilet brush and cleaner for the bowl, and wipe down the exterior, including the base and behind the tank.
    • Wash or replace shower curtains and liners. Machine-wash fabric curtains; wipe plastic liners with vinegar and water.
    • Mirrors and fixtures. Use a glass cleaner or vinegar-water mix for mirrors and chrome fixtures. Polish with a dry microfiber cloth to avoid streaks.
    • Don’t forget the exhaust fan. Remove the cover, vacuum off dust, and wash it in soapy water.

    Bedrooms: Refresh and Reorganize

    Your bedroom should be a sanctuary. Spring cleaning here focuses on textiles and clutter.

    • Strip and wash all bedding. Wash sheets, pillowcases, and duvet covers in hot water. If possible, air-dry them outside for a fresh scent.
    • Flip or rotate the mattress. Vacuum the mattress surface, spot-clean stains with a baking soda paste, and let it air out. Rotate or flip it according to the manufacturer’s instructions.
    • Declutter nightstands and dressers. Go through drawers and remove items you no longer use. Wipe down surfaces and organize with trays or dividers.
    • Clean the closet. Take everything out, try on clothes you’re unsure about, and donate what doesn’t fit or you haven’t worn in a year. Wipe down shelves and vacuum the floor.
    • Dust and vacuum. Dust all surfaces, including baseboards and window sills. Vacuum under the bed and in corners.
    • Wash windows and curtains. Clean the glass inside and out, and wash or vacuum curtains and blinds.

    Living Spaces: Dust and Deodorize

    Living rooms and common areas see the most traffic, so they need a thorough refresh.

    • Dust everything from top to bottom. Start with ceiling fans and light fixtures, then move to shelves, electronics, and furniture. Use a microfiber cloth or duster with an extension pole.
    • Clean upholstery and carpets. Vacuum sofas and chairs, paying attention to crevices. Sprinkle baking soda on carpets and upholstery, let it sit for 15 minutes, then vacuum. For stains, spot-clean with a gentle solution.
    • Wash throw pillows and blankets. Check care labels and machine-wash or spot-clean as appropriate.
    • Clean electronics. Use a dry microfiber cloth for screens and a slightly damp one for keyboards and remotes. Avoid spraying liquids directly on electronics.
    • Dust and clean window treatments. Vacuum blinds with a brush attachment, or wipe them with a damp cloth. Wash curtains if possible.
    • Organize media and books. Dust bookshelves and reorganize. Donate books or DVDs you no longer need.

    Entryway and Mudroom: First Impressions

    Don’t neglect the space that greets you every day.

    • Declutter shoes and outerwear. Store off-season items and donate what you don’t wear. Wipe down shoe racks and shelves.
    • Clean the door and hardware. Wipe down the front door, handles, and light switches. Clean any glass in the door.
    • Sweep and mop the floor. Pay special attention to corners and under mats. Wash or shake out doormats.

    The Final Touches: Details That Make a Difference

    • Baseboards and trim. Wipe them down with a damp cloth or sponge. This is a detail that instantly makes a room look cleaner.
    • Light switches and outlets. These are touched constantly but often forgotten. Wipe them with a disinfectant wipe.
    • Air vents and filters. Vacuum vents and replace HVAC filters if due. This improves air quality and efficiency.
    • Wash windows inside and out. Use a squeegee and a vinegar-water solution for streak-free glass.
    • Rotate seasonal items. Swap out heavy winter bedding for lighter linens, and store bulky coats and boots.

    Eco-Friendly and Family-Friendly Tips

    • Make your own cleaners. Mix equal parts water and vinegar for glass, and use baking soda paste for scrubbing. Add a few drops of essential oil for a pleasant scent.
    • Use reusable supplies. Old t-shirts make great rags, and microfiber cloths can be washed and reused.
    • Get the family involved. Assign age-appropriate tasks: kids can dust low shelves, sort toys, or wipe baseboards. Play music and set a timer for a fun challenge.
    • Take breaks. Spring cleaning is a marathon, not a sprint. Stay hydrated and stretch your back.

    Common Pitfalls to Avoid

    • Don’t try to do it all in one day. Spread tasks over several days or weekends to avoid burnout.
    • Don’t use the wrong products. Vinegar can damage natural stone, and water can ruin unsealed wood. Always test a small area first.
    • Don’t forget about renters. You can still deep-clean, but be mindful of your lease (e.g., don’t repaint without permission).
    • Don’t skip the decluttering step. It makes cleaning faster and more effective.

    With this checklist, you can tackle your spring cleaning with confidence. Remember, the goal isn’t perfection—it’s a refreshed space that brings you peace and joy.

    Spring cleaning is more than a seasonal chore—it’s an opportunity to hit the reset button on your home and your mind. By breaking the process into manageable steps, decluttering first, and using simple, eco-friendly supplies, you can transform your living space without feeling overwhelmed. So put on some music, open the windows, and enjoy the satisfaction of a clean, organized home that’s ready for the brighter days ahead.

    Summary

    • Declutter before you clean—sort items into keep, donate, sell, or trash to make cleaning faster and more effective.
    • Clean top-to-bottom and dry-to-wet—dust ceilings and fans first, then wipe surfaces, and finish with floors.
    • Use simple, eco-friendly supplies like vinegar, baking soda, and microfiber cloths instead of harsh chemicals.
    • Break the work into sessions—a full deep clean can take 8–20+ hours, so spread it over days or weekends.
    • Don’t forget the details—baseboards, light switches, and air vents make a big difference in the final result.

    FAQ

    Q: How long does spring cleaning take?
    A: It varies widely depending on home size and clutter level, but a full deep clean typically takes 8–20+ hours. Break it into manageable sessions over several days or weekends.

    Q: Do I need to buy special cleaning products?
    A: No. Many tasks can be done with basic supplies like white vinegar, baking soda, dish soap, and microfiber cloths. These are effective, eco-friendly, and budget-friendly.

    Q: What’s the difference between decluttering and cleaning?
    A: Decluttering is removing items you no longer need or use, while cleaning is removing dirt and grime. It’s best to declutter first, then clean, so you’re not dusting around clutter.

    Q: Can renters do spring cleaning?
    A: Absolutely. Renters can deep-clean their space, but should be mindful of lease restrictions (e.g., not repainting walls or making permanent changes). Focus on cleaning and organizing within your control.

    Q: How can I make spring cleaning more eco-friendly?
    A: Use homemade cleaners like vinegar and baking soda, opt for reusable cloths instead of paper towels, and air-dry linens and curtains to save energy. Also, donate or recycle items instead of throwing them away.

  • The Ultimate Guide to Free Daily Planner PDFs: What They Are, Where to Find Them, and How to Use Them

    The Ultimate Guide to Free Daily Planner PDFs: What They Are, Where to Find Them, and How to Use Them

    In our fast-paced world, staying organized can feel like a superpower. Yet, with countless apps and digital tools vying for our attention, sometimes the simplest solution is the most effective: a daily planner. And thanks to the internet, you can get one for free, in a format that works on any device: the PDF.

    But what exactly is a free daily planner PDF? Is it just a piece of paper you print, or can you type on it? And are there hidden costs or strings attached? This guide will walk you through everything you need to know about free daily planner PDFs, from their humble origins to modern digital uses, and help you find the perfect one for your needs.

    What Is a Daily Planner PDF?

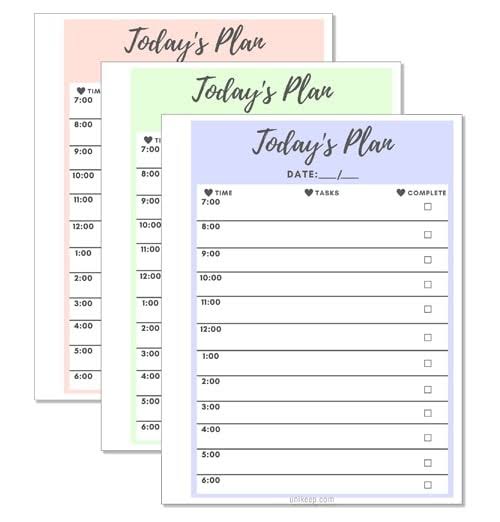
    A daily planner PDF is a pre-designed document that helps you organize your day. It typically includes sections for your top priorities, a schedule broken into hourly slots, a to-do list, and space for notes or reflections. The PDF format ensures that the layout stays exactly the same on any device or printer, so what you see is what you get.

    There are two main types: print-and-write and fillable. Print-and-write PDFs are static—you print them out and fill them in with a pen. Fillable PDFs have interactive form fields (like text boxes and checkboxes) that let you type directly into the document using free software like Adobe Acrobat Reader. This makes them perfect for digital planning on your computer or tablet.

    Why Use a Daily Planner PDF?

    You might wonder: why not just use a digital app? Well, there are several reasons why a PDF planner might be your best bet:

    • Cost: It’s free. No subscriptions, no in-app purchases.
    • Simplicity: No learning curve. Open, print or type, and you’re done.
    • Flexibility: You can use it on paper, on your tablet, or on your computer—whichever suits your mood.
    • Focus: Writing things down by hand has been shown to improve memory and commitment. A printed planner gives you that tactile experience without the cost of a fancy paper planner.
    • Privacy: Your data stays with you. No cloud sync, no tracking.

    Common Elements of a Daily Planner PDF

    While designs vary, most daily planners include these core sections:

    • Date: To note the day.
    • Top 3 Priorities: A focused list of the most important tasks.
    • Hourly Schedule: Time slots, often from 6 AM to 9 PM, for time-blocking.
    • To-Do List: A simple checklist for tasks.
    • Habit Tracker: Small boxes to check off habits like drinking water, exercising, or reading.
    • Meals/Water Tracker: For those who like to monitor nutrition.
    • Notes: Space for jotting down ideas or reminders.
    • Gratitude/Reflection: A prompt to end the day on a positive note.

    Some planners also include a weekly overview or a meal planning section, so it’s worth checking the layout before you download.

    Where to Find Free Daily Planner PDFs

    You can find free daily planner PDFs in many places online:

    • Productivity blogs: Many bloggers offer free templates as a way to build their email list. A quick search like “free daily planner PDF” will bring up countless options.
    • Template sites: Websites like TemplateLab, Vertex42, and OnPlanners have extensive collections.
    • Design platforms: Canva offers free templates that you can customize and download as PDFs.
    • Pinterest: A visual search engine where you can discover planners linked to blogs or Etsy shops.
    • Etsy: Many sellers offer free low-resolution versions as samples, with paid upgrades for high-resolution or editable files.

    How to Use a Daily Planner PDF

    Printing Your Planner

    If you prefer pen and paper, simply download the PDF and print it. Here are a few tips:

    • Check the paper size: Templates are often designed for A4 or US Letter. Make sure your printer settings match, or use “Fit to Page” to avoid cut-offs.
    • Adjust margins: If content is getting cut off, try reducing margins in your printer settings.
    • Print a test page: Before printing a whole month, print one page to check the layout.

    Filling It Digitally

    If you want to type on your planner, you’ll need a fillable PDF. Here’s how:

    1. Download a fillable PDF (look for “fillable” or “interactive” in the description).
    2. Open it in a free PDF editor like Adobe Acrobat Reader, Foxit Reader, or a browser-based editor like Smallpdf.
    3. Click on the form fields and type your text. Checkboxes can be ticked with a click.
    4. Save your file and you’re done.

    Using on a Tablet

    Many people now use PDF planners on tablets like the iPad with apps like GoodNotes, Notability, or Xodo. You can import the PDF and write on it with a stylus, combining the benefits of digital storage with the feel of handwriting.

    Common Pitfalls and Misconceptions

    “Free” Doesn’t Always Mean No Strings

    Some free templates require you to sign up for an email list before downloading. That’s often the price of “free.” Others may be watermarked or low-resolution previews of a paid product. Always read the fine print.

    PDFs Aren’t Editable by Default

    A standard PDF is like a printed page—you can’t type on it unless it has form fields. If you try to type on a static PDF and fail, it’s not broken; it’s just not fillable. Look for “fillable” or “interactive” in the description.

    Print Scaling Issues

    If a template designed for A4 paper is printed on US Letter (or vice versa), it may be cut off or have weird margins. Use “Fit to Page” in your printer settings to fix this.

    Fillable PDFs Need the Right Software

    Not all PDF viewers support form fields. Mobile browsers often struggle. For the best experience, use Adobe Acrobat Reader (free) on your computer or a dedicated PDF editor app.

    “Daily” vs. “Weekly” Confusion

    Some templates labeled “daily” actually contain weekly overviews or multiple days per page. Always check the layout before downloading to make sure it matches your needs.

    Copyright Restrictions

    Most free templates are for personal use only. Redistributing or selling them, even if you modify them, may violate the creator’s license. Respect the creator’s terms.

    How to Choose the Right Planner for You

    With so many options, how do you pick? Consider your needs:

    • If you’re a student: Look for planners with space for class schedules and assignment deadlines.
    • If you’re a busy professional: You might want a fillable PDF that you can type into quickly, with sections for meetings and appointments.
    • If you’re a parent: Meal planning and habit trackers could be useful.
    • If you’re aesthetic-driven: Search for designs that match your style—boho, minimal, floral, etc.
    • If you’re a digital planner user: Look for hyperlinked PDFs with ample writing space and dark-mode-friendly designs.

    Conclusion

    Free daily planner PDFs are a versatile, cost-effective tool for boosting productivity and staying organized. Whether you prefer the tactile feel of paper or the convenience of digital typing, there’s a template out there for you. By understanding the different types, where to find them, and how to use them effectively, you can harness the power of a daily planner without spending a dime. So why not give it a try? Your future self will thank you.

    A free daily planner PDF is more than just a piece of paper—it’s a simple, flexible, and powerful way to take control of your day. With the tips in this guide, you can find the perfect template, avoid common pitfalls, and start planning like a pro. So go ahead, download one today, and experience the difference a little structure can make.

    Summary

    • What: A daily planner PDF is a pre-designed document for organizing your day, available in print-and-write or fillable formats.
    • Why: They are free, simple, flexible, and can improve focus and memory through handwriting.
    • Where: Find them on productivity blogs, template sites, Canva, Pinterest, and Etsy.
    • How: Print them for pen-and-paper use, or fill them digitally with free software like Adobe Acrobat Reader.
    • Watch out: “Free” may require email sign-up, not all PDFs are editable, and print scaling can be an issue—check before you commit.

    FAQ

    Q: Are free daily planner PDFs really free?
    A: Yes, they are free to download and use, but some sites may require you to sign up for an email list or provide attribution. Always check the terms.

    Q: Can I type on a daily planner PDF?
    A: Only if it’s a fillable PDF with form fields. Look for “fillable” or “interactive” in the description. You’ll need software like Adobe Acrobat Reader to type.

    Q: Why is my printed planner cut off?
    A: This is likely a paper size mismatch. If the template is A4 and you’re printing on US Letter (or vice versa), use “Fit to Page” in your printer settings.

    Q: Can I use a daily planner PDF on my tablet?
    A: Yes, you can import it into apps like GoodNotes, Notability, or Xodo and write on it with a stylus.

    Q: Can I sell or share a free planner PDF I downloaded?
    A: Most free templates are for personal use only. Redistributing or selling them, even modified, may violate the creator’s license. Always read the terms.