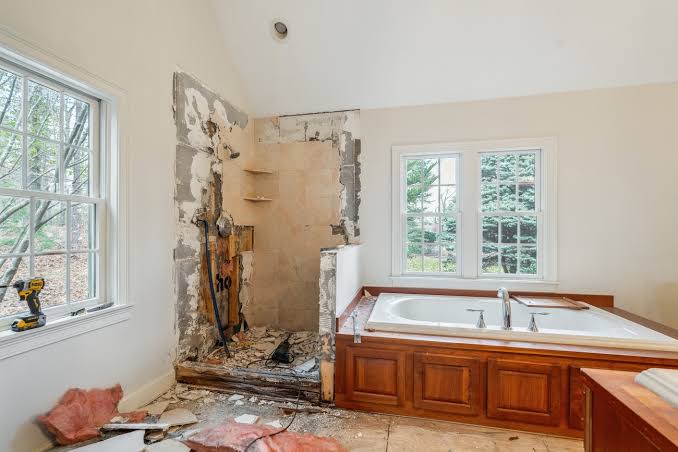
Tag: home improvement

  • 10 Clever DIY Repairs That Will Save You $1,000 This Year

    5 Easy DIY Car Maintenance Tasks That Could Save You $1,000 This Year

    Home repairs can feel like a financial black hole. Between the cost of parts and the hefty labor fees charged by professionals, a single fix can easily set you back a few hundred dollars. But here’s the good news: many common household issues are surprisingly easy to tackle yourself, even if you’re not particularly handy. With a little patience and the right guidance, you can save a significant chunk of change—potentially over $1,000 a year.

    This isn’t about becoming a master carpenter or an electrician. It’s about knowing which repairs are truly beginner-friendly and offer the highest return on your time. From a running toilet that wastes water (and money) to a drafty window that drives up your energy bill, these are the fixes that pay for themselves. Let’s dive into ten clever DIY repairs that can put real money back in your pocket.

    1. Fix a Running Toilet

    A running toilet isn’t just annoying—it can waste up to 200 gallons of water a day, adding a noticeable bump to your water bill. The culprit is often a worn-out flapper, which costs about $10 at any hardware store. Replacing it is a 10-minute job: turn off the water supply, flush to drain the tank, remove the old flapper, and snap in the new one. A plumber would charge $150–$250 for this simple fix. Do it yourself and pocket the difference.

    2. Replace a Faucet Washer or Cartridge

    That dripping faucet isn’t just a nuisance—it can waste thousands of gallons of water a year. Most leaks are caused by a worn-out washer or cartridge, which you can replace for under $30. Start by turning off the water valves under the sink, then disassemble the faucet handle to access the cartridge. Take the old part to the hardware store to match it, install the new one, and reassemble. A plumber would charge $200–$350 for this repair. You’ll save that and gain a sense of accomplishment.

    3. Patch Small Drywall Holes

    Whether it’s a doorknob dent or a nail hole from a picture frame, small drywall holes are easy to fix with a patch kit and some spackle. Clean the area, apply the patch, spread spackle over it, sand smooth, and paint. Materials cost $10–$30, and the job takes about an hour. Hiring a handyman for this would run you $100–$200. Plus, you’ll avoid the annoyance of living with an eyesore.

    4. Clear a Clogged Drain Without Chemicals

    Before you call a plumber for a slow or clogged drain, try a drain snake. You can rent one from a hardware store for $20–$40, or buy a manual one for about $15. Remove the drain cover, feed the snake in, and twist to break up the clog. This is a messy but straightforward job that takes 30–60 minutes. A plumber’s visit for a clogged drain typically costs $100–$300. Skip the harsh chemicals—they can damage pipes—and go mechanical.

    5. Reset or Replace a Garbage Disposal

    If your garbage disposal hums but doesn’t grind, it might just be jammed. First, try pressing the reset button on the bottom. If that doesn’t work, use an Allen wrench to manually turn the blades from the underside. If the disposal is truly dead, replacing it is a DIY-friendly project: disconnect the power, unscrew the mounting ring, and swap in a new unit (around $100–$150). A plumber would charge $150–$400 for this. Just be sure to turn off the power at the breaker before starting.

    6. Change Your HVAC Filter Regularly

    This is the easiest repair on the list—and one of the most impactful. A dirty HVAC filter makes your system work harder, increasing energy bills and shortening its lifespan. Filters cost $10–$30, and replacing them quarterly takes five minutes. Over a year, you could save $50–$100 on energy costs, and you’ll avoid a costly breakdown down the road. Mark it on your calendar and make it a habit.

    7. Caulk Windows and Doors

    Drafty windows and doors let warm air escape in winter and cool air in summer, driving up your energy bills. Sealing gaps with caulk or weatherstripping is a cheap, effective fix. Buy a tube of caulk ($5–$10) and a caulking gun ($10), then run a bead along the seams. For doors, add weatherstripping tape. This project takes a few hours and can save $100–$300 annually in energy costs. It’s a classic high-ROI DIY.

    8. Replace a Toilet Flapper (Again, But Worth It)

    Yes, we mentioned flappers, but this one deserves its own spot because it’s so common and so easy. If your toilet runs intermittently, the flapper is the likely culprit. It’s a $10 part and a 10-minute fix. A plumber would charge $100–$200. Even if you’ve done it before, it’s worth repeating—this is the single easiest way to save money on a repair.

    9. Replace a Dishwasher Door Gasket

    A worn-out dishwasher gasket can cause leaks that damage your floor and subfloor—a repair that could cost $1,500 or more. The gasket itself costs $15–$30 and can be replaced in about 30 minutes. Remove the old gasket by pulling it out of the channel, clean the area, and press the new one in place. This is a preventive measure that saves you from a much bigger headache (and bill) later.

    10. Fix a Squeaky Door Hinge

    A squeaky hinge is a minor annoyance, but it’s also a sign of friction that can wear out the hinge over time. Fix it by applying a few drops of WD-40 or a silicone lubricant to the hinge pin. If the door sticks, you might need to sand the edge or adjust the strike plate. This takes 10 minutes and costs nothing if you have lubricant on hand. A handyman would charge $50–$150 for this. It’s a small win, but it adds up.

    The Bottom Line: Know Your Limits

    While these ten repairs are all DIY-friendly, it’s crucial to know when to call a professional. Gas line work, major electrical, structural changes, and anything involving refrigerant should be left to the experts. A botched DIY job can cost more than the professional would have charged. Always turn off water or power before starting, and if you hit a snag, don’t hesitate to stop and reassess. With these ten repairs, you’re well on your way to saving $1,000 or more this year—without breaking a sweat.

    DIY repairs aren’t just about saving money—they’re about gaining confidence and self-reliance. Start with one or two of these projects, and you’ll quickly see how satisfying (and lucrative) it can be. Remember, the goal isn’t to do everything yourself; it’s to know which things are worth your time. With these ten repairs, you’re making a smart investment in your home and your wallet.

    Summary

    • Save $1,000+ annually by tackling common repairs like running toilets, leaky faucets, and clogged drains yourself.
    • High-ROI projects like fixing a running toilet (10 minutes, $200 saved) and caulking windows ($100–$300 saved) offer the best return on time.
    • Preventive maintenance (e.g., replacing a dishwasher gasket) can avoid costly water damage down the road.
    • Know your limits: Avoid DIY for gas, major electrical, or structural work—a botched job can cost more than a pro.
    • Always turn off water/power before starting, and take the old part to the store to ensure you buy the right replacement.

    FAQ

    Q: Is DIY always cheaper than hiring a professional?
    A: Not always. If you buy the wrong part, make multiple trips, or damage something, you can spend more than a pro would charge. Stick to beginner-friendly repairs and research thoroughly before starting.

    Q: What tools do I need for these repairs?
    A: Most require just a screwdriver, an adjustable wrench, and maybe a plumber’s wrench. For drains, you’ll need a drain snake (rentable). For caulking, a caulking gun. Start with basic tools and add as needed.

    Q: Will DIY repairs void my appliance warranty?
    A: Possibly. Some warranties require certified technicians for repairs. Check your warranty before working on a new appliance. For older appliances, it’s usually safe.

    Q: How do I know if a repair is too difficult for me?
    A: If it involves gas lines, electrical panels, structural walls, or refrigerant, call a pro. Also, if you start and feel overwhelmed, stop and reassess—it’s better to hire someone than to make things worse.

    Q: Can renters do these repairs?
    A: Yes, with landlord permission. Many minor repairs like patching nail holes, re-caulking, and fixing squeaky doors are renter-friendly and can help you get your security deposit back.

  • Bathroom Renovation Blunders: 7 Mistakes That Cost Time, Money, and Sanity

    13 Bathroom Renovation Mistakes That Could Break Your Budget - GD HOME

    Renovating a bathroom is one of the most rewarding home improvement projects you can tackle—it boosts daily comfort and can recoup up to 67% of its cost at resale. But it’s also a minefield of hidden pitfalls. Between water, electricity, and a tight footprint, a single misstep can turn a dream remodel into a nightmare of mold, leaks, and budget overruns.

    Whether you’re a seasoned DIYer or hiring a contractor, knowing where things go wrong is half the battle. This guide unpacks the most common bathroom renovation mistakes—from waterproofing myths to ventilation oversights—so you can avoid costly rework and enjoy your new space without regret.

    1. Skimping on Waterproofing (The #1 Mistake)

    Many homeowners assume that tile and grout are enough to keep water out. The truth is, grout is porous and will absorb moisture over time. Without a proper waterproofing membrane—like Schluter-KERDI or a liquid-applied membrane such as RedGard—water seeps behind your tile, leading to mold, rot, and structural damage.

    What to do instead: Always install a waterproofing membrane in wet areas (showers, tub surrounds, and floors). This is non-negotiable, even if it adds a few hundred dollars to your budget. It’s far cheaper than tearing out a moldy wall later.

    2. Ignoring Ventilation Requirements

    A bathroom without adequate ventilation is a breeding ground for mold and mildew. Code typically requires an exhaust fan rated at least 50 CFM (cubic feet per minute), or 1 CFM per square foot of room area. Many older homes have undersized fans or none at all.

    What to do instead: Install a properly sized exhaust fan that vents to the outside (not into the attic). Consider a model with a humidity sensor that turns on automatically. This small investment protects your paint, drywall, and health.

    3. Underestimating the Budget (and Forgetting Hidden Costs)

    The average mid-range bathroom remodel runs between $10,000 and $25,000, but first-timers often budget only for visible items like tile and fixtures. They forget permits, dumpster rentals, underlayment, and unexpected structural repairs—like fixing rotted subfloor or outdated plumbing.

    What to do instead: Add a 20% contingency fund to your budget. Get itemized quotes from contractors and ask about potential extras. Never pay more than a 10–20% deposit upfront, and tie progress payments to completed milestones.

    4. Moving Plumbing Without Thinking It Through

    Relocating a toilet, shower, or sink drain is not just a matter of rerouting pipes—it involves slope calculations, venting, and sometimes structural changes. This can easily add thousands to your project and extend the timeline by weeks.

    What to do instead: Keep plumbing fixtures in their existing locations whenever possible. If you must move them, consult a licensed plumber early in the design phase to get a realistic cost estimate. Sometimes a small shift (a few inches) is affordable, but a major relocation can blow your budget.

    5. Choosing Trendy Materials Over Practical Ones

    Large-format tiles, matte black fixtures, and floating vanities look stunning in showrooms, but they require specific installation expertise. Large tiles, for example, need perfectly flat subfloors or they will crack or ‘tent.’ Natural stone needs sealing and can be slippery when wet, making it a poor choice for shower floors.

    What to do instead: Choose materials that balance aesthetics with durability. For shower floors, use small-format tiles (like mosaic) with textured surfaces for grip. If you love a trend, ask your contractor about the installation challenges and whether your home can accommodate it.

    6. Skipping Permits to Save Time or Money

    Many jurisdictions require permits for any work involving plumbing, electrical, or structural changes. Skipping them can lead to fines, forced removal of unpermitted work, and headaches when you sell your home—buyers’ inspectors will flag it.

    What to do instead: Check with your local building department before starting. Pull the necessary permits and schedule inspections. It might add a week to your timeline, but it protects your investment and ensures the work meets safety codes (like GFCI outlets within 6 feet of water).

    7. Hiring the First Contractor (or Going DIY Without Skills)

    Skilled contractors are in high demand, with lead times of 4–8 weeks. In a rush, homeowners often hire the first available person or attempt complex work themselves. The result? Poor workmanship, code violations, and costly rework.

    What to do instead: Vet contractors thoroughly—check licenses, insurance, references, and online reviews. Get at least three bids. If you’re DIYing, be honest about your skills: plumbing and electrical are not beginner-friendly. It’s often cheaper to hire a pro for those parts and do the cosmetic work yourself.

    Bonus: Over-Personalizing for Resale

    While your bathroom should reflect your taste, extreme customization (think saunas, bold color schemes, or luxury fixtures) can hurt resale value. Realtors warn that highly personalized spaces appeal to a narrow buyer pool.

    What to do instead: Aim for a ‘sweet spot’—a clean, neutral design with quality materials that appeals to most buyers. You can add personal touches with accessories that are easy to change later.

    A bathroom renovation is a significant investment, but it doesn’t have to be a horror story. By avoiding these common mistakes—prioritizing waterproofing, ventilation, proper budgeting, and realistic planning—you can create a space that’s beautiful, functional, and adds value to your home. Remember: the cheapest fix is the one you do right the first time.

    Summary

    • Waterproofing is non-negotiable: Grout is not waterproof; install a membrane to prevent mold and rot.
    • Ventilation matters: Install a properly sized exhaust fan to avoid moisture damage.
    • Budget for the unexpected: Add a 20% contingency for hidden costs like permits and structural repairs.
    • Don’t move plumbing casually: Relocating fixtures can add thousands; keep them in place when possible.
    • Choose durable over trendy: Some materials require special installation or maintenance; pick practical options for wet areas.
    • Get permits and vet contractors: Protect your investment and ensure safety by following codes and hiring qualified pros.

    FAQ

    Q: How much does a bathroom remodel typically cost?
    A: The average mid-range bathroom remodel in the U.S. costs between $10,000 and $25,000, with upscale remodels exceeding $50,000. Costs vary by region, materials, and scope.

    Q: Can I do a bathroom renovation myself to save money?
    A: Yes, but only for cosmetic tasks like painting or installing fixtures. Plumbing, electrical, and waterproofing require expertise—mistakes can lead to costly damage or safety hazards. Consider hiring a pro for those critical parts.

    Q: What is the most common cause of mold in bathrooms?
    A: Poor ventilation and improper waterproofing. Without an exhaust fan or a waterproofing membrane, moisture accumulates behind walls and under tile, leading to mold and rot.

    Q: Do I need a permit for a bathroom remodel?
    A: Most jurisdictions require permits for any work involving plumbing, electrical, or structural changes. Check with your local building department to avoid fines and resale complications.

    Q: How long does a bathroom renovation take?
    A: Typically 3–6 weeks, but delays are common due to plumbing issues, tile backorders, or permit inspections. Plan for extra time in your schedule.

  • Solar Panels: The Complete Guide to Pros, Cons, and What They Mean for Your Home

    Solar panel - Wikipedia

    Solar panels have moved from a niche eco-statement to a mainstream home improvement. With prices dropping 90% since 2010 and a federal tax credit covering 30% of costs, more homeowners than ever are considering making the switch. But is solar right for you? The answer isn’t a simple yes or no—it depends on where you live, how much you pay for electricity, and what your roof looks like.

    This guide breaks down the real-world pros and cons of solar panels, from financial payback periods to environmental impact, so you can make an informed decision. We’ll look at the numbers, the policy landscape, and the different perspectives—from homeowners to utility companies—to give you a complete picture.

    How Solar Panels Work: A Quick Refresher

    Before diving into pros and cons, it helps to understand the basics. Photovoltaic (PV) panels—the kind you see on rooftops—convert sunlight directly into electricity using semiconductor materials like silicon. When sunlight hits the panel, photons knock electrons loose, creating direct current (DC) electricity. An inverter then converts that DC into alternating current (AC) for your home.

    Most residential systems are 5–10 kilowatts (kW) in size, with panel efficiencies ranging from 15–22%. That means a typical panel converts about one-fifth of the sunlight it receives into usable electricity. Panels are built to last: most come with 25–30 year warranties and degrade at a slow rate of about 0.5% per year.

    The Pros: Why People Love Solar

    1. Significant Long-Term Savings

    The most obvious benefit is financial. While the upfront cost is substantial—a typical 6 kW system runs $15,000–$21,000 before incentives—the federal Investment Tax Credit (ITC) knocks 30% off that price through 2032. After that, the credit steps down. Many homeowners see a payback period of 6–12 years, depending on electricity rates and sun exposure. In sunny states like Arizona, a 6 kW system can generate 9,000–10,000 kWh per year, which could cover most of a household’s electricity needs.

    2. Environmental Impact

    Solar is clean and renewable. A typical residential system offsets 3–4 tons of CO₂ per year—equivalent to planting about 150 trees annually. Over a 25-year lifespan, that’s a significant reduction in your carbon footprint. As the grid continues to incorporate more renewables, solar helps reduce reliance on fossil fuels.

    3. Energy Independence

    Solar gives you a degree of control over your energy costs. When utility rates rise—and they often do—your solar system keeps producing power at a fixed cost. With battery storage (like a Tesla Powerwall), you can store excess daytime power for nighttime use, providing resilience against grid outages. This is especially valuable in areas prone to blackouts or with time-of-use electricity rates.

    4. Increasing Home Value

    Studies show that homes with solar panels sell for more than comparable homes without them. While the exact premium varies, many buyers see solar as a desirable feature that reduces future utility bills.

    The Cons: What to Consider Before Going Solar

    1. High Upfront Cost

    Despite falling prices, solar remains a significant investment. A 6 kW system costs $15,000–$21,000 before incentives. Even with the 30% federal tax credit, you’re looking at $10,500–$14,700 out of pocket. For many households, that’s a barrier, especially if you don’t have cash on hand and need to finance.

    2. Payback Depends on Your Situation

    Solar isn’t universally worthwhile. If you live in a cloudy state like Washington, a 6 kW system might only produce 6,000–7,000 kWh per year—less than half of what it would in Arizona. If your electricity rates are low, the savings are smaller, extending the payback period. And if you plan to move in a few years, you might not recoup your investment.

    3. Maintenance and Repairs

    Solar panels are low-maintenance but not zero-maintenance. You’ll need to clean them periodically (especially in dusty areas), and the inverter—a critical component—typically needs replacement every 10–15 years, costing $1,000–$2,000. While panels are warrantied for 25–30 years, the inverter often isn’t.

    4. Roof Suitability

    Not every roof is a good candidate. Shading from trees or nearby buildings can drastically reduce output. Roof orientation matters—south-facing roofs in the Northern Hemisphere are ideal. And if your roof is old, you may need to replace it before installing panels, adding to the cost.

    5. Environmental Costs of Manufacturing

    While solar is clean in operation, manufacturing panels has an environmental footprint. Mining silicon and rare metals, plus the energy-intensive production process, creates emissions and waste. However, studies show that panels typically offset their manufacturing footprint within 1–3 years of operation.

    The Changing Policy Landscape

    Government incentives and net metering policies play a huge role in solar’s economics. Net metering allows you to sell excess electricity back to the grid at retail rates, effectively spinning your meter backward. But these policies are shifting. California’s NEM 3.0 (2023) reduced export credits by about 75%, making batteries more important for payback. Other states are also reevaluating net metering, which could affect future savings.

    On the flip side, some states offer additional incentives like rebates or Solar Renewable Energy Certificates (SRECs), which provide extra income per megawatt-hour generated. It’s essential to check your state’s policies before committing.

    Different Perspectives: Who Wins and Who Loses?

    The Homeowner’s View

    For many, solar is a win: lower bills, environmental benefits, and energy independence. But for others—especially those with shaded roofs, low electricity rates, or plans to move—the math doesn’t work.

    The Utility’s View

    Utilities are less enthusiastic. Rooftop solar reduces their revenue, and they argue that non-solar customers end up paying more for grid maintenance—a phenomenon called the “utility death spiral.” They also point to the intermittency problem: solar only produces when the sun shines, requiring backup generation or storage to meet demand at night.

    The Equity Perspective

    Solar adoption skews toward wealthier, home-owning households. Renters and low-income families are often left out, though community solar programs aim to change that. Net metering, some argue, is a regressive subsidy that shifts costs from solar to non-solar customers. On the other hand, solar reduces air pollution, which disproportionately benefits low-income communities near fossil fuel plants.

    The Industry View

    Solar is a booming industry, but it’s not without challenges. Thin margins, fierce competition, and trade tensions (like U.S. tariffs on Chinese panels) create price volatility. Technological advances, such as perovskite cells, promise higher efficiencies but are still in development.

    Making the Decision: Is Solar Right for You?

    To decide, ask yourself a few questions:

    • What are your electricity rates? Higher rates mean greater savings.
    • How much sun does your roof get? South-facing, unshaded roofs are ideal.
    • How long do you plan to stay in your home? If you’ll move within 5 years, solar may not pay off.
    • What incentives are available in your state? Federal ITC is a given, but state and local incentives vary widely.

    If you’re a good candidate, solar can be a smart financial and environmental investment. If not, you might consider community solar or simply wait until prices drop further.

    Solar panels are not a one-size-fits-all solution. They offer real financial and environmental benefits, but the upfront cost and dependence on location and policy mean they’re not right for everyone. By understanding the pros and cons—and how they apply to your specific situation—you can make a decision that’s good for your wallet and the planet.

    Summary

    • Pros: Long-term savings on electricity, reduced carbon footprint, energy independence, and increased home value.
    • Cons: High upfront cost, payback varies by location and electricity rates, maintenance needs, and roof suitability issues.
    • Policy matters: Federal ITC (30% through 2032) and state incentives can significantly affect payback; net metering changes like California’s NEM 3.0 are shifting the economics.
    • Not for everyone: Renters, low-income households, and those with shaded or unsuitable roofs may not benefit; community solar is an alternative.
    • Environmental trade-offs: Manufacturing has a footprint, but panels offset it within 1–3 years of operation.

    FAQ

    Q: How much do solar panels cost in 2024?
    A: The average installed cost is $2.50–$3.50 per watt before incentives. A typical 6 kW system costs $15,000–$21,000, but the 30% federal tax credit reduces that to $10,500–$14,700.

    Q: How long do solar panels last?
    A: Most panels are warrantied for 25–30 years and degrade at about 0.5% per year, meaning they still produce around 85–90% of their original output after 25 years.

    Q: What is net metering and why does it matter?
    A: Net metering credits homeowners for excess electricity sent to the grid at retail rates. It’s a key financial incentive, but some states are reducing these credits, which can affect payback.

    Q: Do I need a battery with solar panels?
    A: Not necessarily, but batteries allow you to store excess daytime power for nighttime use, increasing energy independence. They add $10,000–$15,000 to the cost, so weigh the benefits.

    Q: Can I get solar panels if I rent?
    A: Typically no, unless you have a landlord willing to install them. Community solar programs allow renters to subscribe to a shared solar array and receive credits on their electricity bill.