Bleach has been a household staple for generations, but its harsh fumes, corrosive nature, and environmental toll are prompting many to seek safer alternatives. The good news: nature offers a powerful arsenal of cleaning agents that can tackle grime, germs, and odors without the downsides. This article explores eight natural solutions that often outperform bleach for everyday cleaning tasks, backed by science and centuries of practical use.
Why Ditch the Bleach?
Bleach (sodium hypochlorite) is undeniably effective at killing a wide range of pathogens. However, its benefits come with significant costs. The fumes can irritate your respiratory tract, eyes, and skin, and mixing it with ammonia or acidic cleaners produces toxic gases. Bleach is also corrosive, damaging natural stone, fabrics, and metals over time. Environmentally, its production and transport leave a sizable carbon footprint, and it contributes to indoor air pollution.
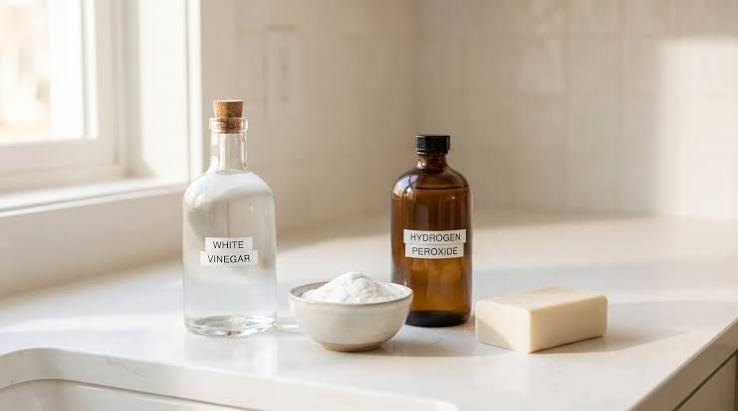
Yet, the alternatives are not just ‘safer’ — they are often better suited for everyday cleaning. Bleach disinfects but doesn’t clean; it leaves behind dirt and grime unless you pre-clean. Natural solutions like vinegar and hydrogen peroxide both clean and disinfect, saving you a step. Plus, they’re gentler on surfaces and your health.
The 8 Natural Cleaners That Get the Job Done
1. White Vinegar: The Acidic All-Rounder
White vinegar, a 5% solution of acetic acid, is a powerhouse for breaking down mineral deposits, soap scum, and grease. Its acidity disrupts bacterial cell membranes, making it effective against common household pathogens like E. coli, Salmonella, and Listeria.
Best for:
– Descaled coffee makers and kettles
– Showerheads and faucets with hard water stains
– Glass and mirror cleaning (when diluted with water)
How to use: Mix equal parts vinegar and water in a spray bottle for an all-purpose cleaner. For tough mineral buildup, use full strength and let it sit for 15–30 minutes. Note: vinegar is not effective against all viruses (like norovirus) and shouldn’t be used on porous surfaces like unsealed grout.
2. Hydrogen Peroxide: The True Disinfectant
Unlike vinegar, hydrogen peroxide (3% solution) is a genuine disinfectant. It kills bacteria, yeast, fungi, and viruses, including rhinovirus and influenza, by releasing oxygen radicals that damage microbial cells. It breaks down into water and oxygen, leaving no toxic residue.
Best for:
– Kitchen countertops and cutting boards
– Bathroom surfaces (toilets, sinks, tiles)
– Cleaning toothbrushes and mouthguards
How to use: Spray directly onto non-porous surfaces and let it sit for 1–5 minutes (longer for heavy contamination). For a potent cleaner, combine with vinegar in separate bottles — never mix them together, as this creates peracetic acid, which is irritating.
3. Baking Soda: The Gentle Scrubber and Deodorizer
Baking soda (sodium bicarbonate) is mildly abrasive, making it perfect for scrubbing without scratching. It neutralizes odors by balancing pH, but it’s not a disinfectant on its own. However, it enhances the effectiveness of other cleaners.
Best for:
– Scrubbing sinks, tubs, and stovetops
– Deodorizing carpets, refrigerators, and trash cans
– Polishing stainless steel and silver
How to use: Make a paste with water and apply to surfaces. For extra power, sprinkle baking soda on a surface, then spray with vinegar — the fizzing action helps lift grime.
4. Castile Soap: The Plant-Based Surfactant
Castile soap is made from plant oils (like olive or coconut) and acts as a surfactant, lifting dirt and grease off surfaces. It’s biodegradable and non-toxic, making it safe for homes with kids and pets. While it doesn’t disinfect, it’s an excellent base for DIY cleaners.
Best for:
– General purpose cleaning (floors, walls, counters)
– Washing dishes and laundry
– Making foaming hand soap
How to use: Dilute 1–2 tablespoons in a spray bottle of water for an all-purpose cleaner. Add a few drops of tea tree oil for a disinfectant boost.
5. Lemon Juice: The Fresh-Scented Acid
Lemon juice contains citric acid, which has antibacterial properties and dissolves hard water stains and grease. Its fresh scent is a bonus — and it’s less pungent than vinegar.
Best for:
– Cutting boards (to remove odors)
– Brass and copper polish
– Microwave cleaning (steam with lemon water)
How to use: Mix lemon juice with salt to create a scrub for tough stains. For a degreasing spray, combine with water and a bit of Castile soap. Note: citric acid is less potent than vinegar against some bacteria, so use it for cleaning rather than disinfection.
6. Essential Oils: Nature’s Antimicrobials
Certain essential oils, particularly tea tree, eucalyptus, and lavender, have demonstrated antibacterial and antifungal properties. Tea tree oil, for instance, is effective against Staph aureus and Candida. However, concentrations matter — you need a 0.5–1% solution for meaningful antimicrobial effect.
Best for:
– Adding to homemade cleaners for a disinfectant boost
– Freshening laundry and carpets
– Natural air fresheners
How to use: Add 10–20 drops of tea tree oil to a spray bottle of water and vinegar. Always dilute; essential oils can cause skin irritation in high concentrations.
7. Salt: The Abrasive and Dehydrating Agent
Salt is a classic abrasive and dehydrating agent. It’s useful for scrubbing and, when combined with vinegar or lemon, creates a paste that can tackle rust and hard water stains.
Best for:
– Scrubbing pots and pans
– Removing rust from tools
– Cleaning cutting boards (with lemon)
How to use: Mix salt with lemon juice or vinegar to form a paste. Apply to the surface, scrub, and rinse.
8. Borax: The Mineral Cleaner
Borax (sodium borate) is a naturally occurring mineral that fights mold and mildew, deodorizes, and boosts detergent power. It’s more potent than baking soda and can be used in laundry, on surfaces, and as a mold killer.
Best for:
– Laundry booster and stain remover
– Cleaning toilets and drains
– Mold and mildew removal
How to use: Dissolve 1/2 cup of borax in a gallon of warm water for an all-purpose cleaner. For mold, make a paste with water and apply to affected areas. Caution: borax is mildly toxic if ingested and should be kept away from pets and children.
How Do These Compare to Bleach?
Bleach still holds the crown for rapid, broad-spectrum disinfection of hardy pathogens like C. diff and norovirus. But for everyday cleaning and sanitizing, these naturals are just as effective — provided you give them enough contact time (5–10 minutes).
Consider the task: if you’re wiping down a counter after raw chicken, hydrogen peroxide works within minutes. If you’re scrubbing a soap-scummed shower, vinegar and baking soda outperform bleach because they dissolve the grime, not just kill germs. And if you’re concerned about indoor air quality, naturals win hands down — they emit negligible VOCs compared to bleach.
Safety and Precautions
While natural cleaners are safer overall, they’re not without caveats. Vinegar and lemon can irritate skin at high concentrations. Hydrogen peroxide can temporarily bleach skin. Borax and essential oils require caution around pets and children. Always test on a small area first, and never mix hydrogen peroxide with vinegar — the resulting peracetic acid is an irritant.
Putting It All Together
Here’s a quick recipe for a versatile, natural disinfecting cleaner:
- 1 cup water
- 1 cup white vinegar
- 20 drops tea tree oil
- 1 teaspoon Castile soap
Combine in a spray bottle. Use on countertops, sinks, and bathroom fixtures. Shake well before each use.
The shift away from bleach isn’t just a trend — it’s a smarter way to clean. By choosing natural solutions like vinegar, hydrogen peroxide, and baking soda, you’re protecting your health, your home, and the planet. And as science shows, they often work better because they clean and disinfect in one step. Next time you reach for the bleach, consider a natural alternative that gets the job done without the baggage.
Summary
- Bleach is effective but comes with health, environmental, and surface-damage downsides.
- Natural cleaners like vinegar, hydrogen peroxide, and baking soda clean and disinfect effectively for everyday tasks.
- Acids (vinegar, lemon) disrupt bacteria, oxidizers (hydrogen peroxide) kill a wide range of pathogens, and abrasives (baking soda, salt) physically remove grime.
- Essential oils and borax add antimicrobial power, but require proper dilution and caution.
- For most household cleaning, natural solutions are safer, eco-friendlier, and often outperform bleach by combining cleaning and disinfecting in one step.
FAQ
Q: Are natural cleaners as effective as bleach at killing viruses?
A: For many common viruses, yes. Hydrogen peroxide is a true disinfectant effective against rhinovirus and influenza with proper contact time. However, bleach is faster and more reliable for hardy pathogens like norovirus and C. diff spores, so natural alternatives may not be suitable for high-risk situations.
Q: Can I mix vinegar and hydrogen peroxide?
A: No. Mixing them creates peracetic acid, which can irritate skin, eyes, and respiratory tract. Use them separately, even on the same surface, but allow one to dry or rinse before applying the other.
Q: Is baking soda a disinfectant?
A: No, baking soda is not a disinfectant. It is a mild abrasive and deodorizer. It can enhance the cleaning power of other agents but should be paired with an acid or hydrogen peroxide for disinfection.
Q: Are essential oils safe to use around pets?
A: Some essential oils, like tea tree, are toxic to cats and dogs if ingested or applied in high concentrations. Always dilute properly and keep pets away from freshly cleaned surfaces. Consult your vet if unsure.
Q: Can I use vinegar on all surfaces?
A: Vinegar is acidic and can damage natural stone (like marble), unsealed grout, and some metals. Test on an inconspicuous area first, and avoid using it on these surfaces. It’s best for glass, tile, and sealed countertops.