Tag: design

  • The Unlikely Ingenuity of the Split-Flap Display: How a 1950s Airport Innovation Became a Design Icon

    The Unlikely Ingenuity of the Split-Flap Display: How a 1950s Airport Innovation Became a Design Icon

    Solari boards: The disappearing sound of airports - BBC News

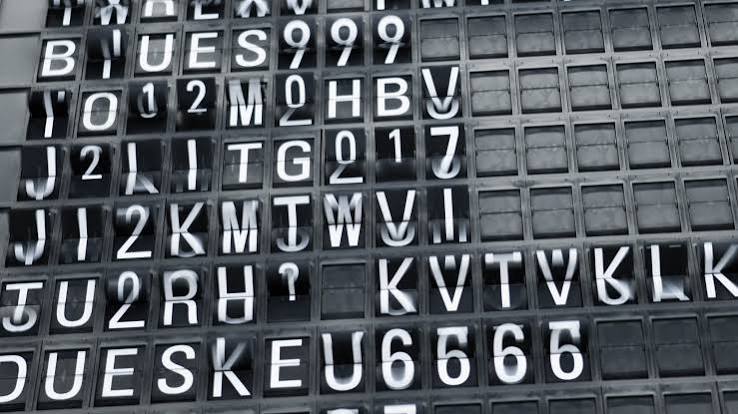
    Imagine standing in a bustling airport terminal in the 1960s. The air smells of jet fuel and cigarette smoke. You’re waiting for your flight number to appear on the massive board overhead. Suddenly, a mechanical clatter erupts a cascade of flipping flaps and the letters rearrange themselves, revealing your gate. That sound, that motion, was the split-flap display, a marvel of mid-century engineering that became as iconic as the aircraft it served.

    Today, you’re more likely to see a split-flap board in a hipster coffee shop or a boutique hotel lobby than at an airport. But its journey from essential infrastructure to retro design object is a story of ingenuity, nostalgia, and the enduring appeal of analog technology in a digital world.

    The Problem: When Manual Boards and Bulbs Just Didn’t Cut It

    Before split-flap boards, airports and train stations relied on two methods to display schedules. The first was manual boards—racks where workers physically placed letters or numbers into slots. This was slow, error-prone, and required constant labor. The second was roll-up displays: continuous fabric loops with pre-printed schedules. Updating them meant printing new fabric sections, which was expensive and time-consuming.

    Early electronic displays used incandescent bulbs arranged in dot-matrix patterns. They could update quickly, but they were hard to read in bright daylight, suffered from frequent bulb burnouts, and consumed a lot of electricity. The industry needed something better: a display that was legible, reliable, and fast.

    The Solution: A Mechanical Masterpiece

    The split-flap display solved all these problems with elegant mechanical simplicity. Each character position—each letter, number, or symbol—is a module containing a stack of thin flaps, hinged to a rotating drum. When the display changes, the drum rotates, and the flaps flip down one by one, ‘splitting’ open at the top, until the correct character is revealed. The entire process takes about one to two seconds, producing that signature clatter.

    The flaps are typically made of lightweight plastic or metal, and each module may contain anywhere from 40 to 100 flaps, depending on the character set. A small electric motor drives the drum, and a cam or solenoid triggers the flap release. Crucially, the display only draws power during the flip—not to hold a static image. That made it incredibly energy-efficient.

    But the real genius lay in its reliability. If a flap jammed, the next rotation would often clear it. The system was self-correcting, a feature that endeared it to maintenance crews worldwide.

    The Solari Board: From Rome to the World

    The design we recognize today was refined and commercialized by Italian engineer Remigio Solari and his company, Solari di Udine, founded in 1948. In 1956, Solari patented the flap mechanism that became the industry standard. The first major airport installation was at Rome Fiumicino Airport in the late 1950s. From there, Solari boards spread rapidly across the globe, appearing at JFK, Heathrow, Charles de Gaulle, and hundreds of other airports. The name ‘Solari board’ became so synonymous with the design that it often functioned as a generic trademark.

    Solari’s aesthetic—black background, white or amber characters, and a distinctive custom font—became the visual standard for transit information. Other manufacturers, such as Krone and Ferranti-Packard, made similar systems, but none matched Solari’s iconic look.

    The Cultural Icon: Sound and Sight of Modernity

    The split-flap board quickly became more than just a functional display. It became a visual shorthand for travel, transit, and modernity in mid-20th-century cinema and photography. Its rhythmic clatter was an auditory icon of airports, later sampled in music and films like Catch Me If You Can and The Terminal.

    Design theorists have since cited the split-flap as an early example of ‘calm technology’—information that is visible at a glance without demanding constant attention. Unlike a flashing digital screen, the split-flap board presented updates in a composed, almost theatrical manner. The flip animation provided kinetic feedback: you saw the change happen, which made the information feel more tangible and trustworthy.

    The Decline and the Revival

    By the 1980s, digital LED and LCD displays began to replace split-flap boards. They were cheaper to manufacture, easier to update in real time, and required less maintenance. By the 2000s, most airports had ripped out their clattering boards in favor of silent screens.

    But you can’t keep a good mechanical icon down. In the 2010s, a nostalgia-driven revival took hold. Designers, architects, and hospitality brands rediscovered the split-flap as an analog counterpoint to the ubiquity of digital screens. Boutique hotels like The Hoxton and Ace Hotel installed custom boards to display event schedules or witty messages. Craft breweries used them to list their rotating taps. Even Google’s offices have them.

    Enthusiast communities have sprung up online, with makers building DIY versions using 3D-printed parts and microcontrollers. Subreddits like r/splitflap share tips on sourcing vintage boards and building new ones.

    Why It Endures: The Appeal of Mechanical Authenticity

    Why do we love these clunky, mechanical relics? Perhaps because they are honest. In an age of pixel-perfect simulations, a split-flap board is unapologetically physical. You can hear it work, see the flaps move, and almost feel the engineering. Its imperfections—the occasional jam, the slightly uneven flip—are part of its charm.

    Moreover, the split-flap display is a reminder of a time when technology was designed to serve human needs with clarity and elegance. It didn’t demand your attention; it simply provided information when you needed it. That’s a lesson that resonates in our notification-saturated world.

    The split-flap display may have outlived its original purpose, but its legacy is far from over. As a design icon, it continues to inspire, delight, and remind us that good engineering can be beautiful. Whether you encounter one in a vintage airport museum or a modern coffee shop, take a moment to listen to that clatter—it’s the sound of ingenuity.

    Summary

    • Split-flap displays are mechanical boards that flip hinged flaps to show characters, popularized by Solari di Udine in the 1950s.
    • They solved readability, reliability, and power issues of earlier displays, becoming standard in airports worldwide.
    • The distinctive sound and motion made them cultural icons, later sampled in films and music.
    • After digital screens replaced them in the 1980s, they’ve seen a nostalgic revival in design-forward venues.
    • Their enduring appeal lies in their physicality, elegant mechanics, and calm, non-intrusive information display.

    FAQ

    Q: How does a split-flap display work?
    A: A split-flap display has a series of thin flaps attached to a rotating drum for each character position. To change a character, the drum rotates, and flaps flip down one by one until the correct one is shown, creating a ‘split’ effect at the top.

    Q: Who invented the split-flap display?
    A: Italian engineer Remigio Solari and his company Solari di Udine refined and patented the design in 1956, though earlier precursors existed in the 1940s.

    Q: Why were split-flap displays replaced by digital screens?
    A: Digital screens became cheaper, easier to update in real time, and required less maintenance, leading to their widespread adoption starting in the 1980s.

    Q: Where can I see a split-flap display today?
    A: You can find them in some airports and train stations, but more often in boutique hotels, restaurants, breweries, and offices that use them as design elements.

    Q: Can I build my own split-flap display?
    A: Yes, many hobbyists build DIY versions using 3D-printed parts and microcontrollers. Online communities like r/splitflap offer guidance and resources.
  • Canva for Beginners: A Step-by-Step Guide to Your First Design

    Canva for Beginners: A Step-by-Step Guide to Your First Design

    Have you ever stared at a blank page, wanting to create a beautiful flyer, social media post, or presentation, but felt overwhelmed by complex design software? You’re not alone. For years, graphic design was a skill reserved for professionals with expensive tools and years of training. But in 2012, a small startup in Sydney, Australia, set out to change that. Canva was born with a simple mission: make design accessible to everyone.

    Today, Canva is used by over 170 million people every month, from teachers and small business owners to students and social media influencers. Its drag-and-drop interface, thousands of templates, and generous free plan have made it the go-to tool for anyone who needs to create visual content without a design degree. In this guide, we’ll walk you through everything you need to know to create your first design, from setting up your account to downloading your finished masterpiece.

    Getting Started: Creating Your Canva Account

    The first step is to create a free account. Go to canva.com and click the “Sign up” button. You can sign up with your email address, Google account, or Facebook account. Choose whichever is most convenient for you. Once you’ve signed up, you’ll be taken to the Canva home screen.

    Navigating the Canva Dashboard

    The dashboard is your command center. On the left side, you’ll see a sidebar with options like “Home,” “Templates,” “Projects,” and “Brand.” In the center, you’ll see a search bar and a grid of design types. This is where you can start a new design or browse templates.

    Take a moment to explore. Click on “Templates” to see the vast library of pre-designed layouts. You can search for specific types like “Instagram Post,” “Resume,” or “Birthday Invitation.” Don’t worry about making a mess—you can’t break anything. Just click around to get comfortable.

    Choosing Your First Template

    Templates are the fastest way to create a professional-looking design. For this tutorial, let’s create a simple social media post. Click on “Social Media” in the design types, then choose “Instagram Post.” You’ll see a grid of templates. Pick one that catches your eye—maybe a quote graphic or a promotional post. Click on it, and it will open in the editor.

    The Canva Editor: A Quick Tour

    The editor is where the magic happens. Here’s a breakdown of the main areas:

    • Left Panel: This has tabs for Templates, Photos, Elements, Text, and more. You can search for specific items or browse categories.
    • Canvas: The main area in the center where your design appears. You can click on any element to select it.
    • Top Toolbar: This has buttons for undo/redo, file, resize, and download. When you select an element, the toolbar changes to show formatting options.
    • Right Panel: When you select an element, this panel shows properties like color, font, and transparency.

    Editing Text: Making It Yours

    Click on the text in your template. You’ll see a text box appear with handles. You can drag it to move it, or use the corner handles to resize. In the right panel, you can change the font, size, color, and alignment. Double-click the text to edit the actual words. Type in your own message, like “Welcome to My Page!” or “Sale This Weekend!”

    Changing Colors and Fonts

    To change the color of a text or shape, click on it, then in the right panel, click the color box. You can choose from the preset colors or use the custom color picker. For fonts, click the font dropdown and scroll through the hundreds of options. Canva suggests font pairings that look good together, so you can click “Pairings” to see recommendations.

    Adding Images and Elements

    To add an image, go to the left panel and click “Photos.” You can search for free stock photos or upload your own by clicking “Uploads.” Drag a photo onto your canvas. You can resize and reposition it. To add shapes, icons, or illustrations, click “Elements” and search for what you need. For example, search “stars” to add some decorative stars.

    Using the Position and Arrange Tools

    If you have multiple elements overlapping, you can control which one is on top. Click on an element, then in the top toolbar, click “Position.” You’ll see options like “Bring forward” and “Send backward.” This is useful when you want text to appear in front of a shape, or an image behind text.

    Downloading Your Design

    Once you’re happy with your design, it’s time to download it. Click the “Share” button in the top right, then select “Download.” You’ll see a menu with file types. For most purposes, PNG is a good choice because it’s high quality and supports transparent backgrounds. JPG is smaller but doesn’t support transparency. PDF is great for printing. Choose PNG, select the size (we recommend the default), and click “Download.”

    Saving and Organizing Your Projects

    Your design is automatically saved to your Canva account as you work. You can find it later by clicking “Projects” in the sidebar. You can create folders to organize your designs. For example, create a folder called “Social Media” and move your design there.

    Next Steps: Explore and Experiment

    Now that you’ve created your first design, the possibilities are endless. Try making a presentation, a flyer, or a YouTube thumbnail. Experiment with different templates and tools. Canva also offers free tutorials and courses through Canva Design School if you want to learn more.

    Remember, the key to getting better is practice. Don’t be afraid to make mistakes—you can always undo. And with Canva’s intuitive interface, you’ll be designing like a pro in no time.

    Canva has truly democratized design, putting powerful tools in the hands of anyone with an idea. By following this step-by-step guide, you’ve learned the basics: creating an account, navigating the dashboard, using templates, editing text and images, and downloading your work. Now it’s time to unleash your creativity. Whether you’re designing for business, school, or fun, Canva is your canvas—go paint something amazing.

    Summary

    • Canva is a free, cloud-based design tool with over 170 million users.
    • Start by creating an account and exploring the dashboard.
    • Use templates to quickly create professional designs.
    • Edit text, colors, images, and elements with the drag-and-drop editor.
    • Download your design as PNG, JPG, or PDF, and organize projects in folders.

    FAQ

    Q: Is Canva really free?
    A: Yes, Canva has a free plan that includes thousands of templates, 5GB of storage, and basic design tools. There are no watermarks on free designs. Pro features like brand kits and background remover require a paid subscription.

    Q: Can I use Canva on my phone?
    A: Absolutely. Canva has apps for iOS and Android, so you can design on the go. Your projects sync across devices.

    Q: What file formats can I download from Canva?
    A: You can download as PNG, JPG, PDF, SVG (Pro), GIF, MP4, and PPTX (Pro). PNG is best for images with transparent backgrounds.

    Q: How do I remove the background from an image?
    A: The background remover is a Pro feature. If you’re on the free plan, you can use the “BG Remover” app in Canva, but it’s limited. Alternatively, you can use a free online tool and then upload the image.

    Q: Can I use Canva for commercial purposes?
    A: Yes, you can use Canva designs for commercial use, even on the free plan. However, some elements and templates may have restrictions, so check the license for each item. Canva provides a content license that allows most uses.