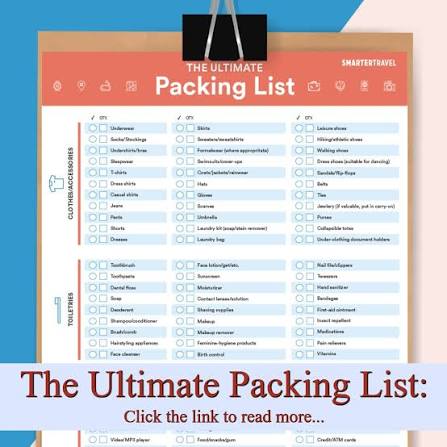
Packing for a vacation can be a source of anxiety. You’re juggling the fear of forgetting something essential with the dread of lugging around a suitcase full of items you’ll never use. It’s a delicate balance, and most travelers get it wrong—either overpacking ‘just in case’ or leaving behind a crucial charger or medication.
But packing doesn’t have to be a gamble. A well-structured checklist acts as your safety net, ensuring you have everything you need without the excess baggage. This guide will walk you through a comprehensive packing checklist, tailored to different travel styles, and help you avoid the most common pitfalls. Whether you’re a minimalist, a family organizer, or a business traveler, you’ll find practical tips to streamline your packing and start your vacation stress-free.
Why a Packing Checklist Matters
A packing checklist is more than just a list of items—it’s a strategic tool. It prevents forgetfulness, curbs overpacking, and saves you time and money. Studies show that overpacking is one of the most common travel regrets, leading to extra baggage fees, strained backs, and a cluttered hotel room. A checklist forces you to think critically about what you truly need, based on your destination, activities, and trip length.
Moreover, checklists have evolved. Gone are the days of handwritten lists on scrap paper. Today, digital apps like PackPoint and TripIt can auto-generate lists based on your destination, weather forecast, and trip duration. But even a simple, well-organized list can be a game-changer.
The Core Categories: Your Packing Foundation
Every comprehensive checklist should cover these six categories. Use them as your starting point, then customize based on your specific trip.
1. Documents and Money
This is the most critical category—losing these items can ruin a trip. Always keep them in your carry-on or personal item, not in checked luggage.
- Passport/ID: Ensure it’s valid for at least six months beyond your travel dates for international trips.
- Boarding pass/travel itinerary: Have digital copies on your phone and physical backups.
- Travel insurance: Carry a copy of your policy and emergency contact numbers.
- Reservations: Hotel, car rental, and activity confirmations.
- Emergency contacts: A list of family members, your embassy, and local emergency numbers.
- Money: Credit/debit cards, local currency (for immediate needs), and small bills for tips.
Pro tip: Take photos of all your important documents and store them in a secure cloud folder. This can be a lifesaver if your wallet is lost or stolen.
2. Clothing: The Art of Versatility
Clothing is where most overpacking happens. The key is to pack versatile, mix-and-match items that can be layered and worn multiple times.
- Underwear and socks: A general rule is 7 days’ worth, but you can pack fewer if you plan to do laundry.
- Versatile outfits: Choose a color palette that mixes well. For example, 3 bottoms and 5 tops can create 15 different outfits.
- Weather-appropriate layers: Always include a light jacket or sweater, even in warm climates—air conditioning and evening breezes can be chilly.
- Comfortable shoes: Limit yourself to 2-3 pairs: one for walking, one for dressier occasions, and maybe one for specific activities (hiking, beach). Shoes are the heaviest items in your bag, so choose wisely.
- Swimwear: Even if you’re not headed to the beach, many hotels have pools.
Minimalist tip: Try the ‘capsule wardrobe’ approach—pack only 5-10 items that all coordinate. If you wouldn’t carry it for 20 minutes, don’t pack it.
3. Toiletries: Know the Rules
Toiletries are essential, but they’re also subject to strict airline regulations.
- TSA 3-1-1 rule: For carry-ons, all liquids, gels, and aerosols must be in containers of 3.4 oz (100 ml) or less, all fitting in a single quart-sized clear bag. This includes shampoo, conditioner, lotion, and even toothpaste.
- Checked bags: You can pack larger liquids in checked luggage, but be aware that some items (like flammable aerosols) are restricted everywhere.
- Essentials: Toothbrush, toothpaste, deodorant, shampoo, conditioner, sunscreen, and any personal care items you use daily.
- Medications: Always keep these in your carry-on, as checked luggage can be lost or delayed. For controlled substances, carry a doctor’s note.
Travel hack: Invest in travel-sized containers and refill them from your home products. This saves money and space.
4. Electronics: Stay Connected and Powered
Electronics are non-negotiable for most travelers, but they come with their own set of rules.
- Phone and charger: The most forgotten item—always double-check.
- Power bank: Essential for long days out. Remember, power banks must be in your carry-on, not checked luggage, due to fire risk.
- Adapter: For international travel, a universal adapter is a must.
- Laptop/tablet: If you’re working or want entertainment, pack these with their chargers.
- Camera: If you’re not using your phone, pack a camera with extra batteries and memory cards.
Warning: Batteries, power banks, and e-cigarettes are prohibited in checked bags. This is a common oversight that can delay your trip.
5. Health and Medications
Your health should be a top priority. Pack a small first-aid kit and any personal medications.
- Prescription medications: In their original containers, with a copy of the prescription.
- Over-the-counter remedies: Pain relievers, antacids, motion sickness pills, and allergy medication.
- First-aid basics: Band-aids, antiseptic wipes, and tweezers.
- Hand sanitizer and face masks: Still relevant in many situations.
Pro tip: If you have a chronic condition, wear a medical alert bracelet and carry a note from your doctor explaining your condition and medications.
6. Miscellaneous: The Little Things That Matter
This category covers the odds and ends that make your trip smoother.
- Snacks: For the journey and for emergencies. Avoid liquids to breeze through security.
- Entertainment: Books, magazines, or downloaded movies for flights and downtime.
- Travel pillow and eye mask: For long-haul flights.
- Reusable water bottle: Fill it after security to stay hydrated.
- Ziplock bags: Useful for storing liquids, dirty clothes, or wet swimwear.
Tailoring Your Checklist: Different Travel Styles
Your checklist should adapt to your travel style. Here’s how to customize it for different scenarios.
The Minimalist Traveler
- Goal: Carry-on only, no checked bag.
- Strategy: Pack a capsule wardrobe of 5-10 mix-and-match items. Use packing cubes to compress clothes. Buy toiletries at your destination if needed.
- Key principle: If you wouldn’t carry it for 20 minutes, don’t pack it.
The Family Traveler
- Goal: Keep everyone happy and healthy.
- Strategy: Add a separate list for kids—diapers, wipes, toys, snacks, and a change of clothes for each child. Pack a family first-aid kit and extra chargers. Redundancy is key for critical items like medications.
The Business Traveler
- Goal: Look professional and be prepared for meetings.
- Strategy: Pack wrinkle-free clothing, a laptop with chargers, and presentation tools. Include a backup set of essentials (like a spare shirt) in case of lost luggage. Keep your tech organized in a dedicated bag.
The Adventure Traveler
- Goal: Stay safe and comfortable in the outdoors.
- Strategy: Focus on safety gear—headlamp, first-aid kit, water purification tablets. Layer clothing for temperature swings. Choose lightweight, quick-dry materials. A good pair of hiking boots is non-negotiable.
Common Packing Mistakes to Avoid
Even with a checklist, travelers make mistakes. Here are the most common ones and how to avoid them.
- Treating the checklist as a maximum: A checklist is a guide, not a mandate. Don’t pack everything on it if you don’t need it. Customize it to your trip.
- Forgetting the ‘day-of’ bag: Your checklist should include items you need on travel day—passport, phone charger, medication, snacks—that must be accessible in your carry-on.
- Ignoring the liquids rule: The 3-1-1 rule applies to carry-ons only. Checked bags can have larger liquids, but some items are restricted everywhere.
- Putting electronics in checked luggage: Batteries and power banks are prohibited in checked bags. Always pack them in your carry-on.
- Assuming ‘I’ll buy it there’: This works in cities, but not on cruises, remote islands, or late-night arrivals. Pack essentials like toiletries and medications.
- Underestimating shoe weight: Shoes are the heaviest items. Limit yourself to 2-3 pairs and wear your heaviest pair on the plane.
Final Thoughts: The Perfect Packing Checklist
There’s no one-size-fits-all packing list. The ‘perfect’ list depends on your destination, trip length, and personal preferences. But by following the categories above and customizing for your travel style, you’ll be well-prepared. Remember, the goal is to pack smart, not heavy. A good checklist ensures you have what you need, without the burden of excess.
Packing doesn’t have to be a stressful pre-trip scramble. With a well-thought-out checklist, you can approach your vacation with confidence, knowing you have everything you need and nothing you don’t. So, take the time to build your personalized checklist, and then enjoy the journey—your future self will thank you.
Summary
- A packing checklist prevents forgetting essentials and curbs overpacking, saving time, money, and stress.
- Organize your list into six core categories: documents/money, clothing, toiletries, electronics, health/medications, and miscellaneous.
- Customize your checklist based on your travel style—minimalist, family, business, or adventure—to ensure it meets your specific needs.
- Avoid common mistakes like ignoring TSA liquid rules, packing batteries in checked luggage, and forgetting the ‘day-of’ bag.
- The perfect packing list is a guide, not a mandate—pack only what you’ll actually use.
FAQ
Q: How many pairs of shoes should I pack?
A: Limit yourself to 2-3 pairs: one for walking, one for dressier occasions, and one for specific activities like hiking or the beach. Shoes are the heaviest items in your bag, so choose versatile, comfortable options.
Q: Can I pack a power bank in my checked luggage?
A: No. Power banks and batteries must be in your carry-on due to fire risk. This is a common oversight that can lead to confiscation or delays.
Q: What’s the TSA 3-1-1 rule?
A: For carry-ons, all liquids, gels, and aerosols must be in containers of 3.4 oz (100 ml) or less, all fitting in a single quart-sized clear bag. Checked bags can have larger liquids, but some items are restricted everywhere.
Q: Should I pack my medications in my carry-on or checked bag?
A: Always pack medications in your carry-on. Checked luggage can be lost or delayed, and you need your meds accessible. For controlled substances, carry a doctor’s note.
Q: Is it better to pack light and buy items at my destination?
A: It depends. In urban areas, you can easily buy toiletries and sundries. But for cruises, remote islands, or late-night arrivals, stores may be closed or limited. Pack essentials like medications and a basic toiletry kit, and buy the rest if needed.