Owning a car is a significant investment, and like any investment, it requires regular attention to maintain its value and performance. Yet, many drivers treat maintenance as an afterthought—until a warning light flickers or a strange noise emerges. The good news? A simple, proactive checklist can prevent most costly breakdowns and keep your car running smoothly for years.
This guide breaks down the essential maintenance tasks every car owner should know, organized by time and mileage. We’ll separate the non-negotiables from the optional extras, debunk common myths, and help you decide what to DIY versus when to call a pro. Whether you’re a first-time owner or a seasoned driver, this checklist is your roadmap to a healthier, longer-lasting vehicle.
Why Maintenance Matters More Than You Think
Skipping routine maintenance is a gamble. An oil change might cost $50, but ignoring it can lead to engine failure—a repair that easily tops $4,000. Similarly, worn brake pads are a safety hazard, and a tire blowout at highway speed can be catastrophic. Beyond safety and cost, a documented maintenance history can boost your car’s resale value by 10–20%, and it’s often required to keep your warranty valid. In short, a little prevention goes a long way.
The Owner’s Manual: Your Ultimate Authority
Before diving into any checklist, understand this: your car’s owner’s manual is the final word on maintenance intervals. It contains a factory-recommended schedule tailored to your specific make and model. Many modern vehicles also have a Maintenance Minder system that calculates oil life and service needs based on your driving habits. Use these as your primary guide, and treat generic checklists—like this one—as a helpful supplement.
The Essential Checklist: Time-Based Tasks
Monthly Checks (5 Minutes or Less)
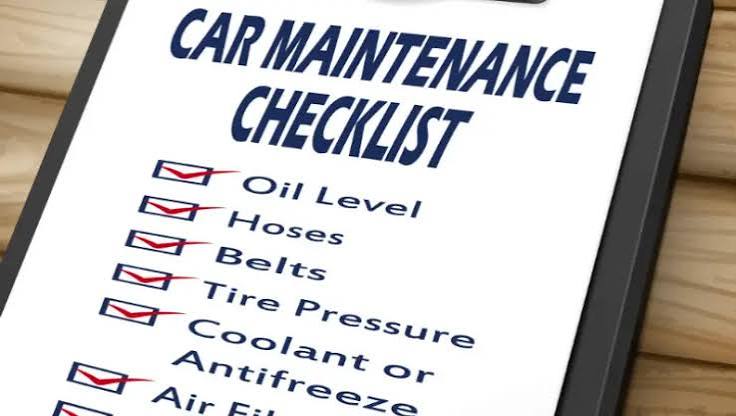
- Tire Pressure: Check when tires are cold. Proper inflation improves fuel economy, handling, and tire lifespan. Look for the recommended PSI on a sticker inside the driver’s door.
- Fluid Levels: Peek at the oil dipstick, coolant reservoir, brake fluid, and windshield washer fluid. Top off as needed.
- Lights: Walk around and verify headlights, taillights, brake lights, and turn signals are working.
Every 3–6 Months
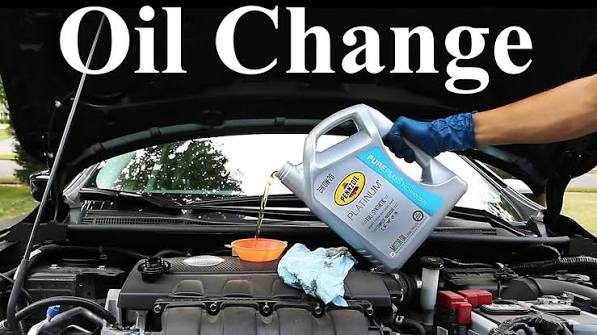
- Oil & Filter: Conventional oil needs changing every 5,000–7,500 miles; synthetic can go 7,500–10,000. Check your manual.
- Battery: Test the charge and clean any corrosion from terminals. A simple wire brush and baking soda solution work wonders.
- Wiper Blades: Replace if they streak or skip. This is a cheap, DIY-friendly fix.
Annually or Every 10,000–15,000 Miles
- Brake Inspection: Have a professional check pads, rotors, and fluid level. Squealing or grinding is a red flag.
- Tire Rotation: Rotate tires to ensure even wear. This extends tire life and improves performance.
- Air Filters: Replace the engine air filter and cabin air filter. A clogged engine filter reduces fuel efficiency; a dirty cabin filter affects your A/C and heating.
The Mileage Milestones: What to Watch For
30,000 Miles
- Belts & Hoses: Inspect for cracks, fraying, or looseness. Replace if worn.
- Coolant Flush: Replace coolant to prevent corrosion and overheating.
- Spark Plugs: Copper plugs typically last 30,000 miles; iridium can go 60,000–100,000. Check your manual.
60,000 Miles
- Transmission Fluid: Often replaced around this mark, especially if you tow or drive in stop-and-go traffic.
- Brake Fluid Flush: Brake fluid absorbs moisture over time, reducing braking performance.
- Shocks & Struts: If your ride feels bouncy or you notice uneven tire wear, have them inspected.
100,000 Miles and Beyond
- Timing Belt: If your engine has one (many modern engines use chains), replace it per the manual—failure can destroy the engine.
- Water Pump: Often replaced alongside the timing belt.
- Suspension Components: Bushings, ball joints, and tie rods wear out. A professional inspection is wise.
The ‘Severe Usage’ Clause: When to Shorten Intervals
Most manuals include a ‘severe service’ schedule for drivers who frequently take short trips, drive in extreme heat or cold, traverse dusty roads, tow heavy loads, or sit in stop-and-go traffic. If that sounds like you, intervals may be shortened by 30–50%. For example, oil changes might drop to every 3,000–5,000 miles. Be honest about your driving habits—it’s better to err on the side of caution.
DIY vs. Professional: Know Your Limits
DIY-Friendly: Oil changes, air filters, wiper blades, battery replacement, tire pressure checks, and fluid top-offs. These require minimal tools and are well-documented online.
Call a Pro: Brake fluid flushes, transmission service, timing belt replacement, AC recharge, wheel alignment, and anything under warranty. These involve specialized tools, safety risks, or warranty implications.
Debunking Common Myths
Myth: ‘Change your oil every 3,000 miles.’
This is a relic of older engines and conventional oils. Modern synthetic oils and improved engineering allow 5,000–10,000+ miles. Always follow your owner’s manual.
Myth: ‘Premium fuel is better for your car.’
Unless your manual requires it, premium fuel offers no benefit. It’s a waste of money.
Myth: ‘You need a tune-up every 30,000 miles.’
Modern cars have electronic ignition and long-life components. ‘Tune-ups’ are largely a thing of the past—just follow the scheduled maintenance.
Seasonal Considerations
- Winter: Check battery health (cold weather is hard on batteries), antifreeze levels, and wiper blades. Consider winter tires if you live in snowy areas.
- Summer: Ensure coolant is fresh, A/C is blowing cold, and tire pressure is adjusted for heat (pressure increases with temperature).
EVs and Hybrids: A Different Beast
Electric vehicles have fewer moving parts—no oil, spark plugs, or transmission fluid. Maintenance focuses on tires (EVs are heavier and wear tires faster), brakes (regenerative braking extends pad life), cabin air filters, and battery coolant checks. Hybrids have a gas engine but also require less frequent oil changes. Always consult your EV’s manual for specific intervals.
The Environmental Angle
Proper maintenance isn’t just good for your wallet—it’s good for the planet. A well-tuned engine burns fuel more efficiently, reducing emissions. Clean air filters and properly inflated tires also improve fuel economy. And when you do change fluids, dispose of them responsibly at a recycling center or auto parts store—never pour them down the drain.
Car maintenance doesn’t have to be overwhelming. By following a simple checklist and consulting your owner’s manual, you can avoid costly repairs, stay safe on the road, and extend the life of your vehicle. Start with the basics—check your tire pressure, change your oil on schedule, and listen to your car. A little attention today can save you thousands tomorrow.
Summary
- Follow your owner’s manual—it’s the ultimate guide for your specific car.
- Monthly checks (tire pressure, fluids, lights) take minutes and prevent big problems.
- Oil changes are crucial—use the interval for your oil type (5,000–10,000 miles).
- Know your limits—DIY simple tasks, but leave complex jobs to professionals.
- Adjust for severe driving—short trips, extreme weather, or towing mean shorter intervals.
FAQ
Q: How often should I change my oil?
A: It depends on your car and oil type. Conventional oil: every 5,000–7,500 miles. Synthetic: 7,500–10,000 miles. Check your owner’s manual for the exact interval.
Q: Can I do my own maintenance without voiding the warranty?
A: Yes, as long as you follow the manufacturer’s schedule and keep records. Use the recommended fluids and parts, and save receipts.
Q: What are the most important maintenance tasks for safety?
A: Brakes, tires, and steering components. Regularly inspect brake pads, tire pressure and tread, and have alignment checked if the car pulls.
Q: How do I know if my car needs a tune-up?
A: Modern cars rarely need traditional tune-ups. Watch for symptoms like rough idling, poor fuel economy, or a check engine light. Follow the scheduled maintenance in your manual.
Q: Is it worth following the ‘severe service’ schedule?
A: If you drive in severe conditions (stop-and-go traffic, extreme temperatures, dusty roads, towing), yes. Shorten intervals by 30–50% to prevent premature wear.