
Tag: browser

  • WebLLM: Running LLMs Directly in Your Browser with GPU Speed

    WebLLM: Running LLMs Directly in Your Browser with GPU Speed

    Imagine opening a webpage and getting a full large language model like Llama 3 or Mistral running right there, with no server calls, no data leaving your device, and speed that feels close to native. That’s the promise of WebLLM, an open-source JavaScript library that uses the WebGPU API to accelerate LLM inference in the browser. Developed by the MLC team (the folks behind TVM and XGBoost), WebLLM is turning the browser into a legitimate LLM runtime.

    For years, running an LLM meant either sending your prompts to a cloud API (with privacy and latency trade-offs) or installing a heavy native app. WebLLM changes that by compiling models into optimized GPU kernels that run directly in Chrome, Edge, or Firefox. The project has been around since 2023, but recent advances in WebGPU support and model quantization have made it more practical than ever. In this article, we’ll break down how it works, why it’s fast, and what it means for developers and users.

    The Problem: LLMs Are Stuck in the Cloud

    When you use ChatGPT or Claude, your text goes to a data center, gets processed, and comes back. That round trip introduces latency, raises privacy concerns, and makes you dependent on a server. For sensitive data—medical records, legal documents, internal company chats—sending it to a third-party API is a non-starter. And even for casual use, the cloud is not always available: think of flights, remote areas, or just a flaky Wi-Fi connection.

    Native apps solve some of this by running models locally, but they come with their own headaches. You have to download and install the right version for your operating system, manage GPU drivers, and deal with platform fragmentation. Wouldn’t it be better if you could just open a URL and have a full LLM running in your browser, using your device’s GPU? That’s the gap WebLLM fills.

    How WebLLM Achieves Near-Native Performance

    WebLLM’s secret sauce is the TVM compiler stack. Instead of using a generic interpreter, WebLLM compiles each model into highly optimized GPU kernels. This is similar to how native LLM runtimes like llama.cpp work, but the compilation targets WebGPU—a modern browser API that gives JavaScript direct access to the GPU.

    Think of it this way: if running an LLM were cooking a complex meal, a generic interpreter would be like a cook following a recipe step-by-step, reading each instruction as they go. WebLLM’s compiled approach is like a chef who has prepared all the ingredients and knows the exact moves—they can execute much faster because everything is pre-planned and optimized.

    WebGPU support is now stable in Chrome, Edge, and Firefox (with flags), and Safari is catching up. On Apple Silicon, WebGPU runs on Metal; on Windows and Linux, it uses Vulkan or DirectX. This means your GPU’s full power is available, not just the CPU.

    The Numbers: What Performance Looks Like

    The proof is in the token generation speed. On a mid-to-high-end consumer GPU (say, an RTX 3060 or better), WebLLM can generate 20–50 tokens per second for models like Llama 3 8B or Mistral 7B in 4-bit quantization. That’s comparable to what you’d get from a native llama.cpp setup on the same hardware. For comparison, pure CPU-based approaches like Transformers.js or llama.cpp compiled to WASM typically crawl along at single-digit tokens per second—more like a typing turtle than a conversational partner.

    These numbers vary depending on your GPU, browser, and the model size. But the fact that you’re getting near-native speed in a sandboxed browser is remarkable, and it’s only going to improve as WebGPU matures.

    Key Features Beyond Raw Speed

    Running a model is one thing, but WebLLM feels like a full-featured inference engine. It supports streaming output, so you can display tokens as they’re generated, just like ChatGPT. You can interrupt generation mid-stream if the model is going off the rails. There’s also grammar-constrained decoding, which lets you force the model to output valid JSON or other structured formats—essential for building reliable applications.

    Web Workers are supported, meaning the heavy lifting happens in a background thread, so your UI stays responsive. And once the model is downloaded, it’s cached using the Cache API or IndexedDB, so repeat visits don’t require re-downloading those massive weight files—which can be several gigabytes.

    Privacy: Your Data Stays on Your Device

    The most compelling reason to use WebLLM is privacy. When a model runs entirely in your browser, no data ever leaves your machine. This is a game-changer for industries like healthcare, where patient data is regulated, or finance, where confidentiality is paramount. Even for everyday users, there’s comfort in knowing your conversations aren’t being logged somewhere.

    But it’s not a magic bullet. The model weights themselves are downloaded from a CDN, so there’s a supply-chain consideration—you need to trust the source of those weights. And the browser sandbox, while secure, isn’t impenetrable; researchers have theorized about side-channel attacks via GPU timing. Still, for most use cases, running locally is far more private than sending prompts to a cloud API.

    How to Get Started with WebLLM

    You don’t need to be a GPU wizard to use WebLLM. It’s distributed as an npm package, so you can add it to your project with a simple npm install. The library handles the heavy lifting: it detects the best backend, manages the model lifecycle, and gives you a simple API to generate text. You can try it right now on the official demo site, webllm.mlc.ai, to see it in action without writing any code.

    Here’s a minimal example of what integrating WebLLM looks like:

    “`javascript
    import * as webllm from “@mlc-ai/web-llm”;

    const model = “Llama-3.2-3B-Instruct-q4f32_1-MLC”;
    const engine = await webllm.CreateEngine(model);
    const reply = await engine.chat.completions.create({
    messages: [{ role: “user”, content: “Explain WebGPU in simple terms.” }]
    });
    console.log(reply.choices[0].message.content);
    “`

    That’s it. The first time you load a model, it downloads the weights (which can be a few GB), but subsequent visits are fast thanks to caching.

    The Bottom Line: What WebLLM Means for the Web

    WebLLM is more than a cool tech demo; it’s a shift in what the browser is capable of. As WebGPU support expands and models become more efficient, we’ll see more applications that run AI entirely client-side: think of in-browser code assistants, privacy-preserving chat widgets, or even offline document summarization tools.

    The project is actively maintained, with frequent releases and a growing list of supported models. If you’re a developer, it’s worth exploring how WebLLM could simplify your stack and improve your users’ privacy. And if you’re just a curious internet user, head over to the demo page and try it—no server required.

    WebLLM proves that the browser can be a serious platform for running large language models. By leveraging WebGPU and TVM’s compilation magic, it delivers near-native performance while keeping data local. Whether you’re a developer looking to integrate on-device AI or a user who values privacy, this is a technology worth watching. Go ahead, load a model in your browser and see the future of the web.

    Summary

    • WebLLM is an open-source JS library that runs LLMs in-browser using WebGPU for GPU acceleration.
    • It achieves 20-50 tokens per second on mid-range GPUs, comparable to native runtimes.
    • Developed by the MLC team, it uses TVM compilation to optimize models for the browser.
    • Key features include streaming, interruptible generation, grammar-constrained decoding, and Web Worker support.
    • Running models locally keeps data private, with no server calls required.
    • Try it live at webllm.mlc.ai or integrate via npm.

    FAQ

    Q: What hardware do I need to run WebLLM?nA: You need a browser that supports WebGPU (Chrome, Edge, Firefox, or Safari in development). A discrete GPU is recommended for good performance, but integrated GPUs on modern laptops can also handle smaller models at usable speeds.nnQ: Which models can I run with WebLLM?nA: WebLLM supports many open-weight models, including Llama 3.x, Phi-3, Mistral, Gemma, and Qwen, in quantized formats (like 4-bit) to fit in GPU memory.nnQ: How does WebLLM compare to Transformers.js?nA: Transformers.js runs models via ONNX Runtime Web, which is CPU-based and slower. WebLLM uses WebGPU to access the GPU, resulting in significantly higher speed.nnQ: Is there any cost to using WebLLM?nA: The library is open-source (MIT license) and free. You only need to pay for downloading model weights and hosting your webpage, if any.nnQ: Can I use WebLLM offline?nA: Yes, once the model is downloaded and cached, you can run it entirely offline, making it suitable for desktop apps or scenarios with limited connectivity.
  • 9 Keyboard Shortcuts That Turn You Into a Power User

    9 Keyboard Shortcuts That Turn You Into a Power User

    The average computer user knows fewer than ten keyboard shortcuts. Power users often rely on a core set of 20 that they use every day. The gap between those two groups isn’t talent—it’s knowledge.

    Here’s a concrete example: pressing Ctrl + Shift + T in a browser instantly reopens the tab you just closed by accident. That single shortcut can save you minutes of frustration and searching through history. Multiply that by dozens of such shortcuts, and you’re saving hours every week.

    This guide covers nine of the most powerful shortcuts across Windows, macOS, and browsers. They’re ranked by how much time they save and how broadly they apply—so you can start with the first one and work your way down.

    Start with the Universal Four

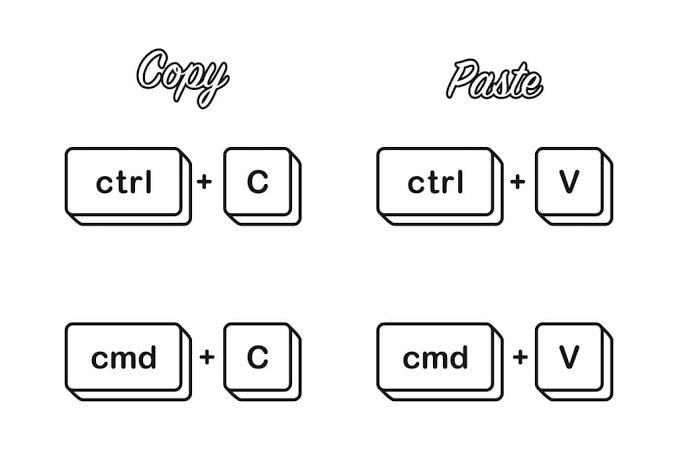
    Before diving into platform-specific tricks, master these four that work everywhere: Ctrl/Cmd + C (copy), Ctrl/Cmd + V (paste), Ctrl/Cmd + X (cut), and Ctrl/Cmd + Z (undo). You probably know these already, but here’s the twist: many people use the right-click menu instead of the keyboard. Every time you right-click and select “Copy,” you lose about two seconds. If you copy something twenty times a day, that’s forty seconds wasted. Over a year, that’s over four hours.

    The undo shortcut is especially powerful because it works in almost every app—even ones that don’t have an obvious undo button. And in most programs, you can press it repeatedly to step backward through your actions.

    1. Ctrl/Cmd + Shift + T — Reopen a Closed Browser Tab

    This is the single most useful browser shortcut. If you accidentally close a tab—or want to revisit a page you closed hours ago—this reopens it in the same position. It works in Chrome, Firefox, Edge, and Safari. Press it multiple times to restore several recently closed tabs.

    Why it’s a power move: you stop frantically searching your history for that article you closed two minutes ago. It’s also a lifesaver when you’re in a workflow and need to quickly recover a reference page.

    2. Win + V — Clipboard History (Windows)

    Windows 10 and 11 include a clipboard history feature that stores everything you copy. Press Win + V to see a list of recent items, then click or use arrow keys to paste any of them. You can also pin frequently used snippets (like your email address or a code snippet) so they stay at the top.

    This shortcut transforms copy-paste from a one-item buffer into a multi-item tool. Instead of copying the same thing repeatedly, you copy it once and access it whenever needed. To enable it, press Win + V and select “Turn on.”

    3. Cmd + Space — Spotlight Search (macOS)

    On a Mac, Spotlight is the fastest way to open any app, file, or document without touching the mouse. Press Cmd + Space, type the first few letters of what you want, and press Enter. It’s faster than navigating the Applications folder or Launchpad.

    Spotlight also performs quick calculations and unit conversions. Type “50 usd in eur” and it shows the conversion instantly. It can even look up definitions and launch web searches.

    4. Ctrl + Shift + Esc — Task Manager (Windows)

    When an app freezes, your first instinct might be to press Ctrl + Alt + Delete and then click “Task Manager.” That’s three steps. Ctrl + Shift + Esc opens Task Manager directly—one step.

    This shortcut is not just for emergencies. You can also use it to see which processes are eating memory or CPU, enabling you to close background apps that slow you down.

    5. Cmd + Option + Esc — Force Quit (macOS)

    On a Mac, the equivalent is Cmd + Option + Esc. This brings up the Force Quit window, where you can select a frozen app and force it to close. It’s faster than using the Apple menu > Force Quit, and it works even when the app is unresponsive.

    6. Win + Arrow Keys — Window Snapping (Windows)

    Windows 7 introduced Aero Snap, and it’s still one of the best productivity features. Press Win + Left Arrow to snap a window to the left half of the screen, Win + Right Arrow to the right half, and Win + Up Arrow to maximize. You can also snap to quarters with Win + Left then Win + Up.

    This is ideal for multitasking—placing a document next to a web browser, or comparing two files side by side. You can do it all with the keyboard, no dragging needed.

    7. Cmd + Shift + 4 — Screenshot a Region (macOS)

    macOS has several screenshot shortcuts. Cmd + Shift + 4 lets you drag a selection box to capture a specific area of the screen. The screenshot is saved to your desktop by default (or copied to clipboard if you add Ctrl).

    For even more control, Cmd + Shift + 5 opens the full screenshot and screen recording toolbar, letting you choose between capturing the entire screen, a window, a region, or recording video.

    8. Ctrl + L — Jump to the Browser Address Bar

    In any browser, Ctrl + L (Windows) or Cmd + L (macOS) selects the entire URL in the address bar, so you can immediately type a new one. This is much faster than clicking on the address bar, especially if the URL is long.

    Combine this with Ctrl + Enter (Windows) to automatically add “www.” and “.com” around whatever you type. For example, type “example” and press Ctrl + Enter to go to example.com.

    9. Alt + Tab (Windows) / Cmd + Tab (macOS) — Switch Apps Quickly

    You probably know Alt + Tab switches between open apps. But here’s the power move: hold down Alt and press Tab multiple times to cycle through apps. Release when you land on the one you want. On macOS, it’s Cmd + Tab.

    Even better, on Windows you can use Alt + Shift + Tab to cycle in reverse. On macOS, Cmd + Shift + Tab does the same. This beats hunting through the taskbar or Dock.

    How to Actually Remember These

    Memorizing all nine at once is a recipe for failure. Instead, pick two or three that solve your biggest pain points—maybe Ctrl + Shift + T if you accidentally close tabs, or Win + V if you copy-paste a lot. Use them deliberately for one week. Sticky notes on your monitor help. Once they become automatic, add the next one.

    Most power users don’t know 50 shortcuts cold. They know a core set of 10-20 that they use daily, without thinking. The goal is not to memorize everything, but to build a toolkit that makes you faster and reduces hand movement.

    Keyboard shortcuts are not about showing off—they’re about saving time and reducing frustration. The nine listed here are a starting point. Start with the ones that feel most relevant to your daily work, practice them until they’re second nature, and you’ll soon find yourself moving through your computer with less effort and more speed.

    Summary

    • Universal shortcuts (copy, paste, undo) are the foundation; mastering them alone saves hours per year.
    • Ctrl/Cmd + Shift + T reopens closed browser tabs in any major browser.
    • Win + V gives Windows users a clipboard history, eliminating repetitive copying.
    • Cmd + Space is the fastest way to launch apps and search files on macOS.
    • Ctrl + Shift + Esc (Windows) and Cmd + Option + Esc (macOS) are direct routes to killing unresponsive apps.
    • Window snapping (Win + Arrow keys) and app switching (Alt/Cmd + Tab) streamline multitasking.
    • Cmd + Shift + 4 (macOS) provides instant region screenshots.
    • Ctrl/Cmd + L jumps to the address bar, and Ctrl + Enter auto-completes URLs.
    • Start with 2-3 shortcuts that address your biggest pain points, then gradually add more.

    FAQ

    Q: Do keyboard shortcuts work the same on Windows and macOS?
    A: No. The Ctrl key on Windows often maps to Cmd on macOS, but not always. For example, Ctrl + Tab switches tabs in browsers on Windows, but on macOS it’s Cmd + Option + Right Arrow. Always check the specific shortcut for your OS.

    Q: Are keyboard shortcuts faster than using a mouse?
    A: For single-action commands like copy, paste, or switching apps, yes—usually by 1-2 seconds per action. For complex tasks like formatting a document, menus or toolbars may be faster. Shortcuts excel at repetitive actions.

    Q: How can I discover more shortcuts for the apps I use?
    A: Many apps show shortcuts in tooltips when you hover over a button. You can also press Ctrl + / or Cmd + / in some apps to see a cheat sheet. Online search for “[app name] keyboard shortcuts” usually yields official lists.

    Q: I keep mixing up shortcuts. What’s the best way to learn them?
    A: Focus on one shortcut at a time. Use it every time you perform that action for a week. Place a sticky note near your screen as a reminder. Once you use it without thinking, move on to the next.

    Q: Are there any risks to using keyboard shortcuts?
    A: The main risk is accidentally executing a command you didn’t intend, like closing a window with Ctrl + W when you meant to type something. Most shortcuts can be undone with Ctrl + Z, and you’ll quickly learn to avoid the dangerous ones.