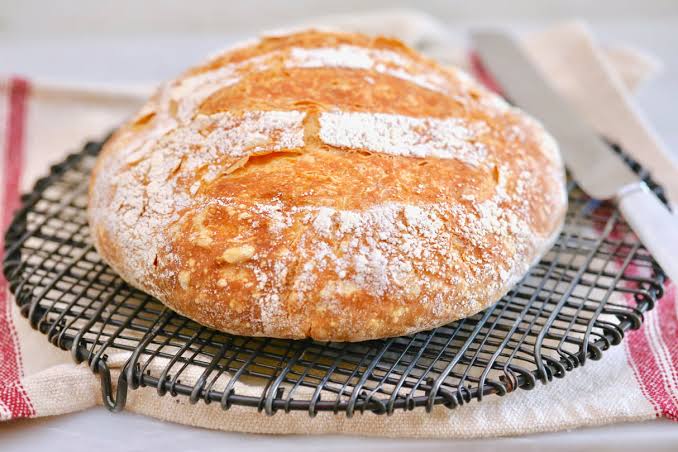
There’s nothing quite like the aroma of fresh bread wafting through the kitchen. But for many home bakers, that anticipation often turns to disappointment when the loaf comes out dense, flat, or gummy. The truth is, bread baking is a science—a delicate dance of flour, water, yeast, and time. Small deviations can lead to dramatically different results.
The good news? Most bread failures are completely avoidable. By understanding the science behind the craft and learning to spot the common pitfalls, you can transform your baking from hit-or-miss to consistently delicious. Whether you’re a beginner or have been baking for years, this guide will walk you through the most frequent mistakes and how to fix them—so your next loaf is your best one yet.
1. Using the Wrong Type of Yeast (or Killing It)
Yeast is the heart of bread—it ferments sugars and produces carbon dioxide, which makes the dough rise. But not all yeast is created equal. Active dry yeast needs to be proofed (dissolved in warm liquid) before use, while instant yeast can be mixed directly into your flour. Using the wrong method can either kill the yeast or delay the rise.
The Fix: Always check your recipe and follow the instructions for your yeast type. If using active dry yeast, proof it in warm water (around 110°F) with a pinch of sugar for 5-10 minutes until frothy. If it doesn’t foam, the yeast is dead—start over. For instant yeast, mix it straight into the flour. Also, check the expiration date; old yeast is a common culprit for flat bread.
2. Guessing Measurements Instead of Weighing
Baking is a science, and precision matters. Measuring flour by volume (cups) can vary by 20-30% depending on how you scoop—packed or sifted. This inconsistency throws off your hydration ratio, leading to dense or overly sticky dough.
The Fix: Invest in a digital kitchen scale and weigh your ingredients in grams. A standard hydration ratio for basic bread is 60-75% water relative to flour weight. Weighing ensures you hit that ratio every time, giving you consistent results and making it easier to adjust if needed.
3. Skipping the Gluten Development Check
Gluten is the protein network that traps gas and gives bread its structure. Under-kneaded dough lacks strength, resulting in a dense loaf. Over-kneading (especially with a machine) can break down the gluten, making the dough tight and prone to tearing.
The Fix: Learn the windowpane test. After kneading, take a small piece of dough and stretch it gently. If it forms a thin, translucent membrane without tearing, the gluten is developed. If it tears easily, keep kneading. If it feels tight and resists stretching, you’ve gone too far—next time, knead less.
4. Rushing the Proofing Process
Proofing is the final rise before baking. Under-proofed dough hasn’t developed enough gas, so it bakes up dense. Over-proofed dough has exhausted its yeast and will collapse in the oven, losing the “oven spring” that gives bread its lift.
The Fix: Follow the recipe’s proofing times, but also use visual cues. The dough should roughly double in size and hold a slight indentation when gently poked. If it springs back immediately, it needs more time. If it doesn’t spring back at all, it’s over-proofed—punch it down, reshape, and let it rise again briefly.
5. Ignoring Oven Temperature and Steam
Most home ovens run hotter or cooler than the dial indicates, and they have hot spots. Baking at the wrong temperature can lead to burnt crusts or raw interiors. Additionally, steam in the first 10-15 minutes of baking delays crust formation, allowing maximum oven spring. Without it, your bread will rise less and have a thicker crust.
The Fix: Use an oven thermometer to verify the actual temperature. Preheat thoroughly (at least 30 minutes). For steam, place a pan of hot water on the bottom rack or spray the loaf with water before closing the oven door. You can also bake in a Dutch oven with the lid on for the first 20 minutes to trap steam.
6. Cutting the Bread Too Soon
It’s tempting to slice into a hot loaf, but cutting too early compresses the crumb and releases steam, making the bread gummy. The interior needs time to set as it cools.
The Fix: Let the bread cool completely on a wire rack—at least 1-2 hours. This allows the starches to recrystallize and the moisture to redistribute, giving you a clean, even crumb. If you can’t wait, at least wait until it’s warm, not hot.
7. Overcomplicating with Sugar and Enriched Doughs
Many beginners think adding sugar helps yeast rise, but yeast feeds on the natural sugars in flour. Too much sugar can actually slow fermentation by drawing water away from yeast cells. Similarly, enriched doughs (with butter, eggs, sugar) require different handling—they bake better at lower temperatures (350-375°F) to avoid burning the crust before the interior cooks.
The Fix: For basic bread, skip the sugar unless the recipe calls for it. If you’re making an enriched dough, lower the oven temperature and extend the baking time. Always check the internal temperature—it should reach 190-210°F for most breads. Use an instant-read thermometer to be sure.
The Bottom Line
Bread baking is a journey of trial and error, but most mistakes are avoidable with a little knowledge. By weighing your ingredients, respecting your yeast, developing gluten properly, proofing patiently, managing oven temperature and steam, and letting your bread cool, you’ll be well on your way to bakery-quality loaves at home. Remember, every baker has a few “bread fails”—the key is to learn from them and keep baking.
Bread baking is as much about understanding the science as it is about following a recipe. By avoiding these common mistakes, you’ll not only improve your loaves but also gain a deeper appreciation for the craft. So preheat your oven, dust off your scale, and get ready to bake the best bread of your life. Happy baking!
Summary
- Weigh your ingredients for consistent hydration and better results.
- Proof your yeast correctly and check its freshness.
- Develop gluten to the windowpane stage—don’t over- or under-knead.
- Proof patiently and use visual cues, not just time.
- Control oven temperature and steam for optimal rise and crust.
- Let bread cool completely before slicing to avoid a gummy texture.
FAQ
Q: Why is my bread dense and heavy?
A: This is often due to under-proofing, under-kneading, or dead yeast. Make sure your yeast is active, knead until the windowpane test passes, and let the dough rise until it doubles in size.
Q: Can I use all-purpose flour instead of bread flour?
A: Yes, but bread flour has more protein, which gives better gluten structure. All-purpose will work but may result in a slightly less chewy crumb. You can add vital wheat gluten to boost protein.
Q: How do I know when my bread is done?
A: The internal temperature should read 190-210°F (88-99°C) on an instant-read thermometer. The crust should be golden brown and sound hollow when tapped on the bottom.
Q: Why does my bread collapse in the oven?
A: This usually means the dough was over-proofed. The yeast has exhausted its food supply, so there’s no oven spring. Next time, bake when the dough is just doubled and springs back slowly when poked.
Q: Do I really need a Dutch oven for good bread?
A: No, but it helps create steam, which improves oven spring and crust. You can also place a pan of hot water in the oven or spray the loaf with water to achieve similar results.