Changing your own oil is one of the most satisfying and cost-effective car maintenance tasks you can learn. Not only do you save money on labor costs, but you also gain control over the quality of oil and filter used in your engine. For many, it’s the first step toward becoming a more self-reliant car owner.
This guide walks you through the entire process, from gathering the right tools to properly disposing of the old oil. Whether you’re a complete novice or just need a refresher, you’ll find clear, actionable steps that prioritize safety and correctness. By the end, you’ll be ready to tackle this job with confidence.
Why Change Your Own Oil?
The primary motivation for DIY oil changes is cost savings. A typical shop charges $50 to $100 or more for an oil change, while doing it yourself costs between $25 and $60 for oil and a filter. Over time, that adds up to significant savings.
But it’s not just about money. When you change your own oil, you choose the exact type and brand of oil and filter, ensuring your engine gets the best protection. You also avoid the hassle of scheduling appointments and waiting in line. Plus, there’s a genuine sense of accomplishment in maintaining your own vehicle.
What You’ll Need
Before you start, gather these tools and materials:
- New oil (check your owner’s manual for the correct viscosity and API rating)
- New oil filter
- Oil filter wrench
- Socket wrench with the correct socket for your drain plug
- Oil catch pan (5–8 quart capacity)
- Funnel
- Rags or shop towels
- Jack and jack stands (or ramps)
- Nitrile gloves and safety glasses
- Optional: torque wrench, drain plug washer, oil absorbent pads
Step-by-Step Instructions
1. Prepare Your Vehicle
Warm up the engine for 2–3 minutes. This thins the oil, making it drain faster and more completely. Then, turn off the engine and park on a level surface. Engage the parking brake and chock the rear wheels to prevent any movement.
2. Safely Lift the Vehicle
Never work under a car supported only by a jack. Use jack stands or ramps to secure the vehicle. Place the jack under the designated lift points (check your owner’s manual) and raise the car, then set it on jack stands. Give the car a gentle shake to ensure it’s stable.
3. Drain the Old Oil
Locate the drain plug under the oil pan. Place the oil catch pan beneath it, then use your socket wrench to remove the plug. Be careful—the oil may be hot. Allow the oil to drain completely, which may take a few minutes. While it drains, inspect the drain plug and washer for wear.
4. Replace the Oil Filter
The oil filter is usually located on the side or bottom of the engine. Use an oil filter wrench to loosen it, then unscrew it by hand. Be prepared for some oil to spill. Before installing the new filter, lubricate its rubber gasket with a little fresh oil. Screw it on by hand until it makes contact, then tighten it an additional ¾ turn. Do not over-tighten.
5. Reinstall the Drain Plug
If your drain plug has a washer, replace it with a new one. Reinstall the plug and tighten it to the manufacturer’s torque specification (found in your owner’s manual). If you don’t have a torque wrench, tighten it snugly—but avoid over-tightening, which can strip the threads.
6. Add New Oil
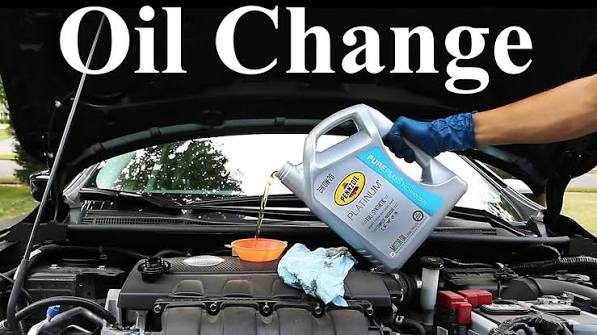
Locate the oil filler cap on top of the engine and remove it. Insert a funnel and pour in the correct amount of oil (check your owner’s manual for capacity). Replace the cap securely.
7. Check for Leaks and Verify Oil Level
Start the engine and let it run for about a minute. Check under the car for any leaks. Turn off the engine and wait a few minutes for the oil to settle. Then, pull out the dipstick, wipe it clean, reinsert it, and pull it out again to check the level. Add more oil if needed, but be careful not to overfill.
8. Dispose of Old Oil Properly
Used oil is hazardous waste. Never pour it down drains or onto the ground—one quart can contaminate 250,000 gallons of water. Instead, pour the used oil into a sealed container and take it to a local auto parts store or recycling center. Many places accept used oil for free.
Tips for a Smooth Oil Change
- Check your owner’s manual for the recommended oil type, viscosity, and capacity. This is the ultimate guide.
- Use ramps instead of a jack if you’re uncomfortable with jack stands—they’re often easier and safer for beginners.
- Keep rags handy to clean up spills immediately.
- Record the mileage and date of your oil change in your maintenance log.
Common Mistakes to Avoid
- Over-tightening the drain plug or filter—this can cause damage.
- Using the wrong oil viscosity—this can reduce fuel economy or cause engine wear.
- Forgetting to replace the drain plug washer—this can lead to leaks.
- Not warming up the engine—cold oil drains slowly and leaves more old oil behind.
When to Change Your Oil
Oil change intervals vary widely. While older advice recommended every 3,000 miles, modern synthetic oils and engines can often go 5,000 to 10,000 miles or more. Many newer vehicles have oil life monitoring systems that alert you when a change is due. Always defer to your owner’s manual—it overrides any generic advice.
Changing your own oil is a practical skill that saves money, gives you control over your vehicle’s maintenance, and offers a satisfying sense of accomplishment. With the right tools and a little patience, you can complete the job in under an hour. So grab your gloves, follow the steps, and enjoy the pride of a job well done.
Summary
- Cost savings: DIY oil changes cost $25–$60 versus $50–$100+ at a shop.
- Control: You choose the oil and filter quality.
- Safety first: Always use jack stands or ramps—never work under a car supported only by a jack.
- Proper disposal: Recycle used oil at an auto parts store or collection facility.
- Follow the manual: Use the recommended oil type, viscosity, and change interval.
FAQ
Q: How often should I change my oil?
A: It depends on your vehicle and oil type. Check your owner’s manual—many modern cars can go 5,000–10,000 miles between changes, especially with synthetic oil.
Q: Can I change my oil without jacking up the car?
A: Some vehicles have enough clearance to slide underneath, but for most, you’ll need to raise the car. Always use jack stands or ramps for safety.
Q: What happens if I use the wrong oil viscosity?
A: Using the wrong viscosity can reduce fuel economy, increase engine wear, or cause poor performance in extreme temperatures. Always use the grade specified in your owner’s manual.
Q: How do I dispose of used oil?
A: Pour it into a sealed container and take it to a local auto parts store or recycling center. Many accept used oil for free. Never pour it down drains or onto the ground.
Q: Is it cheaper to change my own oil?
A: Generally, yes—you save $20–$50 per change. However, factor in the cost of tools if you’re starting from scratch, and consider that some shops offer loss-leader oil changes to attract customers.